The situation
I’ve had the need to upgrade some code that uses IMAP folder to download email, and it uses sometimes Office365 accounts, but Microsoft will remove in the future basic auth as described here in favor of OAuth2 based authentication. This is a good move because Basic Auth is not really secure, and with modern authentication and OAuth2 you can force two factor auth and other more secure login alternative.
The problem is that I was not able to find a complete example. Microsoft has a link that describe the entire process, that link is the only thing you really need, but you do not have any code example, and if you are not familiar with OAuth2 you can lost in the detail.
I’ve literally spent more than half a day looking for a complete example, then I decided to reimplement the whole process
Here you have all the resources I’ve published.
- The complete example can be found in GitHub at this address
- I’ve done a first video for interactive flow https://youtu.be/Q660AYVZM0Y
- I’ve done a second video for NON INTERACTIVE flow with Client Credential Grant Flow https://youtu.be/bMYA-146dmM
- I’ve done a Third video with a recap and added code to access SMTP https://youtu.be/hOgvTDKKgnY
First scenario
In the first scenario I have an ASP.NET application (Client application in OAuth2 terminology) where users can navigate and delegate permission to access their email. We need the client application being able to access the folder for a long time, even if the user is not logged in. This is the scenario where users gave application permission to monitor their email to perform some automation, or is the scenario in which an administrator create a special user with a special email, and use that user to grant application right to use the special email.
Creating an OAuth2 application in azure
The first part is connecting to https://portal.azure.com associated to your Office365 account, and you need to create an application that will be used to perform OAuth2 authentication. You then need to go to the application blade, that you can reach from active directory blade Usually at this address
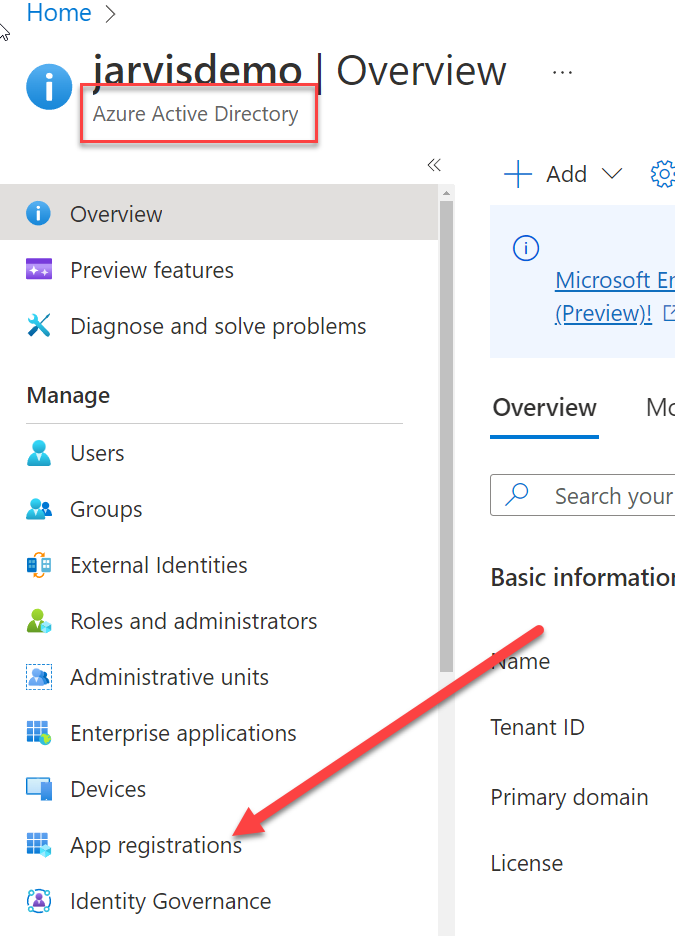 Figure 1: Azure AD Active Directory Blade.
From the application you just need to be sure that you have added a web application and you need to specify the redirect url of your application.
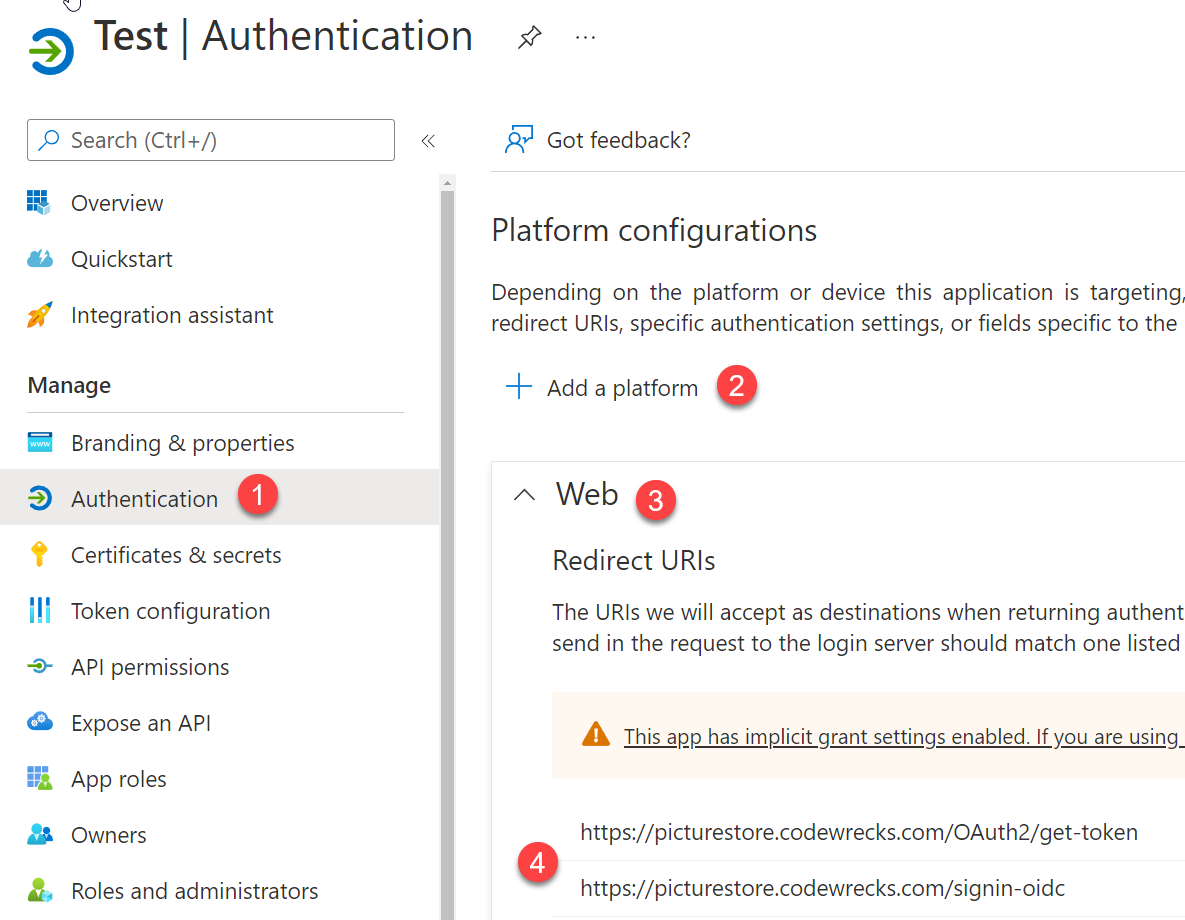 Figure 2: Add web authentication on the application.
As you can see from Figure 2, I’m usually using good real certificates and my local application has a domain called https://picturestore.codewrecks.com/ and I’ve an entry in hosts file that points picturestore.codewrecks.com to 127.0.0.4 (a local loopback address). You can use local address with no problem http://localhost:port, but you need to specify the url that will recover the token.
Now go to the Certificate & Secrets and generate a secrets for your application, write it down because you can view the secret only the first time you create it. Finally as seen in Figure 3 you need to add appropriate permissions to the app. These 4 permissions is the one I’ve used for my demo, offline_access is necessary because I want to be able to continue to access IMAP folder even when the user is not logged.
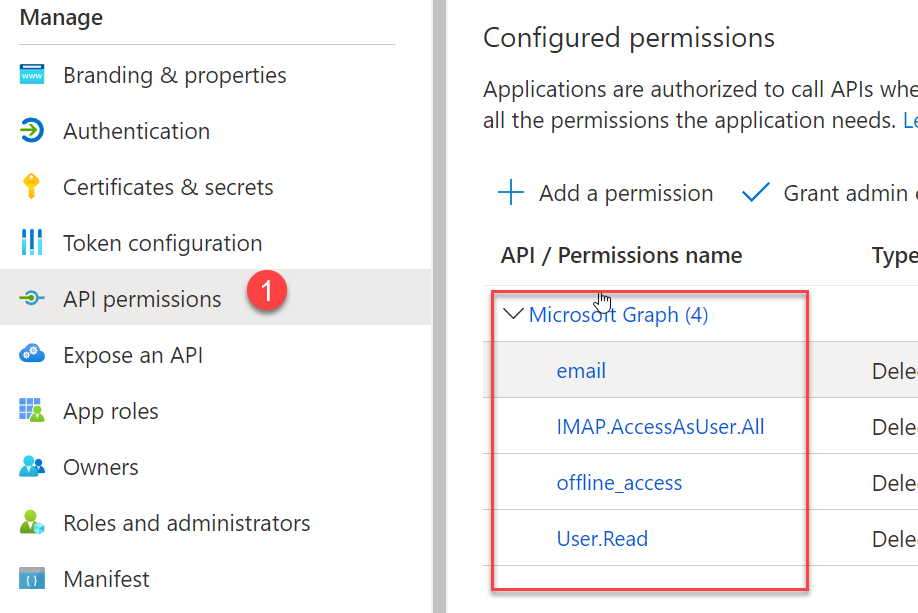 Figure 3: Add permissions to API.
This part should be simple, and it is the prerequisite to start using OAuth2. Finally you need to configure the application.json file in the WebAppTest in the example. Authority is the url used to authenticate, you can use the example below, changing tenant id with your real tenant id. Please pay attention if you create an application that will be available even for user outside your organization in that case you should follow this guide.
| |
You find client and tenant id in the detail of applications as shown in the above picture.
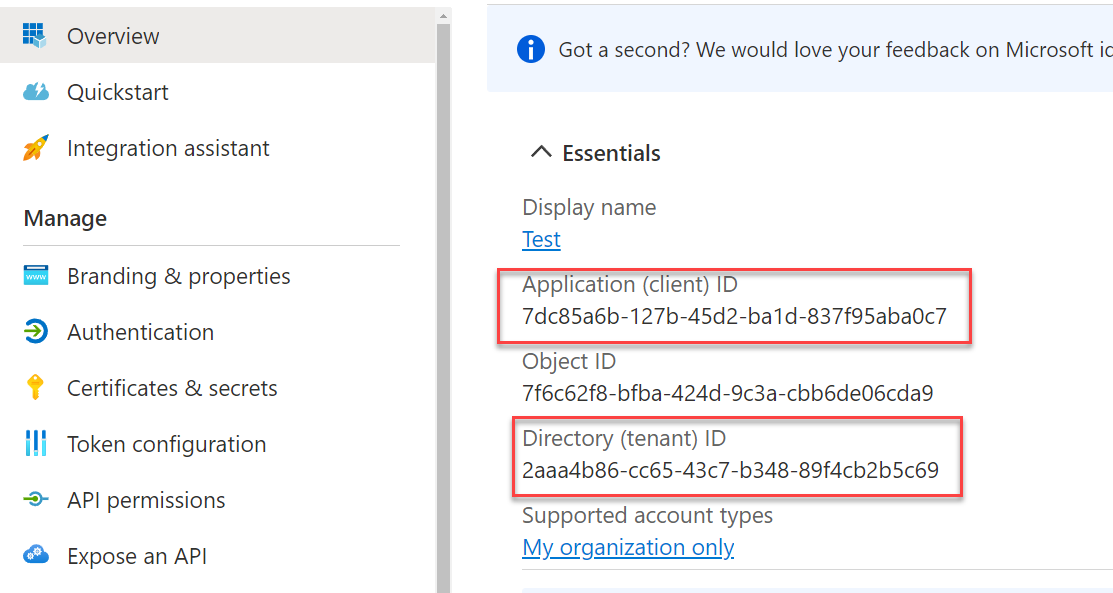 Figure 4: Get details for application to copy in the application.
Now, after the application was created, you only need to perform OAuth2 authentication flow to get a valid token. In this first example I’ve given the Imap.AccessAsUser.All scope, this imply using a Code flow authentication and a user delegated permission.
How the code works
To show all detailed phase I’ve created a video with the entire detailed procedure. I just want to summarize tricky part.
- You need to perform the flow with the correct scope: openid offline_access https://outlook.office.com/IMAP.AccessAsUser.All
- You should use a library or custom code for OAuth2 code flow challenge (using MSAL library is surely more complex)
- You need to understand how IMAP works or you can use MimeKit using the correct auth credential object SaslMechanismOAuth2
The rest of the detail is in the video.
Second scenario
In the second scenario, an administrator want to create an Azure App and letting that app access one or more folders in Office365 account with IMAP (POP3 or SMTP) without any user interaction. This scenario is a subset of the previous one, because in the previous one you can have multiple user delegate access to your app without any administrator intervention. Also in the previous example you do not need to give special authorization to the app. The real difference is that in the first scenario you need an user that will perform interactive authentication to delegate access to the application, but that delegation can be revocated in any moment and noone will give access to user application without explicit user consent. From a security perspective previous scenario is better.
In this second scenario an administrator is needed to delegate permission to app, no user interaction is needed to obtain the OAuth2 token.
In both scenarios the app cannot have access forever, in the first scenario refresh token has a maximum duration (1 or 2 years I do not remember) but even in the second scenario, an app secret has a duration of 2 years maximum. The second scenario is slightly less complicated because once you update the secret the app will regain access to ALL emails without user interaction. In the first scenario all the users need to perform again the code flow to let the application get another refresh token.
This second scenario is described in really great details in another video. In the video I’m able to show all the steps in great detail, in this post I’ll outline the main difference and the main points.
Difference in how you create the application
The app does not need any Platform configured in the Authentication Section, but since it uses the special permission IMAP.AccessAsApp you need one of the Tenant Administrators to give permission to the app, otherwise you will not be able to access any IMAP email. This is needed because you have an App that has really powerful permission, accessing email of user without any User Interaction.
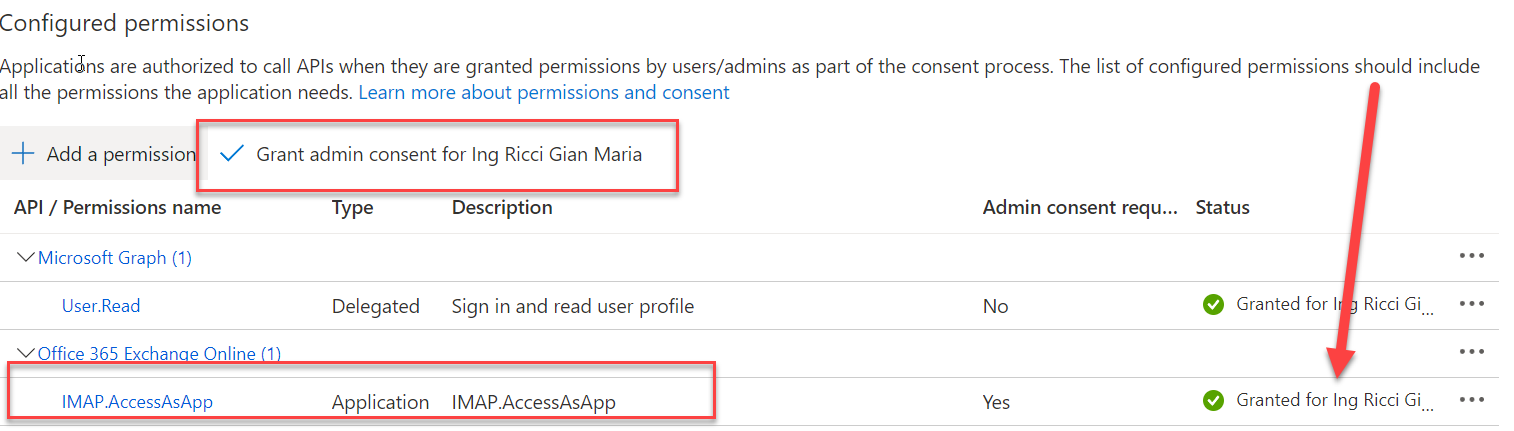 Figure 5: Grant permission to the app.
PowerShell Part
Once you create the application, it has a principal in the Azure AD for RBAC authentication, but Office 365 emails are in another application, that cannot directly use that principal. Thus you need to use some PowerShell to grant permission to email folders to newly created app. This is the only tricky part of the scenario.
First of all, install needed modules and import them.
| |
Now Connect to AzureAD and to Exchange online, this is needed to interact with both world.
| |
Once you connected to the ExchangeOnline immediately try to run New-ServicePrincipal cmdlet, if you got an error, your tenant still is not enabled to create service principals. This part is really annoying because from what I saw you need to wait for your tenant to be enabled. You CANNOT use the New-ServicePrincipal if you did not previously connect with Connect-ExchangeOnline
Once your tenant is enabled and you can run the New-ServicePrincipal cmdlet, you can grant access to the app to one or more email accounts with the following PowerShell
| |
This is all you need to do. It is not complicated but I’ve lost a couple of hours looking on how to install New-ServicePrincipal before realizing that it is only available for some tenants and it is not installable but it is enabled after connecting to Online Exchange.
C# Part
There is nothing complex, obtaining a Token with Client Credential Grant Flow in C# is just a matter of a POST to the token endpoint, you can find everything in the code. There is no Refresh token because you can obtain a new code with a simple POST WITHOUT user interaction. When the token expired you just request another one and you are ready to go.
Obtaining token is really simple you can do with few lines of PowerShell if you need access in a script, because Client Credential Grant flow is just a single POST request with four parameters.
The only tricky part is the scope, that should be equal to https://outlook.office365.com/.default. Pay a lot of attention because I’ve found articles in the internet that uses an old and wrong scope.
Conclusion
I’ve spent really lots of time to have everything works, the problem is mainly the lack of a complete example that explain in details the whole process also I’ve found problem using MSAL library, because manually performing the OAuth2 flow is probably simpler and give you full control over all flow’s steps.
I really hope that this article and the videos can help people to go up to speed in less time and with less effort.
Gian Maria.