In previous post I’ve dealt with exporting Work Item information in Word file with AzureDevOps API, now I want to deal with the inverse operation, importing data from external service into Azure DevOps. If the source service is a Team Foundation Server, you can use the really good tool by Naked Agility Ltd you can find in marketplace , you can also have a shot at the official migration tool if you need to migrate an entire collection, but if you have some data to import from an external system, using API can be a viable solution.
I’ve created a simple project in Github to demonstrate basic usage of API to import data into Azure DevOps (both server and online version), where I’m dealing only with the Azure DevOps parts, leaving to the user the burden to implement code to extract data from source system.
If you need to import data to a System, it is better not to assume where the data is coming from. Having only to deal with the import part, you leave the options to other to do the work of getting data from the source server.
The code uses a MigrationItem class to store all the information we support to migrate data to Azure DevOps, this class contains only a string field to identify the unique id in the source system, as well as the work item type to create. Then it contains a list of MigrationItemVersion that will represent the content of the data in the original system during the time. In this proof of concept I support only Title description and the date of the modification. T his structure is needed because I want to migrate full history from the original system, not only the snapshot of latest version, so I need to know how the original data was during the time.
| |
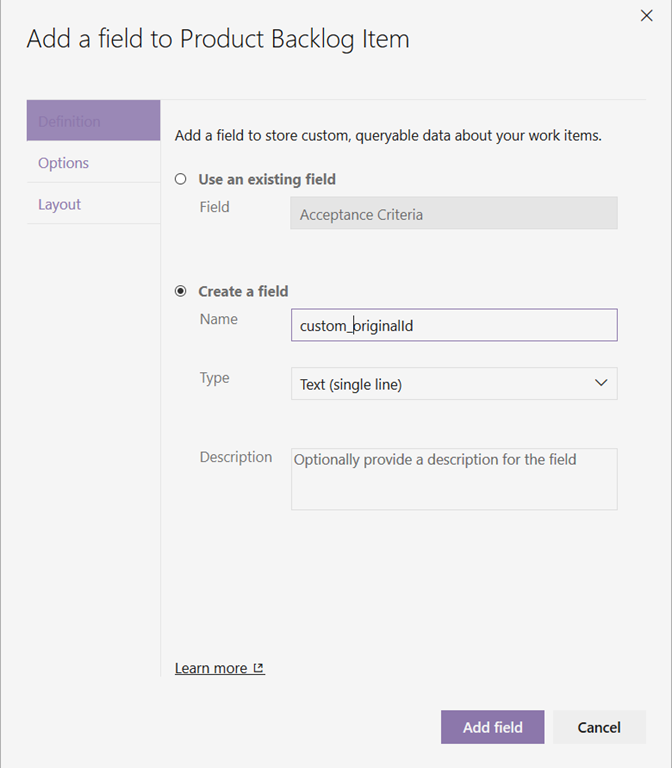
To make this code run you need to do a couple of thing, first of all you need to create a customized process from one of the three base process and add at least one text field to store the original id.

Figure 1: Adding a custom field to store the original id of imported work item
This field is really important, because will help the user to correlate Imported Work Item to data in the original system, thus allowing import tool to identify created work Item to fix or re-import some of the Work Items.
Whenever you import or move data between systems, at least you need to have a unique identifier of data in the original system to be stored into the imported Work Item.

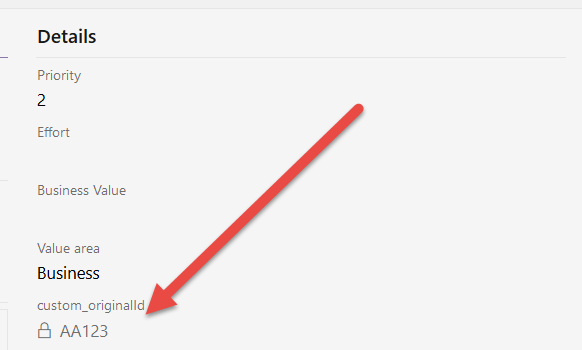
Figure 2: Custom original id on a imported Work Item.
As you can see in Figure 2 this information is readonly, because it is used only by the importer and should never be changed by a Human, you can obtain this with a simple Work Item rule.
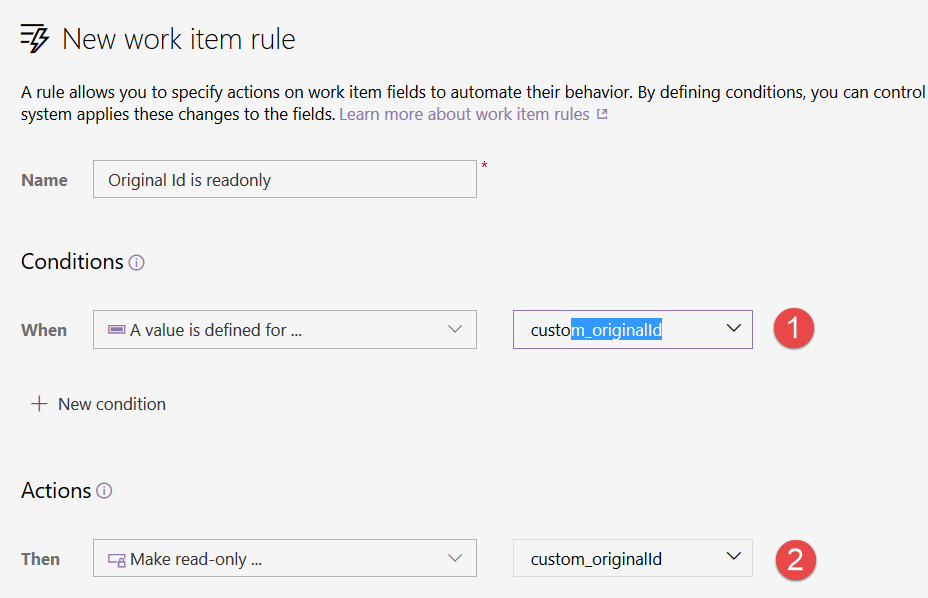
Figure 3: Make OriginalId field Readonly
This will allow me to avoid users to mess and change this number. You can appreciate how easy it is to modify the template and create new fields and rules on Azure DevOps.
Thanks to process inheritance, it is really simple to modify the process in Azure DevOps adding information specific to own process, like the id of original item in case of an import.
Now that everything is in place you need to add the user that is performing the import as member of Project Collection Service Account , this specific group will allow the user to perform action on behalf of other. This is a very special permission, but you should use it if you want to perform a migration with high fidelity.
Once migration is finished, you can remove the user from the Project Collection Service Account and restore it to standard permission. Remember, since the sample project uses Access token to authenticate, be sure that the user that generated the token is a member of Project Collection Service Account group before running the test migration tool.
Being part of Project Collection Service Account allows a user to impersonate others as well as bypass some of the validation rules for the Work Item. This is needed to perform a change to Work Item in the past and on behalf of other user.
Now it came the code part, that, thanks to Azure Devops API it is really simple. I do not descend into details of connection and interaction, because it was something I already discussed in another post, this time I’m interested in how I can create a new Work Item and save multiple versions of it to recreate the history.
| |
The core method is the ImportWorkItemAsync, that takes a MigrationItem to create the new work item. In the very first line I simply look for a work item that was already bound to that external item, if it is present I simply destroy it. This approach is radical, but it allows me to issue multiple test import runs without the hassle to deleting everything before each import. More important, if some of the Work Item where imported not correctly, I can simply re-export them and the corresponding Work Item will be recreated correctly.
| |
The nice stuff about customization, is that I can query Work Item Store using condition on my new defined field. To leave everything flexible, I can specify the name of the field created in Figure 1 to command line. The whole command line to the example looks like this.
| |
Once we are sure that the system does not contains a Work Item related to that external id,the code will create a new Work Item In memory
| |
The type of the Work Item to create is part of MigrationItem information, and the code simply verify that such type of Work Item really exists in current team project. If everything is ok, the code create a new WorkItem in memory using that type, then populate the original id field. This structure allows me to query the original system, then for each Migration Item I can decide destination type in Azure Devops. Last step is iterate through all the versions of the original item, and save every change to Work Item store to recreate the history of the original MigrationItem.
| |
The above code migrate only the Title, but nevertheless allows me to verify that I’m able to import not only a snapshot of Work Item, but a full history. As you can see this is really simple, for each iteration I only need to populate System.ChangedDate and System.ChangedBy, and in the first iteration I can also set System.CreatedBy.
One rule is in place, you cannot save with a date that is not greater that the date used for last save, this will force you to import all the versions in the correct order. Except this you can simply save with a date in the past and as a different user.
Before saving Work Item I simply issue a call to the Validate() method, that is able to determine any validation error before saving the Work Item , in case of error, I logged it then return false to inform the caller that Work Item was not fully imported.
This is a simple test to export some bogus data.
| |
Launching test program I view this output:

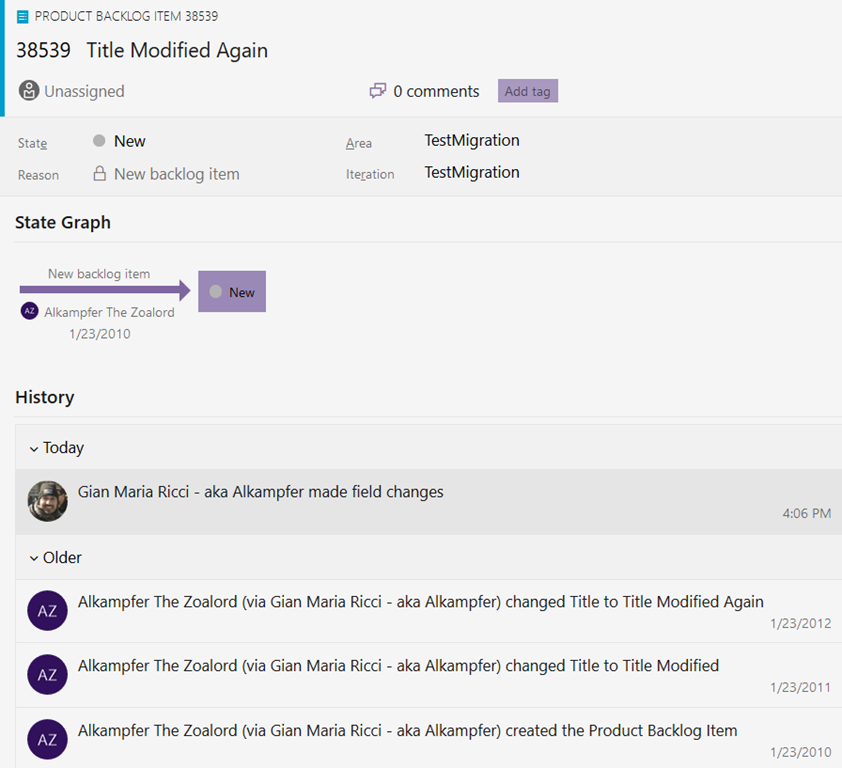
Figure 4: Export output.
This is not the first run, so the logs informed me that an item bound to that original Id was already created and it was deleted, then informed me that a new Work Item is created and then updated for two times.

Figure 2: Work Item was correctly created in Azure Devops Collection
The nice stuff is that the work item History reports all the modification with the correct Date, and this can be done only because the user that generated the token is member of Collection Service Account group. (Do not forget to remove the user after finishing the import, or use a specific user for the import).
Thanks to the great flexibility of Azure DevOps API you can easily imports data with full history to have a migration with higher fidelity than exporting last snapshot of the data.
The only indication that the action was performed by an import is that the history shoved (Via Gian MAria Ricci –aka Alkampfer) that indicates that the action was not really performed by Alkampfer the Zoalord, but was instead done with impersonation. Nevertheless you can maintain full history in the code.
You can find full example In GitHub
Happy Azure DevOps.
Gian Maria.