A similar post was made lots of time ago, but since this is always an hot topic, it is probably the time to refresh with new UI and new concepts of Azure DevOps.
The subject is, how can I apply security to backlogs if I adopt the strategy one single Team Project subdivided by teams?
The approach One Team Project to rule them all is still valid as today , because, once you have a team project, you can divide it with Teams, where each team has its own backlog (or share a single backlog between teams) making everything more manageable.
If you adopt the Single Team Project approach, usually a question of security arise, what if I need people of Team A being able to view only backlog of Team A and Team B are able to view backlog of Team B ? Clearly if you create more than on Team Project the solution is obvious, if John is in Team Project A and Jane is in Team Project B, each one will see only the backlog of Team Projects he/she belongs. This happens because each Team Project has its own user and you can see code, work items, pipeline of a Team Project only if you belong to that Team Project.
Team Project is useful if you need to segregate information between various member, so members of one Team Project cannot see information of other Team Projects.
If you create a single Team Project ad then create Team A and Team B, with the default option you will have two sub areas called TeamProject\Team A and TeamProject\Team B, and two security groups, one for each team. The problem is: is you put John in Team A and Jane in Team B both of them can see Work Items belonging to both teams. This happens because once you are added in a Team Project, you are usually added also to a security group of the corresponding team, that in turn belongs to a special group called Team Project contributors, that in turn can see all Work Items and work with code etc etc.
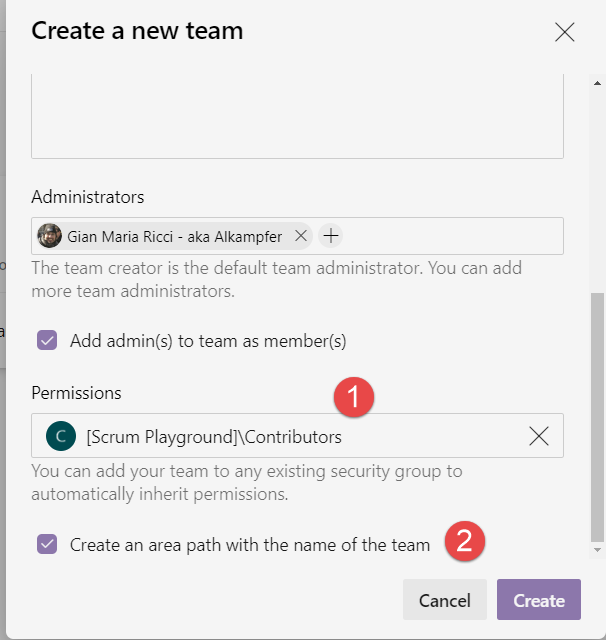
Lets recap: this is the dialog you got when you are creating a new team.

Figure 1: Interface of new Team Creation
Two are the important points in Figure 1, the first is that the security behind that group is [Team Project Name]\Contributors, the second is that a new area path with the name of the team will be created. After you press create, a new security group with the name of the team will be created, and that group will be part of [Team Project Name]\Contributors default group. This imply that each person that is added to Team A will be alos part of Contributors, a special group that has access to all Work Items, Code and other resources in the project.
This is the default behavior, you can remove group in (1), but if you already created the team, this is the situation you got.
Now you need to solve your original problem: member of Team A should see only Work Items of Team A and members of Team B should see only Work Item of Team B. An obvious solution is to change security of corresponding area. Just go to project administration page where you configure areas as shown in Figure 2. 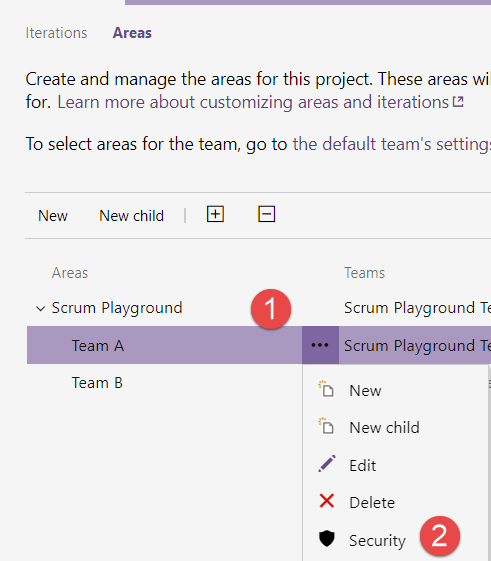
Figure 2: Administration of Area for security of Team A,
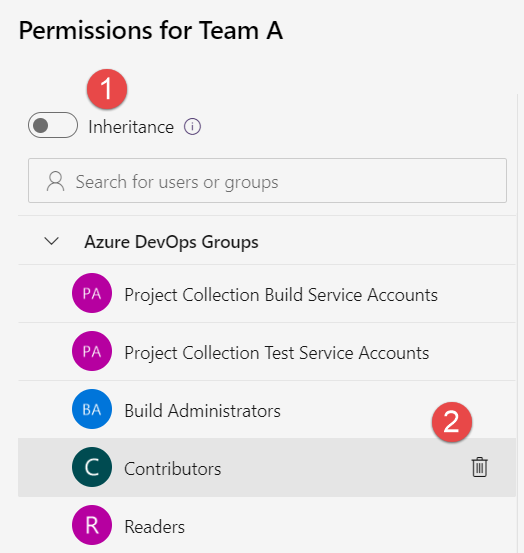
This shows actual permission for Work Items in area of Team A, as you can see from Figure 3 Contributors group can edit everything. From that figure you can see (3) that you have also an option that allows this area to inherit all permissions from parent areas.
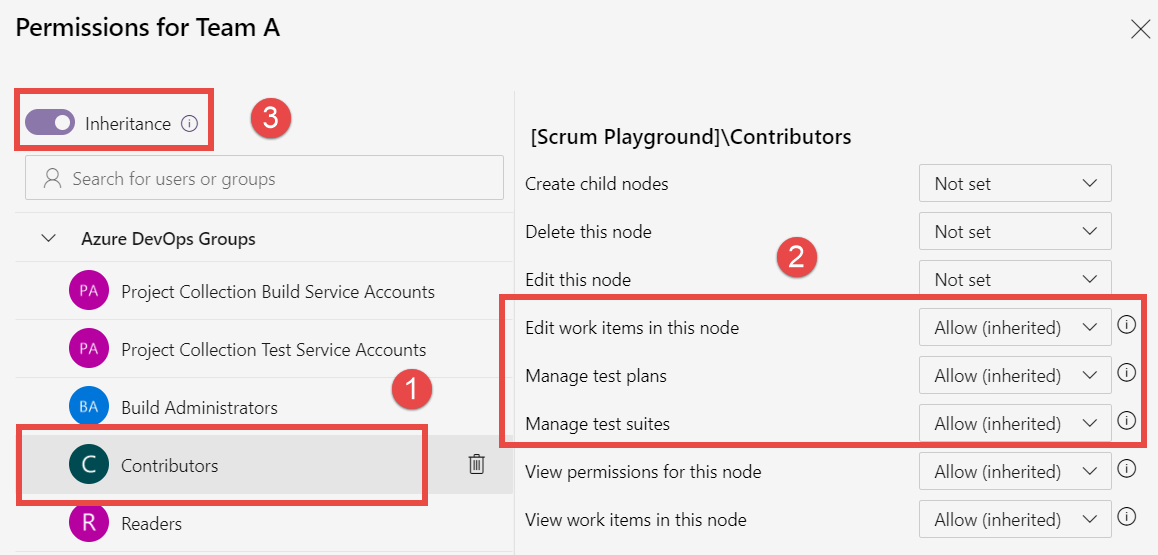
Figure 3: Contributors permission for Work Item of area belonging to Team A.
First step is to remove inheritance and remove contributors from permission list as shown in Figure 4. To remove the group you can simply press the trash bin icon.

Figure 4: Remove permissions for Contributors Group and disable inheritance for the area.
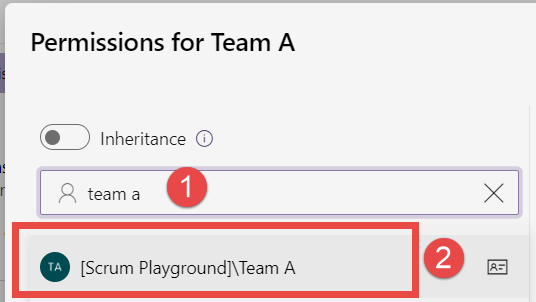
Now only administrators, readers and Build administrators can access Work Item, and it is time to add corresponding team to current area as shown in Figure 5.
Figure 5: Just start typing in search textbox to find the team corresponding to current area. PAY ATTENTION to choose the group that belongs to the right Team Project because you could have multiple Team A in different Team Projects
Since you are configuring Team A area, select corresponding team called Team A (pay attention at team project name if you have more team called Team A in different Team Project). Now you should give permission to see and edit Work Items in that area as shown in Figure 6. 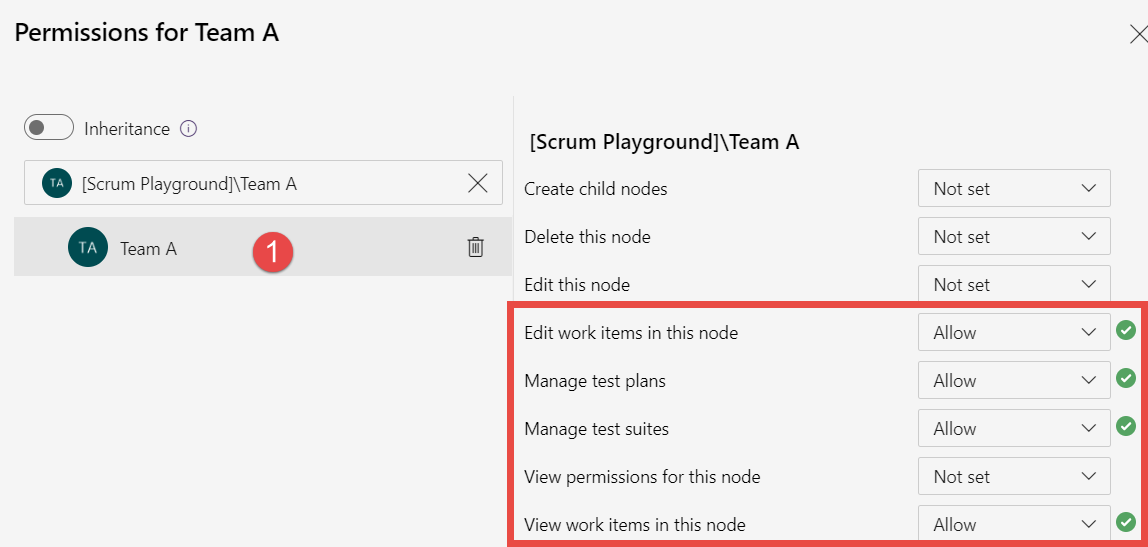
Figure 6: Give all permission to Team A to access work item in area Team A
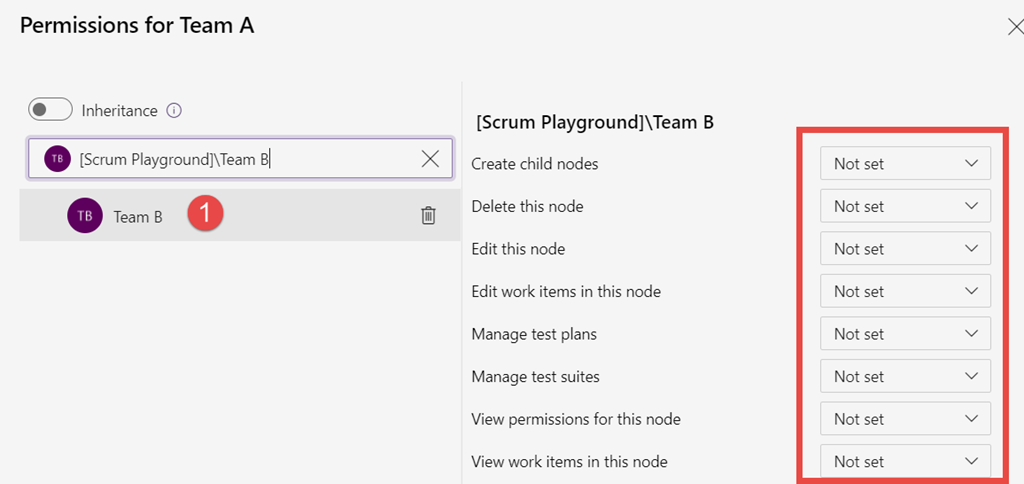
Now people that are only in Team B, cannot access Work Item that are in area Team A, they cannot even find Work Item with a query. If you want to explicitly check permission level of another team, just search Team B in the same UI and check effective permission. As you can see in Figure 7 Team B has no permission in this area . 
Figure 7: Permission of Team B
It is important that permission are “not set” and not deny because a deny wins over all other settings.
Now you should repeat this configuration for each area and for each team. To recap
- Choose settings for the corresponding area
- Remove contributors
- Stop inheritance
- add the corresponding team group and give it permission
Enjoy.
Gian Maria.