Azure DevOps is a big product and often users start using it without fully explore all the possibilities. As an example, when it is time to work with Git Repositories, users just create repositories and start working without any further configuration.
If you navigate to the Repos section of Project Settings page, you can configure lots of options for repositories. Security is probably the most important setting, because it determines who can access that specific repository and what permission each user / group has in the context of that very specific repository.
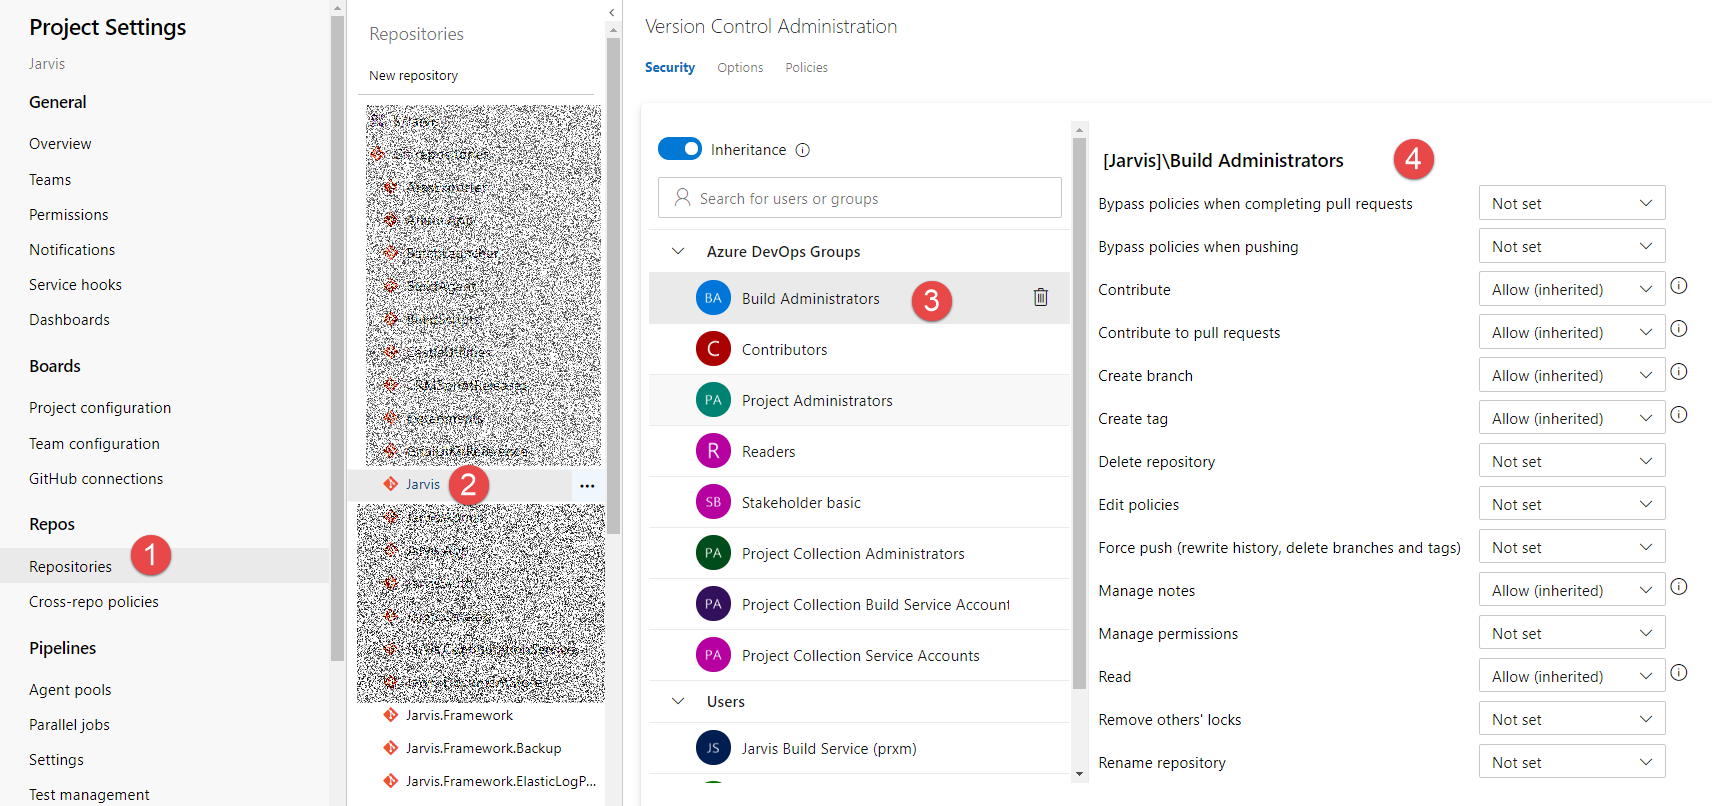
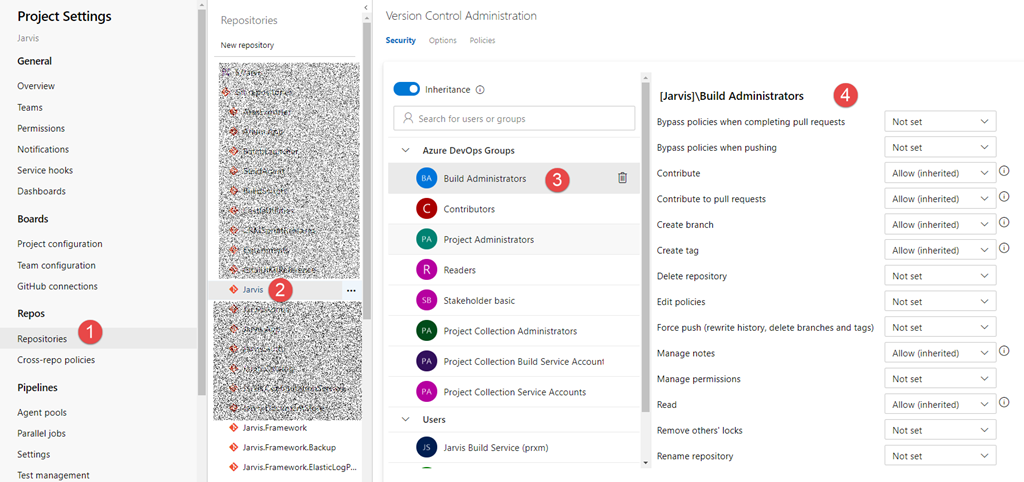
Figure 1: Security settings of a Git Repository
You can simply select repositories (1) then select the specific repository (2) then the user / group (3) and finally set permission level. Permissions can be also set for each different branch of the repository and you can also select the root of the repositories (Git repositories node) to set default security for all repositories. > Thanks to hierarchy you can set permission for all repositories of a Team Project then change permission to child repositories and even single branches
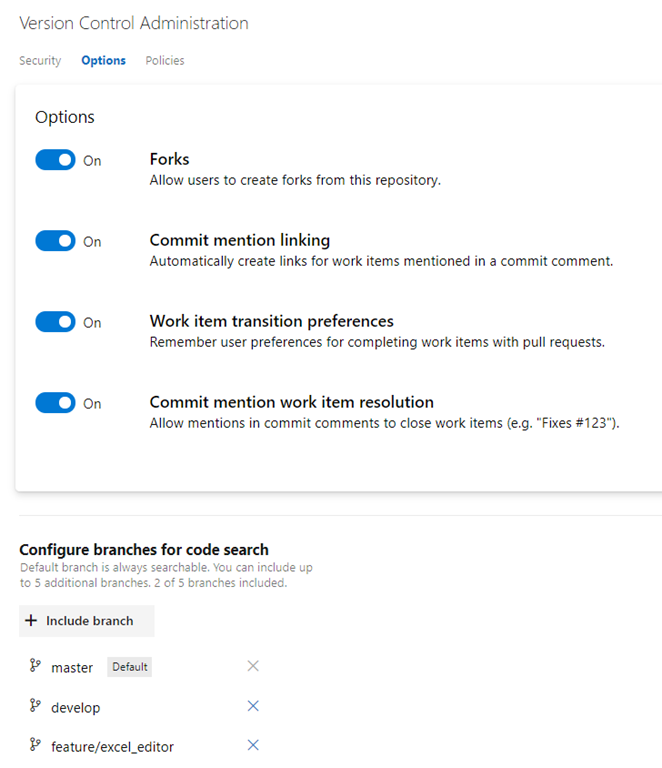
For each repository you have also some options ( Figure 2 ) to allow forking and enable / disable automatic linking and resolution of work item included in comments. You can also select all the branches that will be indexed for code search.
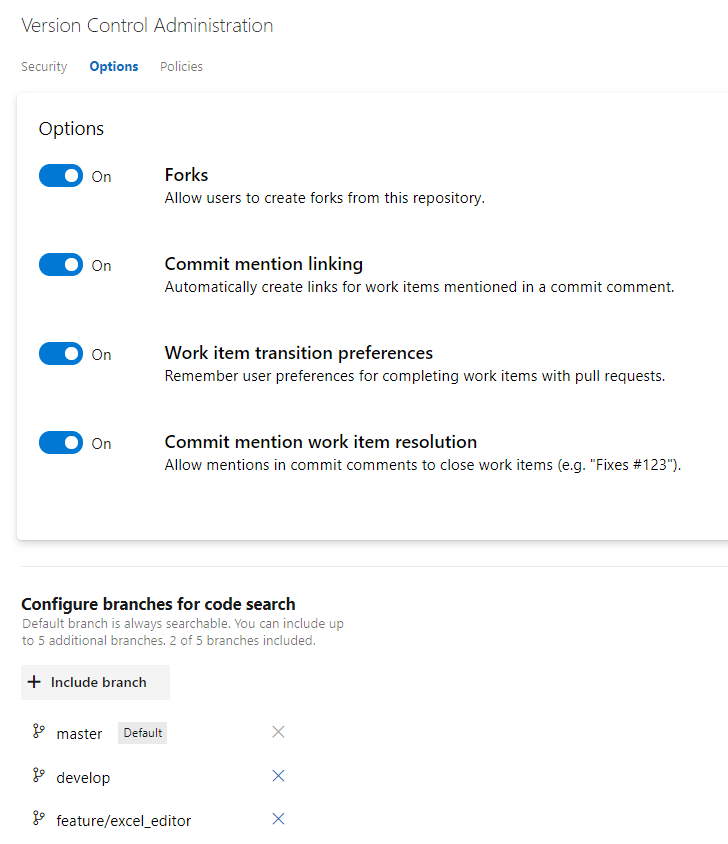
Figure 2: Options for repository
Finally, in Figure 3 you can see policies for the entire repository. These policies are really important because allows you to have an healthy repository. As an example I strongly suggest you to check the Case Enforcement rule, that prohibit change casing of a file in a commit (a problem that can lead to headache). You can also limit maximum file size and limit path length, or blocking pushes that contains files with specific pattern name.
Additionally you have also a pattern for author email, to limit commit authors to a specific set of allowed emails. All policies in Figure 3 can be set on single repository or to the root node to enable them for all repository.
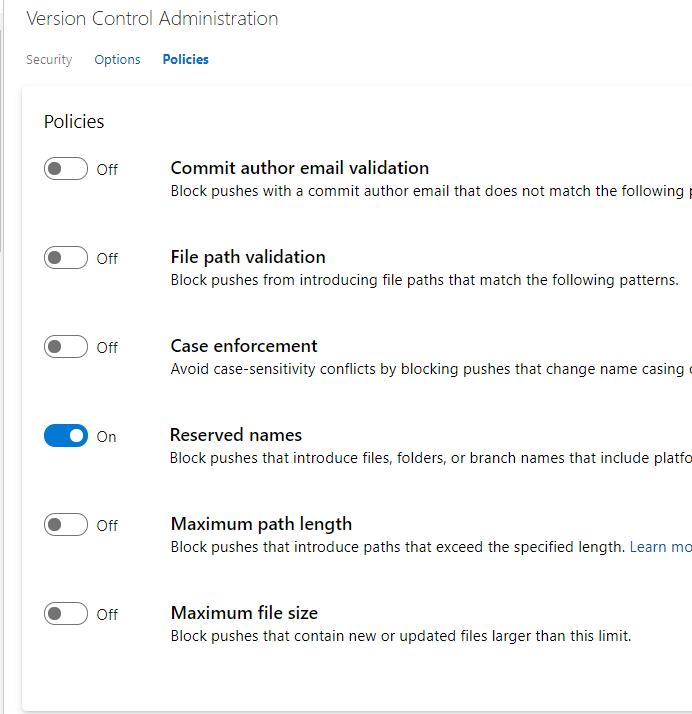
Figure 3: Policy page for a repository
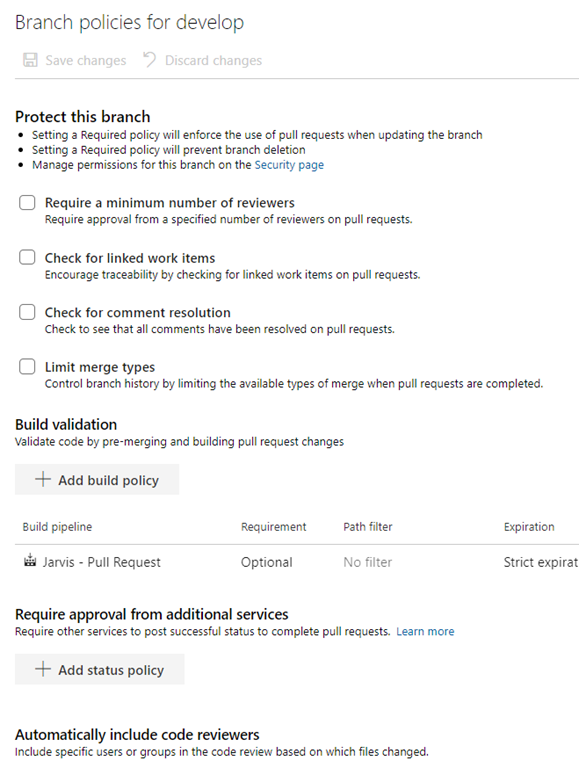
If you check policies for a specific branch, instead of the settings in Figure 3 (valid for the entire repository), you will be presented with the configuration in Figure 4 that allows you to specify pull request rules. 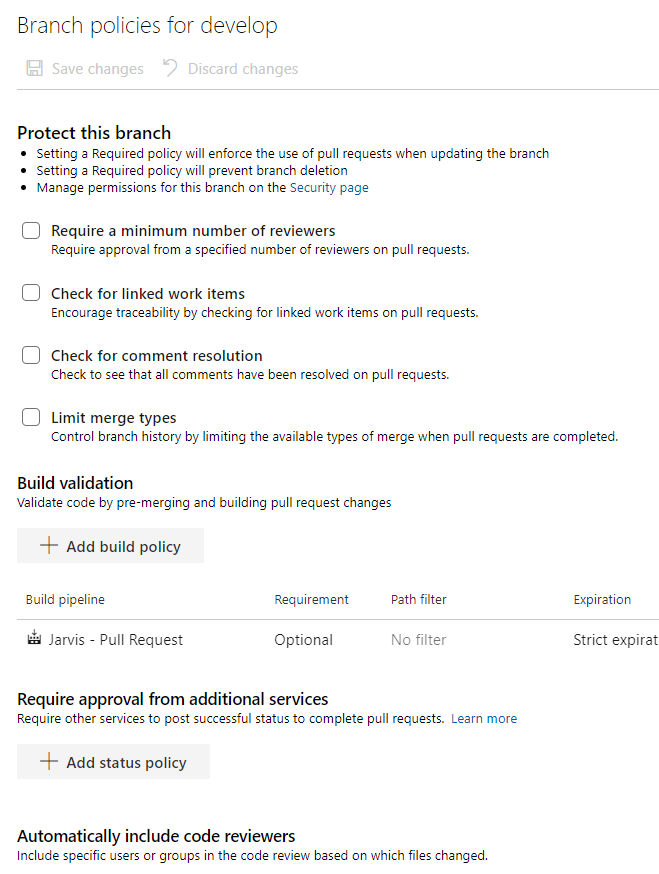
Figure 4: Pull request rules.
These policies can prevent pushing directly on specified branch, enforcing a process of pull request to reintegrate a branch on specified branch. You can use one or more build to automatically verify quality of merged code, automatically require formal approvation from external service or code reviewers. > Pull requests are the only way to have full control on a branch, having a full review for each increment of code that should be merged on that branch In that configuration page, the one I liked the most is Limit merge type option, that allows me to limit the type of merge allowable to close the pull request. Since I’m a big fan of linear history, I strongly suggest you to leave only Rebase and fast forward, to enforce a strict linear history.
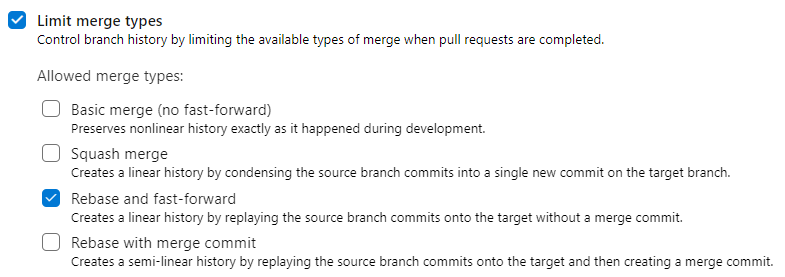
Figure 5: Limit merge type option
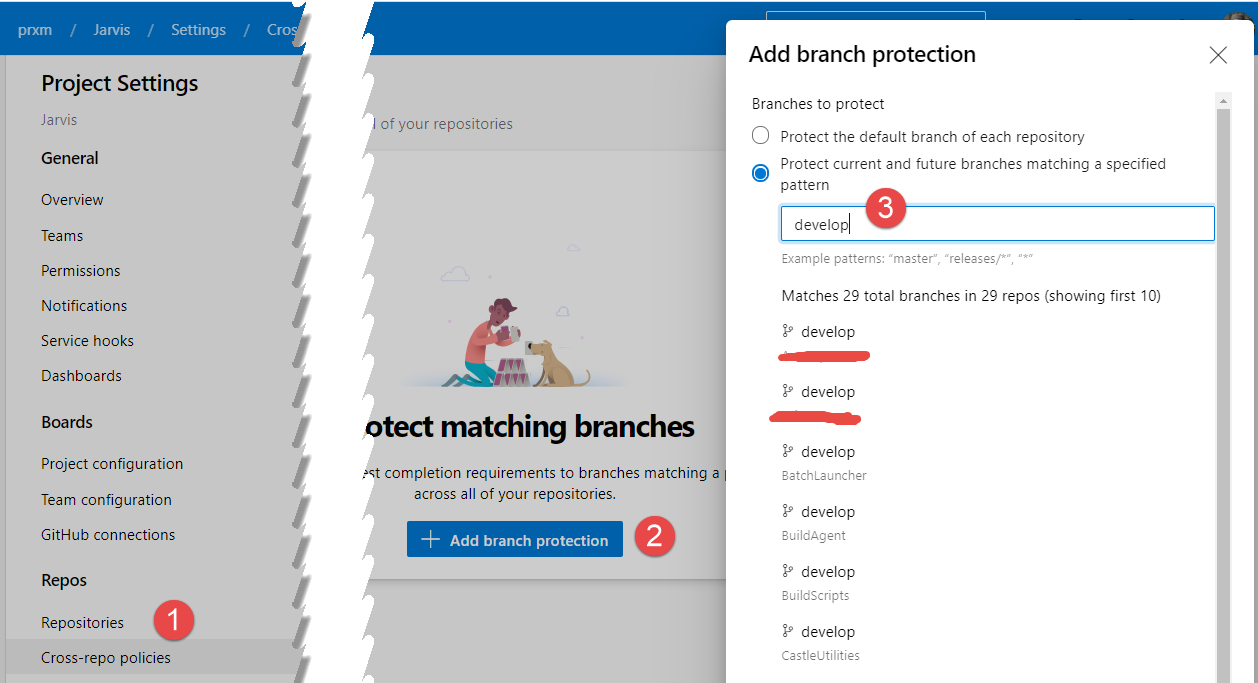
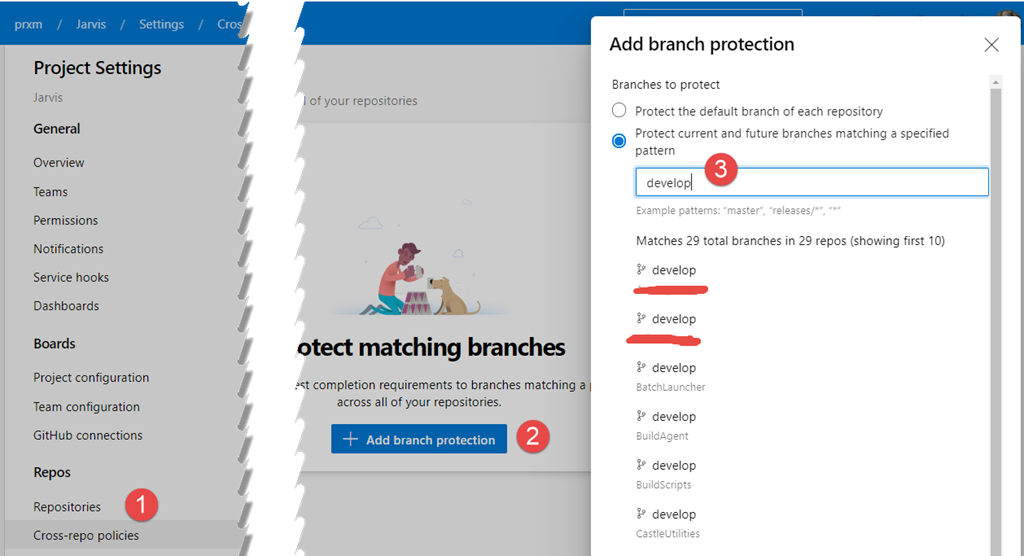
Finally you should be aware of the possibility to specify branch policies by convention, as shown in Figure 6. This options is pretty recent, you can choose Cross-Repo policies, then add branch protection and finally specify the name of the branch to protect, develop in my example.
Figure 6: Cross repo policies
Now you can specify policies for specific branches belonging to any repository in this Team Project, as an example you can enforce branch protection for all develop and master branches for every repository.
If you are using Git in Azure DevOps I strongly suggesting you to have a deep look to all the options to use the tool at the full power.
Gian Maria.