MultiStage pipelines are still in preview on Azure DevOps, but it is time to experiment with real build-release pipeline, to taste the news. The Biggest limit at this moment is that you can use Multi Stage to deploy in Kubernetes or in the cloud, but there is not support for agent in VM (like standard release engine). This support will be added in the upcoming months but if you use azure or kubernetes as a target you can already use it. My sample solution is in GitHub, it contains a real basic Asp.NET core project that contains some basic REST API and a really simple angular application. On of the advantage of having everything in the repository is that you can simply fork my repository and make experiment.
Thanks to Multi Stage Pipeline we finally can have build-test-release process directly expressed in source code.
First of all you need to enable MultiStage Pipeline for your account in the Preview Features, clicking on your user icon in the upper right part of the page.
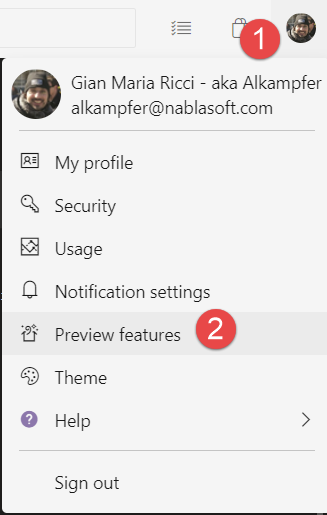
Figure 1: Enable MultiStage Pipeline with the Preview Features option for your user
Once MultiStage Pipeline is enables, all I need to do is to create a nice release file to deploy my app in azure. The complete file is here https://github.com/alkampfergit/AzureDevopsReleaseSamples/blob/develop/CoreBasicSample/builds/build-and-package.yaml and I will highlight the most important part here. This is the starting part.
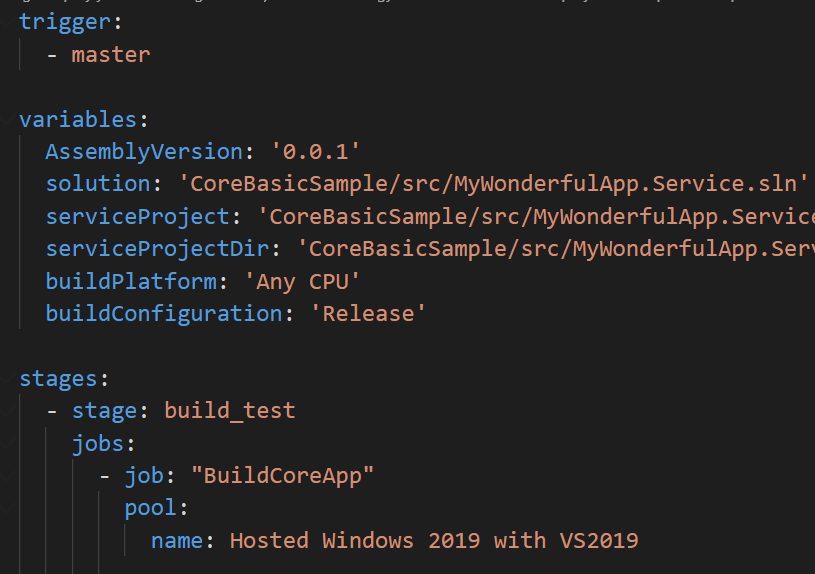
Figure 2: First part of the pipeline
One of the core differences from a standard pipeline file is the structure of jobs, after trigger and variables, instead of directly having jobs, we got a stages section, followed by a list of stages that in turns contains jobs. In this example the first stage is called build_test, it contains all the jobs to build my solution, run some tests and compile Angular application. Inside a single stage we can have more than one job and in this particular pipeline I divided the build_test phase in two sub jobs, the first is devoted to build ASP.NET core app, the other will build the Angular application. 
Figure 3: Second job of first stage, building angular app.
This part should be familiar to everyone that is used to YAML pipeline, because it is, indeed, a standard sequences of jobs; the only difference is that we put them under a stage. The convenient aspect of having two distinct jobs, is that they can be run in parallel, reducing overall compilation time. > If you have groups of taks that are completely unrelated, it is probably bettere to divide in multiple jobs and have them running in parallel. The second stage is much more interesting, because it contains a completely different type of job, called deployment, used to deploy my application.
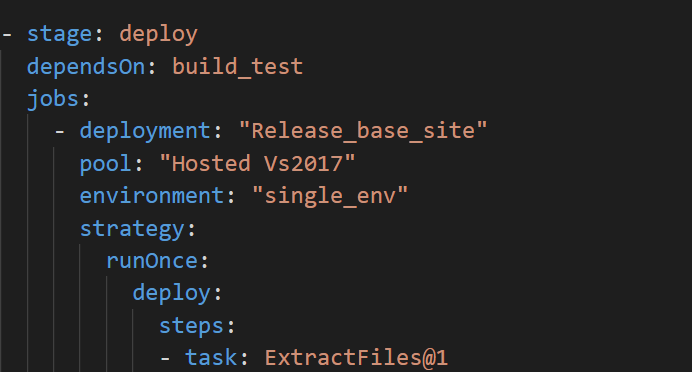
Figure 4: Second stage, used to deploy the application
The dependsOn section is needed to specify that this stage can run only after build_test stage is finished. Then it starts jobs section that contains a single deployment job. This is a special type of job where you can specify the pool, name of an environment and then a strategy of deploy ; in this example I choose the simplest, a run once strategy composed by a list of standard tasks.
If you ask yourself what is the meaning of environment parameter, I’ll cover it in much extension on a future post, for this example just ignore it, and consider it as a way to give a name to the environment you are deploying. > MultiStage pipeline introduced a new job type called deployment, used to perform deployment of your application
All child steps of deployment job are standard tasks used in standard release, the only limitation of this version is that they run on the agent, you cannot run on machine inside environment (you cannot add anything else than kubernetes cluster to an environment today).
The nice aspect is that, since this stage depends on build_test, when deployment section runs, it automatically download artifacts produced by previous stage and place them in folder $(Pipeline.Workspace) followed by another subdirectory that has the name of the artifacts itself. This solves the need to transfer artifact of the first stage (build and test) to deployment stage

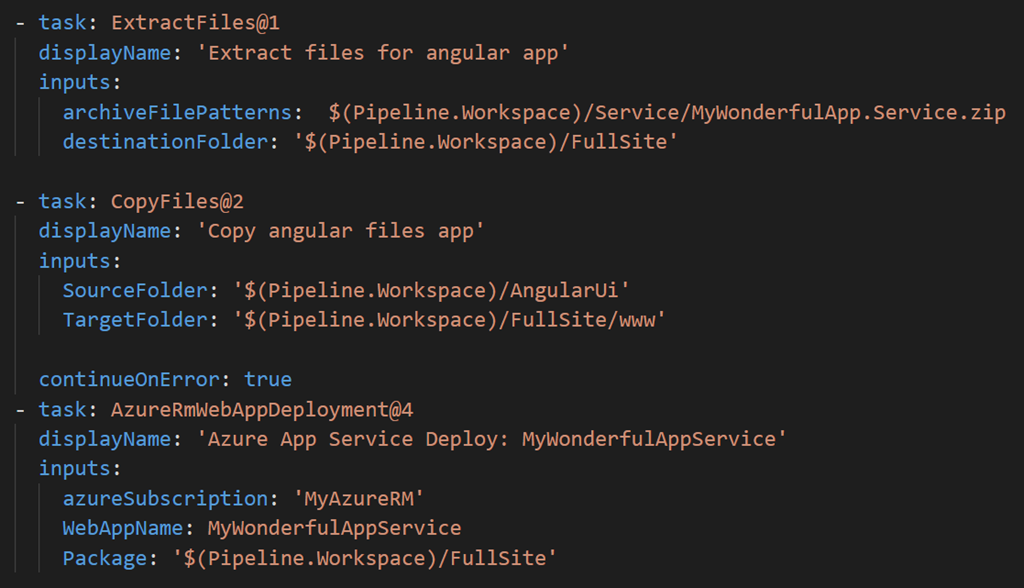
Figure 5: Steps for deploying my site to azure.
Deploying the site is really simple, I just unzip asp.NET website to a subdirectory called FullSite, then copy all angular compiled file in www folder and finally use a standard AzureRmWebAppDeployment to deploy my site to my azure website. Running the pipeline shows you a different user interface than a standard build, clearly showing the result for each distinct stage.
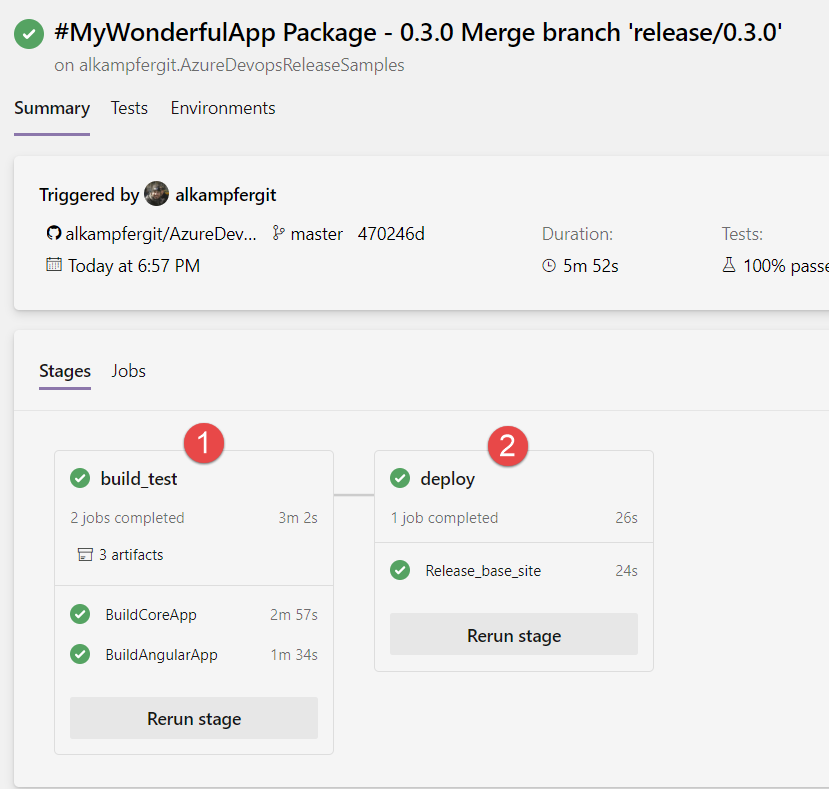
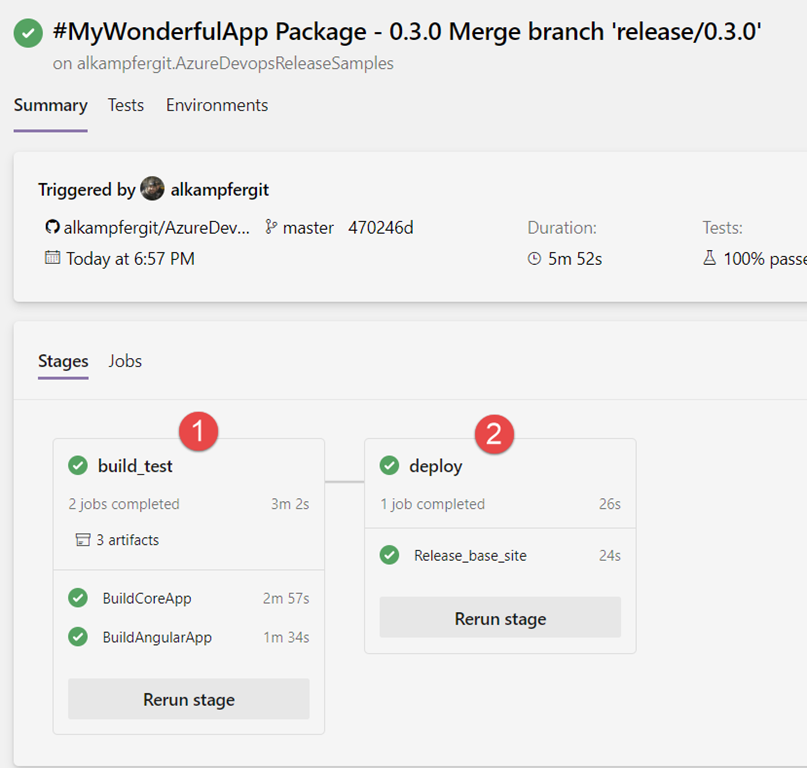
Figure 6: Result of a multi stage pipeline has a different User Interface
I really appreciate this nice graphical representation of how the stage are related. For this example the structure is is really simple (two sequential steps), but it shows clearly the flow of deployment and it is invaluable for most complex scenario. If you click on Jobs you will have the standard view, where all the jobs are listed in chronological order, with the Stage column that allows you to identify in which stage the job was run.
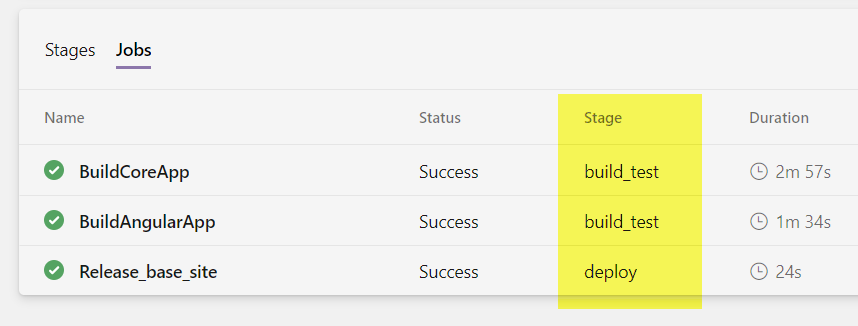
Figure 7: Result of the multi stage pipeline in jobs view
All the rest of the pipeline is pretty much the same of a standard pipeline, the only notable difference is that you need to use the stage view to download artifacts, because each stage has its own artifacts.
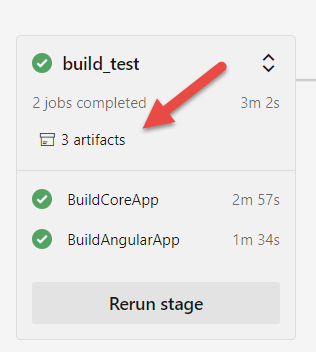
Figure 8: Downloading artifacts is possible only in stages view, because each stage has its own artifacs.
Another nice aspect is that you can simply rerun each stage, useful is some special situation (like when your site is corrupted and you want to redeploy without rebuilding everything)
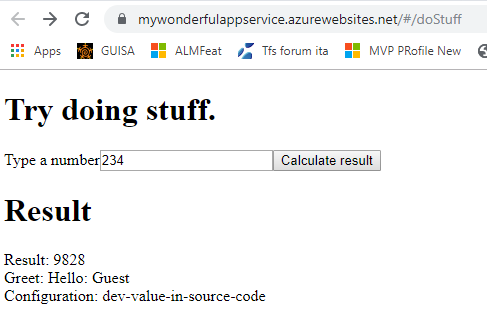
Now I only need to check if my sites was deployed correctly and … voilà everything worked as expected, my site is up and running.
Figure 9: Interface of my really simple sample app
Even if MultiStage pipeline is still in preview, if you need to deploy to azure or kubernetes it can be used without problem , the real limitation of actual implementation is the inability to deploy with agents inside VM, a real must have if you have on-premise environment.
On the next post I’ll deal a little more with Environments.
Gian Maria.