After almost six years, the post on How to configure diff and merge tool in Visual Studio Git Tools is still read by people that found it useful, but it is now really really old and needs to be updated.
That post was written when Visual Studio 2012 was the latest version and the integration with Git was still really young, made with an external plugin made by Microsoft and with really basic support. If you use Visual Studio 2017 or greater, you can simply go to to Team Explorer and open settings of the repository. 
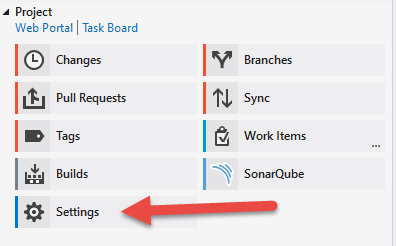
figure 1: Git repository settings inside Visual Studio Team Explorer
Settings pane contains a specific section for Git, where you can configure settings for the current repository or Global settings, valid for all repository of current user.

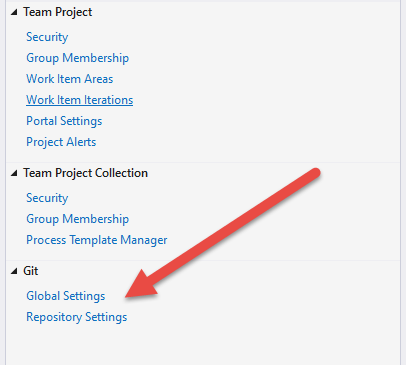
Figure 2: Git settings inside Visual Studio
If you open Repository Settings usually you find that no specific diff and merge tool is set. Merge and Diff configurations are typical settings that are made at User level and not for each single repository.
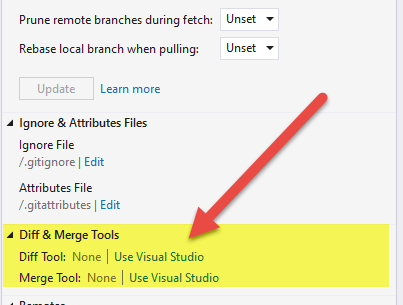
Figure 3: Diff and Merge tool configuration inside Visual Studio.
As you can see, in Figure 3 no diff or merge tool was set for the current repository, this means that it will use the default one for the user (in my situation is none). If you use only Visual Studio this settings is not so useful, if you have a conflict during merge or rebase visual studio will automatically show conflicts and guide you during merging.
If you are inside Visual Studio it will handle diff and merge automatically, even if it is not configured as Diff or Merge Tool. The rationale behind this choice is: If you are inside a tool (like VS) that has full support for diff and merge, the tool will automatically present you with diff and merge capabilities without checking repo configuration.
This happens because when you open a Git Repository, Visual Studio monitors the status of the Repository and, if some operation has unresolved conflicts, it shows the situation to the user, without the need to do anything. The settings in Figure 3 is useful only if you are operating with some other tool or with command line, if you got a conflict during an operation started from any other tool (GUI or command line) the procedure is:
- Opening VS
- from VS Team Explorer localize local git repository and open it
- go to team explorer changes pane to start resolving conflicts
If you configured instead VS as diff and tool you can simply issue a git mergetool command and everything is done automatically without any user intervention. But to be honest, latest VS git integration is really good and it is surely better to manually open local repository. As an example, if you are doing a rebase from commandline and you got conflicts, it is better to manually open VS, solve the conflict, then continue rebase operation inside VS. If you got further conflicts, you do not need to wait for VS to reopen with git mergetool command.
But if you really want to configure VS as Diff and Merge tool, if you press “Use Visual Studio” button ( Figure 3 ) you can modify your local gitconfig. The net result is similar to what I suggested on my old post, VS just adds the six sections for diff and merge in config file.
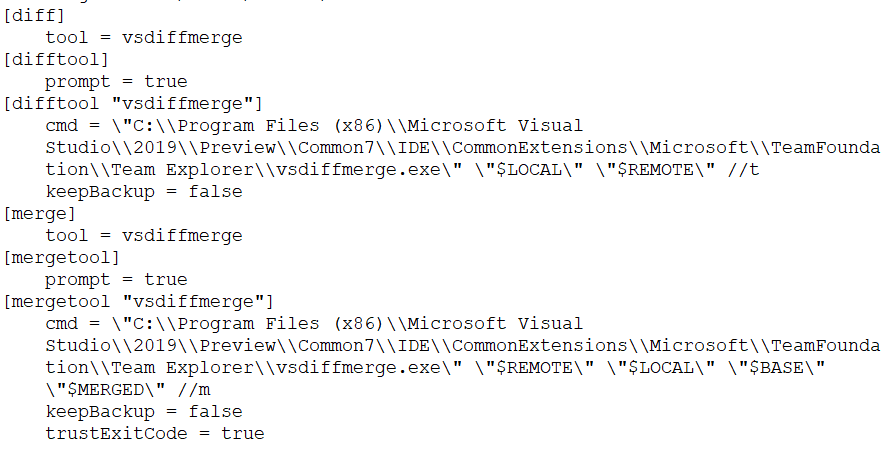
Figure 4: Git diff and merge section as saved from Visual Studio 2019 preview
If Visual Studio is your tool of choice I simply suggest you to configure it globally (file is named %userprofile%.gitconfig ) so you can invoke Merge tool from everywhere and have Visual Studio to handle everything.
Gian Maria.