I cannot stress you enough on how better is the experience of having builds defined in code than having build definition on the server , so I’m here to convince you to move to the new YAML build system in Azure DevOps :).
Having build definition in Code gives you many benefits, the first is that builds evolve with code branches.
If you still think that editing a YAML file is a daunting experience because you have tons of possible tasks and configuration to use, take a peek to the Azure Pipeline extension Visual Studio Code Addin, that brings intellisense for your pipeline editing in Visual Studio Code. I strongly encourage you to have a look at the YAML schema reference to have a complete knowledge of the syntax, but for most people a quick approach to the tool is enough, leaving the deep dive for when they need to do complex stuff.
With the extension enabled, after you opened a YAML Build definition in Visual Studio Code, you can click on the YAML button in the lower right part of visual studio code editor to change language
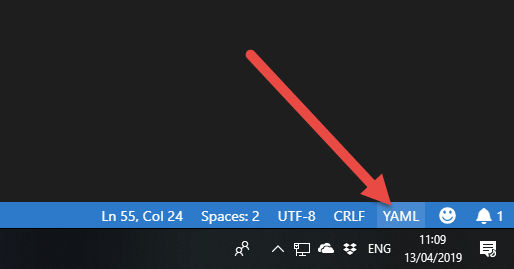
Figure 1: Language mode selection of Visual Studio Code
That area is the Language Mode Selection, and it is where you specify to Visual Studio Code what is the language of the file you are editing. If you simply open a YAML file, VS Code recognize the yaml extension and helps using standard YAML syntax, but it does not know anything about Azure DevOps Pipeline.
When you tell Visual Studio Code that the file is a YAML pipeline, intellisense kicks out and allows you to quickly edit the file
Thanks to the Language Mode Selector, we can now specify that the file is a Azure Pipeline file and not a standard YAML file.
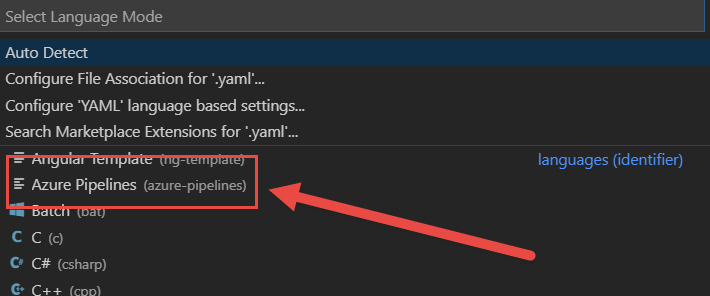
Figure 2: Selecting the right language type allows VS Code to give you tremendous help in editing the file.
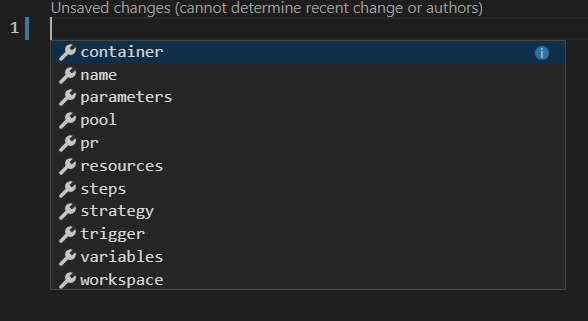
This is everything you need to do, from now on, VS Code will give you helps in the context of Azure DevOps pipeline syntax. Even if the file is completely empty the editor shows you possible choices for the first level nodes

Figure 3: Suggestions on empty file
Since I usually start specifying the pool, I can simply choose pool, then let VS Code guide me in the compilation of all properties 
Figure 4: Intellisense in action editing the file
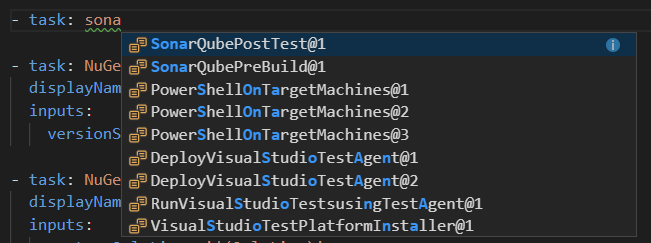
In real scenario you usually starts from some template file (another advantage of having build in code), you already prepared with standard build for you project, but even in that scenario having intellisense to refine the build will help you in choosing tasks. 
Figure 5: Help in choosing tasks
I can assure that, after some usage, it is far more powerful and quick to edit a build with VS Code than to edit a standard build made with tasks in the Web based editor. Graphical editor are powerful and are a good entry point for those who does not know the instrument, but intellisense powered editors are more productive and powerful.

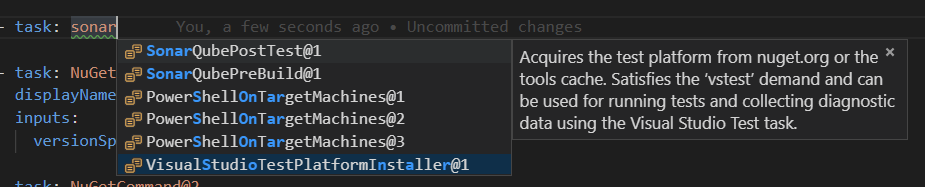
Figure 6: You do not have only intellisense to choose the task, but it will shows you also information about the task
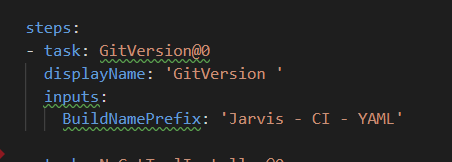
The only drawback I found is using custom tasks that were not recognized by the intellisense, as my GitVersion Task, that was marked as wrong because VS Code does not know it.
Figure 7: Custom tasks were not automatically recognized by VS Code
Intellisense will completely remove the need of the old trick of creating a build with the old editor, place tasks in the pipeline and then letting the tool generates YAML definition based on how you configured the task in graphical editor. I assure you that it is faster to directly copy a reference build and then add needed tasks with intellisense in VS Code than using UI editor.
If you are really a UI Oriented person, in the latest release of Azure DevOps (at the time of writing the feature is rolling out so it is not available on all accounts) you can use the YAML Task Assistant
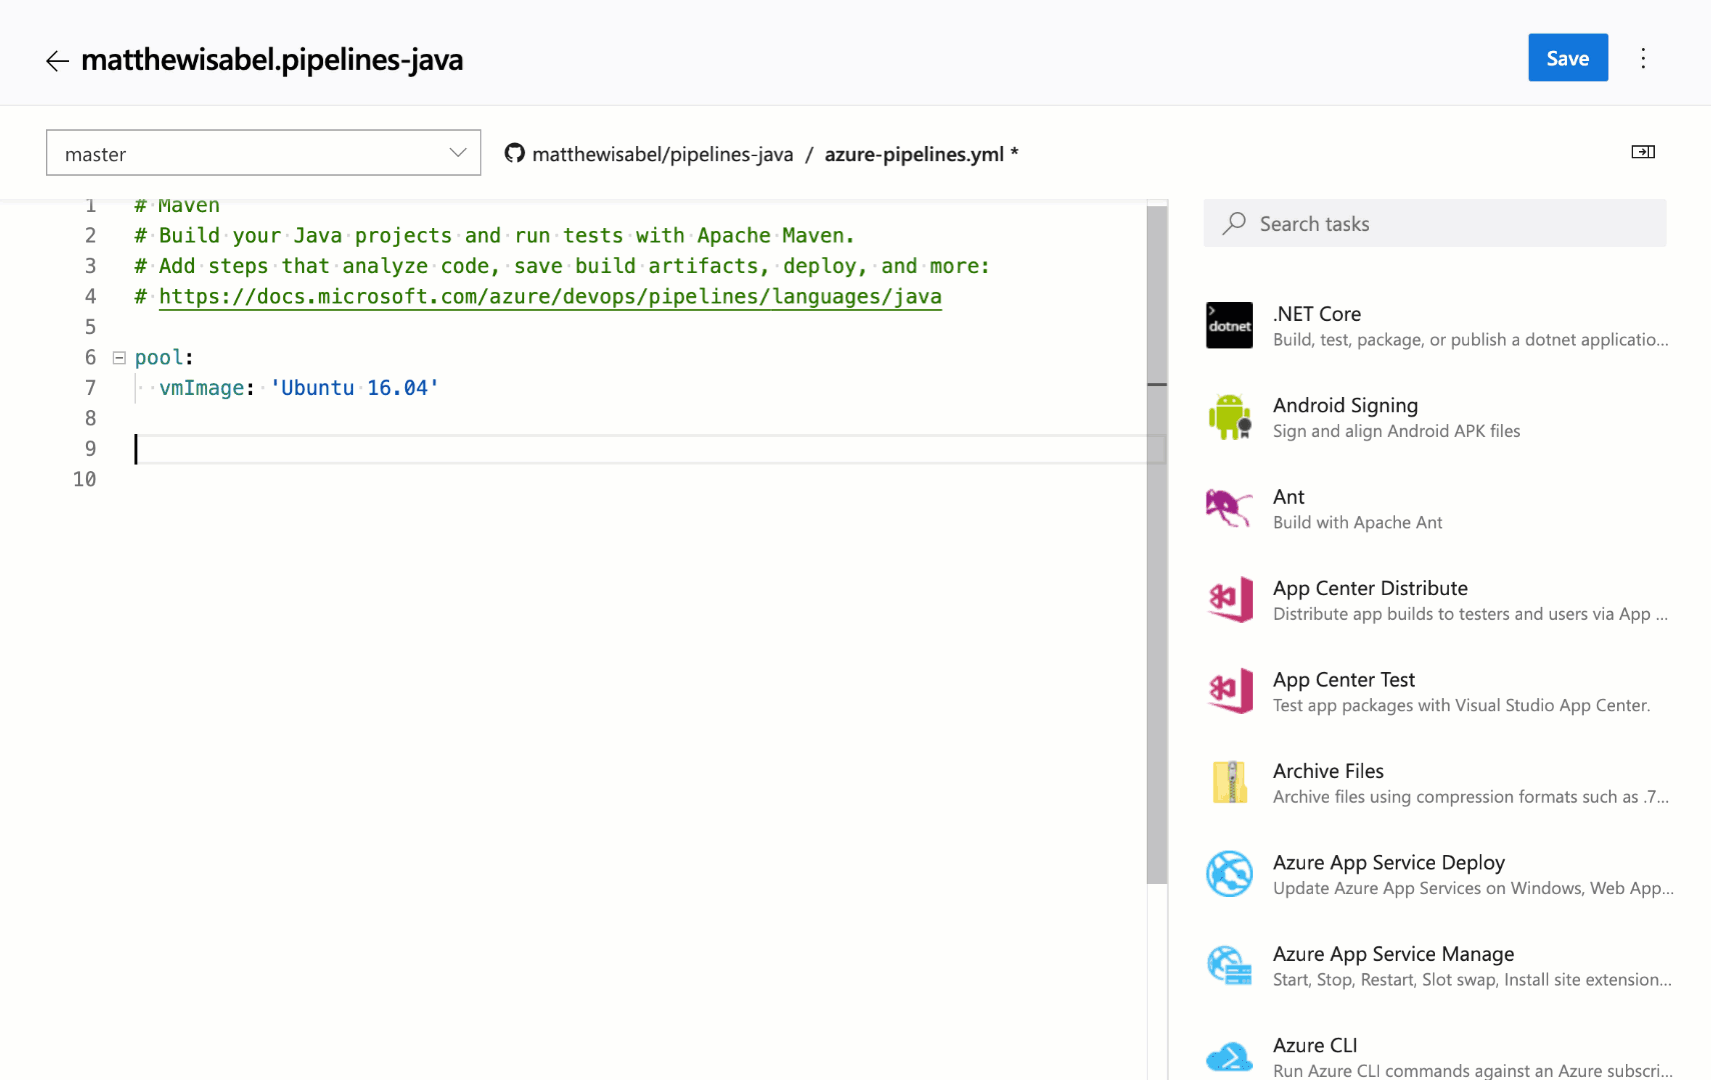
Figure 8: YAML Task assistant in action
The assistant allows you to configure the Task with the very same UI experience you have in UI Based pipeline, once the task is configured you can simply add corresponding YAML to the definition. > Task assistant gives you the same add experience for tasks of the old UI editor, so you can configure the task with graphic editor, then add corresponding YAML syntax to the definition. I think that with Task Assistant there are no more excuses not to move to YAML based definition.
Gian Maria