I’ve blogged in the past about YAML build in azure DevOps, but in that early days, that kind of build was a little bit rough and many people still preferred the old build based on visual editing in a browser. One of the main complaint was that the build was not easy to edit and there were some glitch, especially when it is time to access external services.
After months from the first version, the experience is really improved and I strongly suggest you to start trying to migrate existing build to this new system, to take advantage of having definition of build directly in the code, a practice that is more DevOps oriented and that allows you to have different build tasks for different branches.
YAML Build is now a first class citized in Azure DevOps and it is time to plan switching old build to the new engine.
You can simply start with an existing build, just edit it, select one of the phases (or the entire process) then press View YAML button to grab generated YAML build.
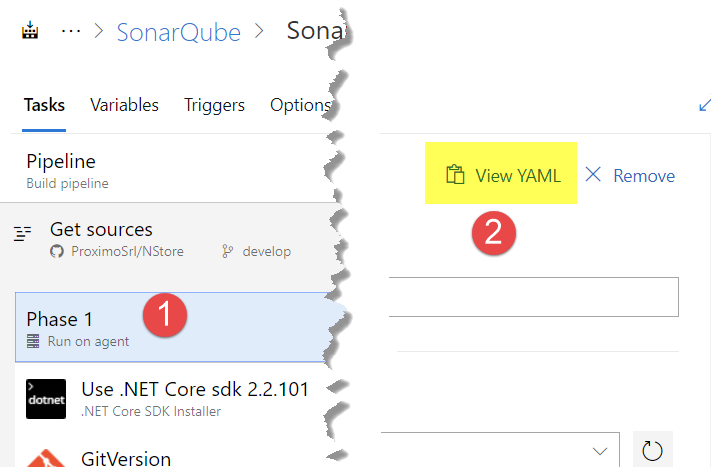
Figure 1: Generate YAML definition from an existing build created with the standard editor
Now you can simply create a yaml file in any branch of your repository, paste the content in the file, commit to the branch and create a new build based on that file. I can clearly select not only AzDO repositories, but I can build also GitHub and GitHub enterprise
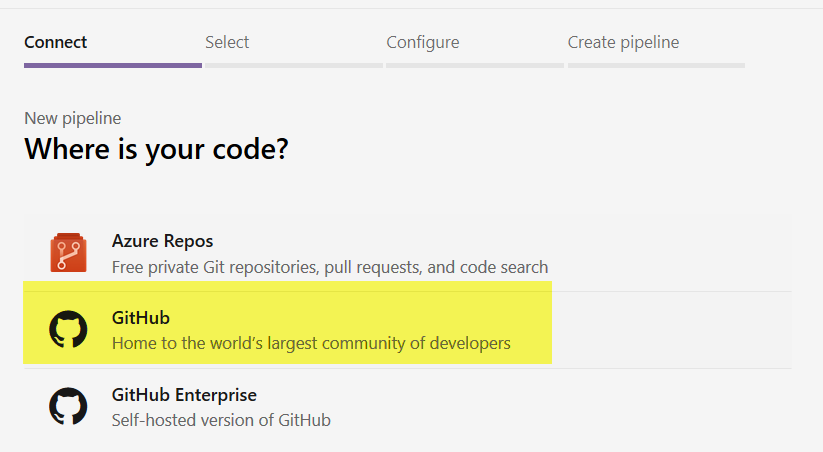
Figure 2: I can choose GitHub as source repository, not only azure repos
Then I can choose the project searching in all the project I have access to with my access token used to connect GitHub
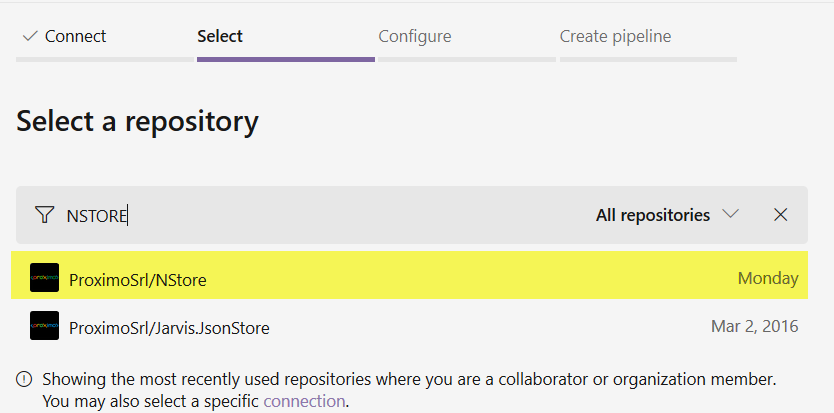
Figure 3: Accessing GitHub repositories is simple, once you connected the acount with an access token AzDO can search in repositories
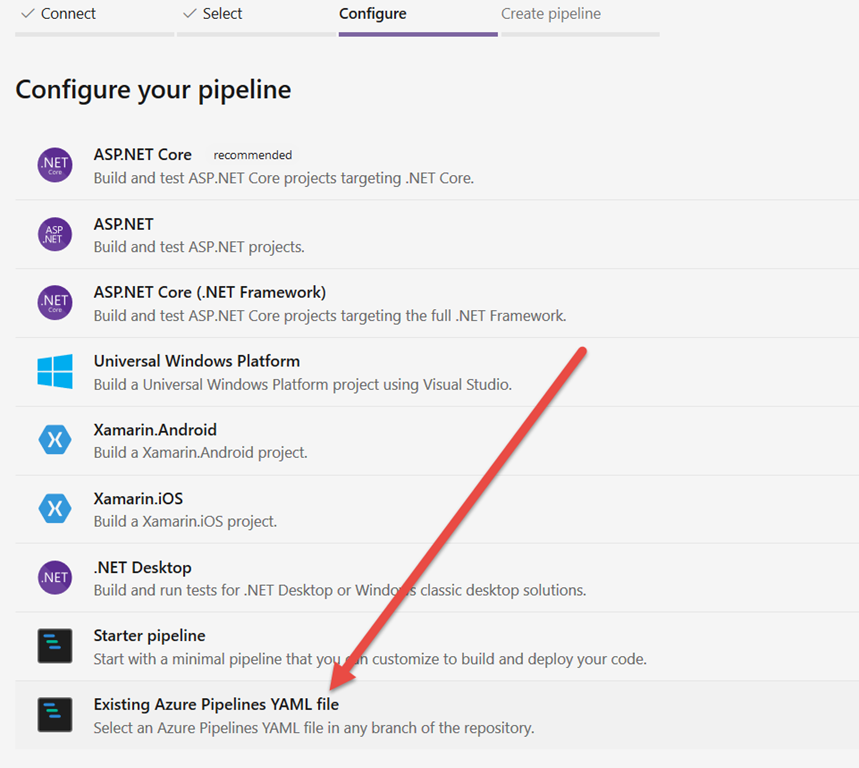
Just select a repository and select the option Existing Azure Pipelines, if you are starting from scratch you can create a starter pipeline.

Figure 4: Choose the option to use an existing pipeline.
You are ready to go, just choose branch and yaml file and the game is done.
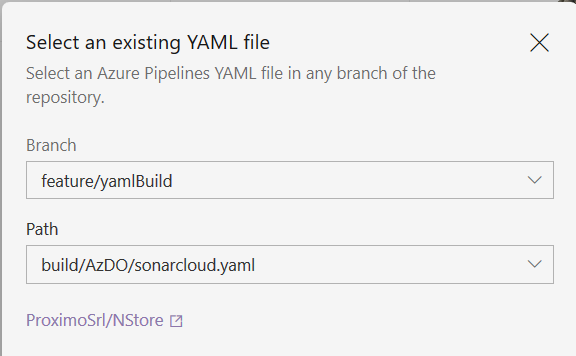
Figure 5: You can directly specify the build file in the pipeline creation wizard.
Converting an existing build pipeline to YAML it is matter of no more than 10 minutes of your time.
Now you can simply run and edit your build directly from the browser, the whole process took no more than 10 minutes, including connecting my AzDO account to GitHub
Figure 6: Your build is ready to run inside Azure DevOPS.
Your build is now ready to run without any problem. If you specified triggers as in Figure 6 you can just push to the repository to have the build automatically kicks in and being executed. You can also directly edit the build in the browser, and pressing the Run button ( Figure 6 ) you can trigger a run of the build without the need to push anything.
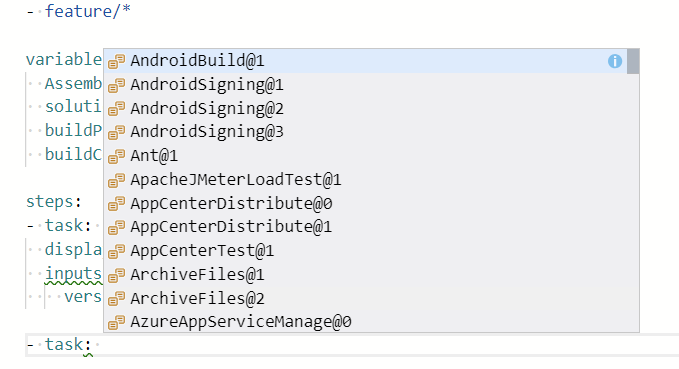
But the coolness of actual YAML build editor starts to shine when you start editing your build in the web editor, because you have intellisense, as you can see in Figure 7.

Figure 7: YAML build web editor has now intellisense.
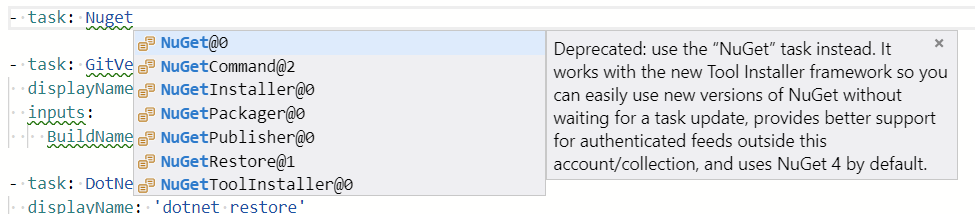
As you can see the YAML build editor allows you to edit with full intellisense support, if you want to add a task, you can simply start writing task followed by a semicolon and the editor will suggest you all the tasks-available. When it is time to edit properties, you have intellisense and help for each task parameters, as well as help for the entire task. This is really useful because it immediately spots deprecated tasks ( Figure 9 )

Figure 8: All parameters can be edited with fully intellisense and help support

Figure 9: Helps gives you helps for the deprecation of old task that should not be used.
With the new web editor with intellisense, maintaining a YAML build is now easy and not more difficult than the standard graphical editor.
Outdated tasks are underlined in green, so you can immediately spot where the build definition is not optimal, as an example if I have a task that have a new version, the old version is underlined in green, and the intellisense suggests me that the value is not anymore supported. This area still need some more love, but it works quite well.
There is no more excuses to still use the old build definition based on web editor, go and start converting everything to YAML definition, your life as bulid maintainer will be better :)
Gian Maria.