When you create a new open source project in GitHub, one of the first step is to setup continuous integration; the usual question is: What CI engine should I use? Thanks to Azure Dev Ops, you can use free build pipelines to build projects even if they are in GitHub (not hosted in Azure Dev Ops)
Azure Dev Ops, formerly known as VSTS, allows to define free build pipelines to build projects in GitHub
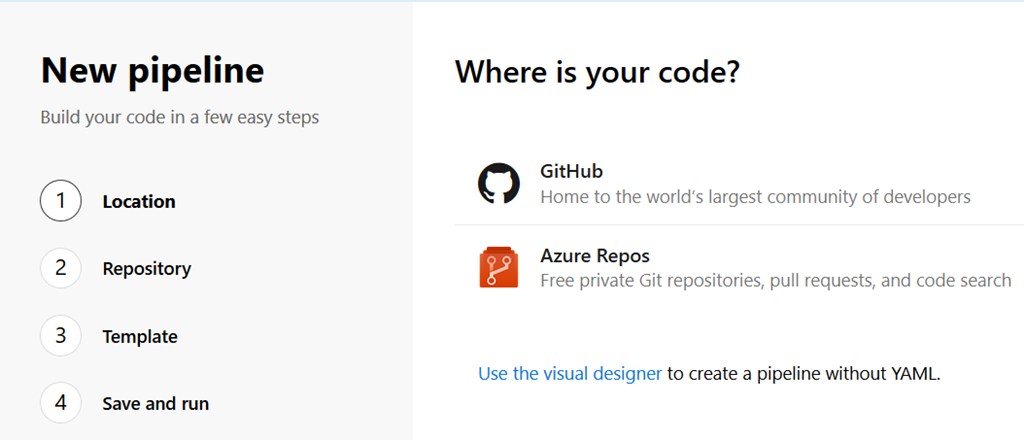
After you created a new project in GitHub, you can simply login to your Azure Dev Ops account (https://dev.azure.com/yourname) then go to azure pipelines and start creating a new pipeline.
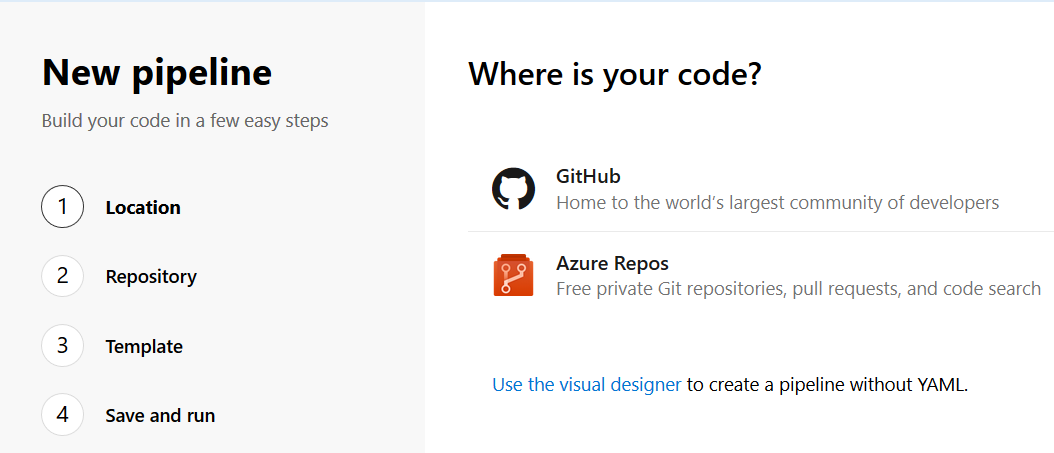
Figure 1: Wizard to create a new pipeline in Azure DevOps
As you can see, you can choose GitHub repository or Azure Repositories. This is the latest UI available for azure pipelines and allows you to create a pipeline with YAML (definition with Code). Since I really prefer this approach than the usual graphical editor, I choose to create my new pipeline with YAML, so I simply press Git Hub to specify that I want to build a project hosted in GitHub.
Pressing Authorize button you can authorize with OAuth in GitHub, if you prefer you can use a token or install the azure devops app from the GitHub Marketplace, but for this example I’m using OAuth, because is the simpler approach.
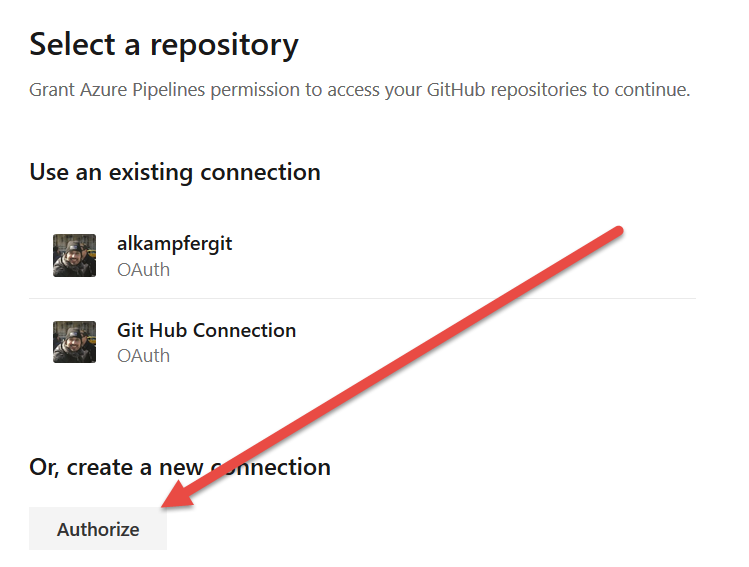
Figure 2: Authorize button allows you to authorize in GitHub to allows Azure DevOps pipeline to access your code
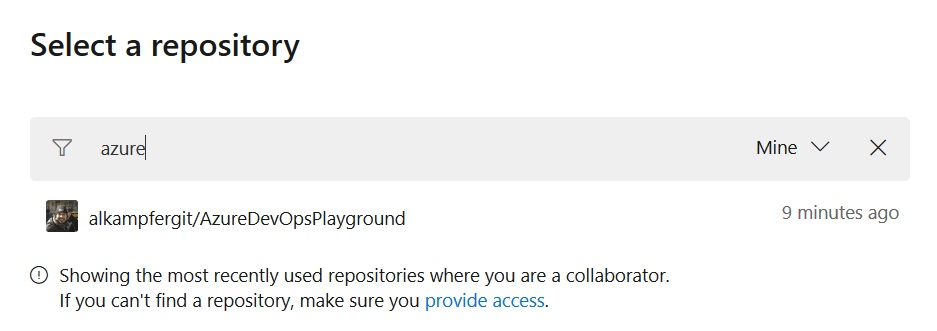
Once logged in, I can browse and search for the repository I want to build.

Figure 3: I’ve chosen the repository I want to build.
When you choose the repository, the wizard analyze the code in the repository, suggesting you the template that best suites your need , in my example code is a standard.NET Desktop application (it is a console app).

Figure 4: Template suggestion from the wizard.
You can choose other template or you can start from an empty template. Whatever is your choice, you can always change the template later, so I choose.NET Desktop and move on.
Thanks to the new Wizard, you can start with a template and a YAML definition that contains basic steps to use as starting point.
Once I’ve chosen the template, the wizard generates a YAML Build definition based on that template, like shown in Figure 5. 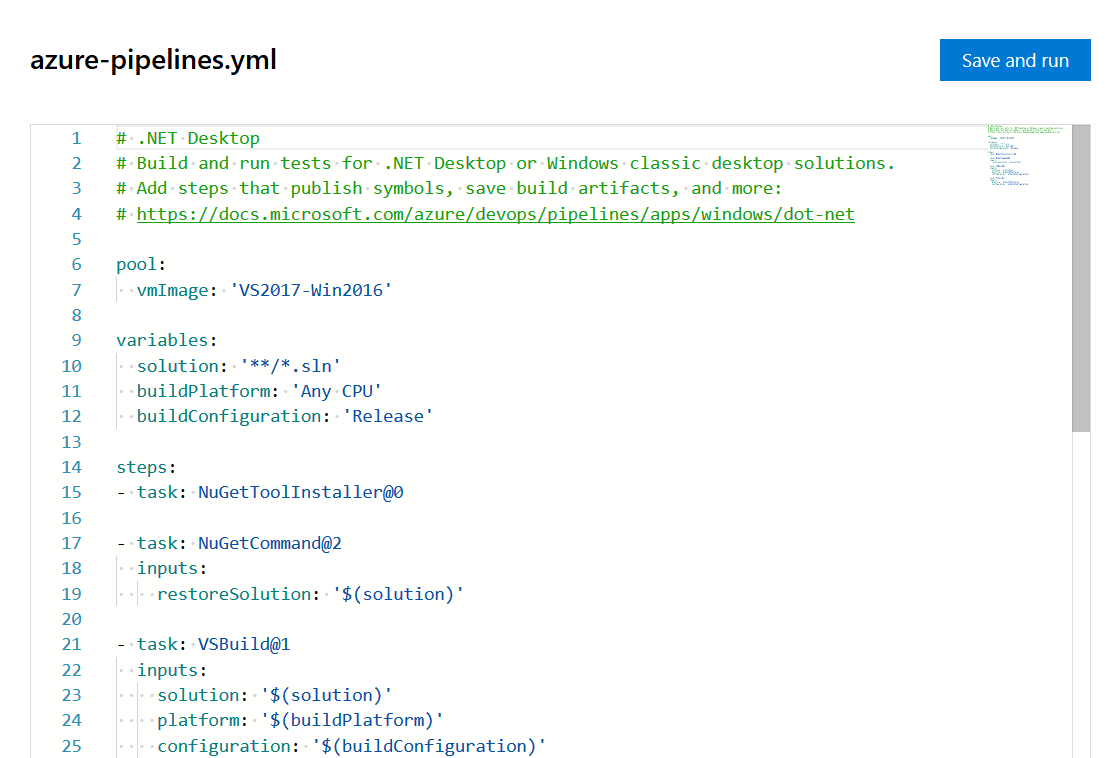
Figure 5: Generated YAML template
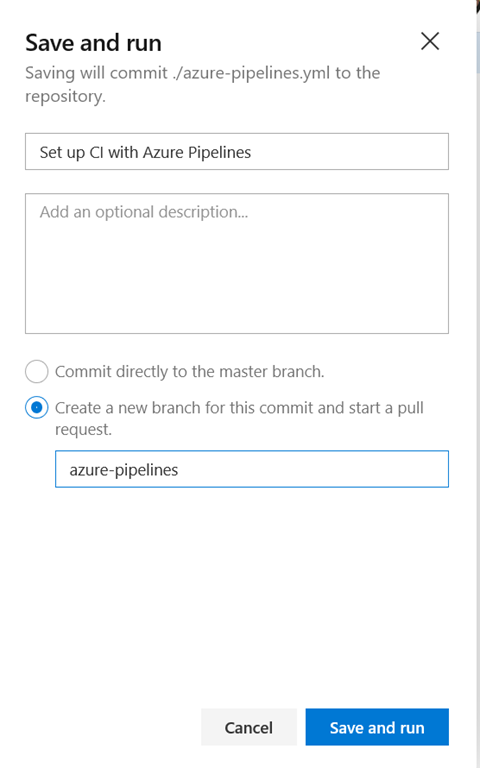
Clearly YAML code for the build should be in the repository, so I press the Save and Run button, then choose to create the file in another special branch.
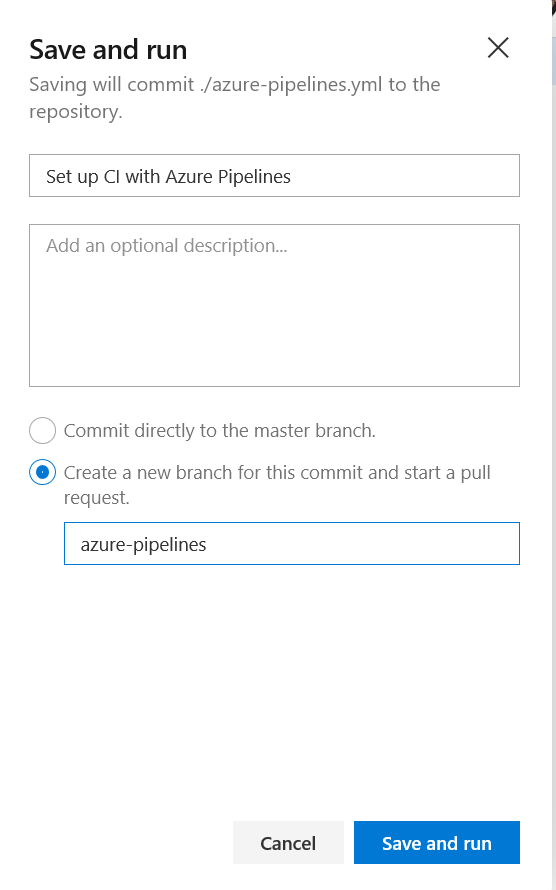
Figure 6: Create the YAML build directly in GitHub repository, but in a different branch.
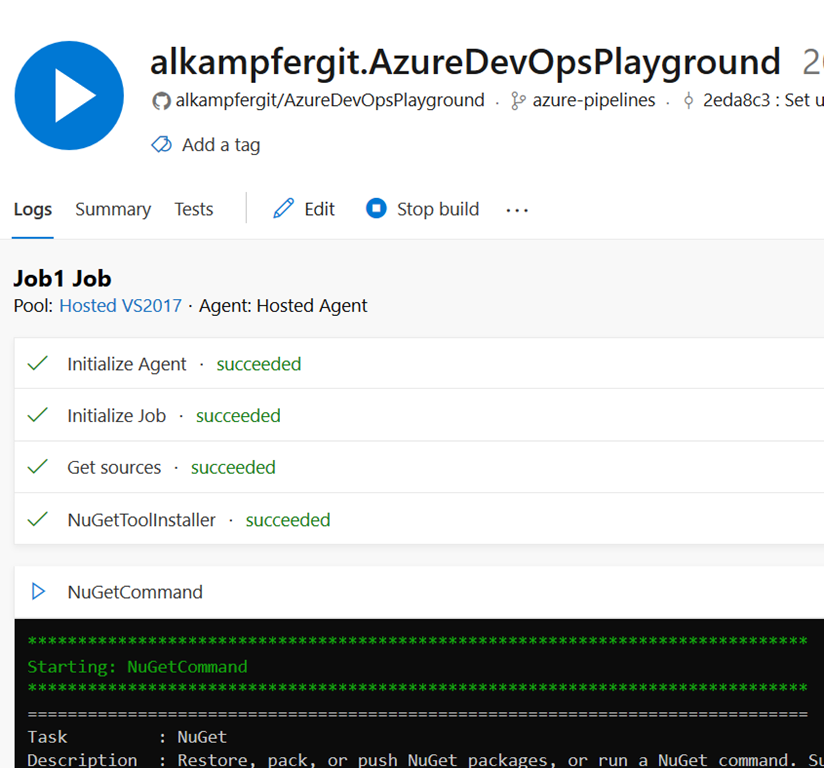
Once the wizard commits the YAML definition, the build immediately starts so you can verify if everything is ok. The nice aspect is that you do not need to configure any build agent, because the build will be executed by Hosted Agent, an agent automatically managed by Microsoft that is hosted in azure. For open source project Azure Dev Ops gives you 10 conccurent builds with unlimited minutes per month, this is really cool.
Azure Pipelines gives you free minutes month and 10 concurrent build for open source projects.

Figure 7: Build is running on hosted agent.
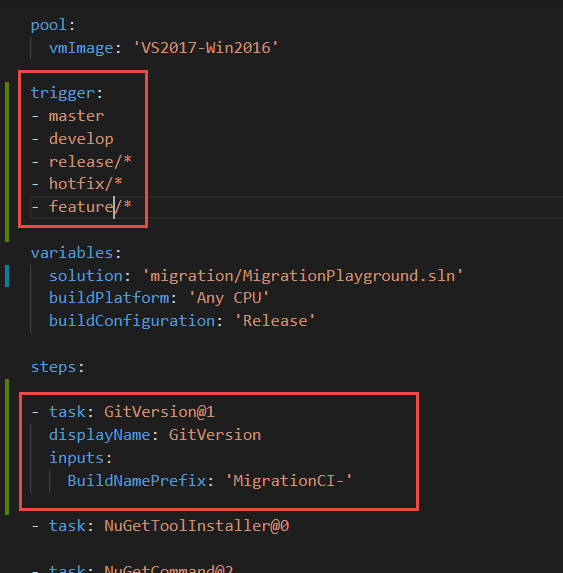
The yaml definition is created on the root folder of the repository, if you do not like the position you can simply manually change location and name of the file, then update the build definition to use the new location. Usually I change the location, add the list of branches I want to monitor with continuous integration and add my GitVersion task to assign build number with GitVersion

Figure 8: Small modification of the build definition, triggers and GitVersion task.
Just push with the new definition and now you define triggers that automatically builds every push to standard master, develop, feature, release and hotfix branches. Thanks to YAML definition everything regarding the build is defined in YAML file.
Once the build is up and running, you can go to summary of the pipeline definition and you can grab the link for the badge, to use in readme in GitHub.
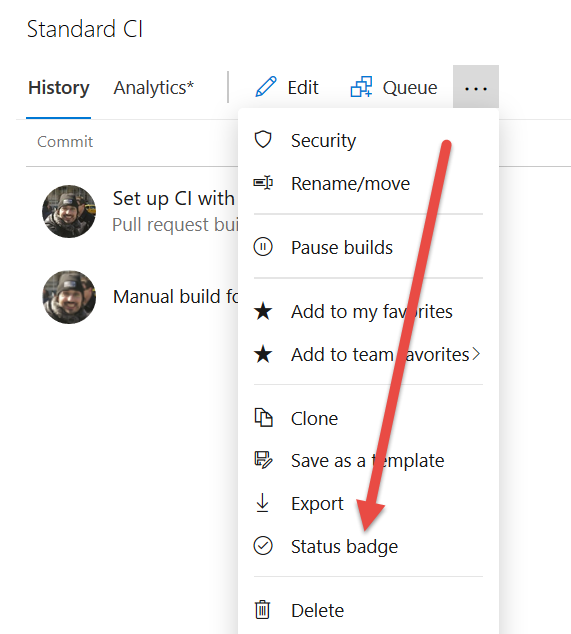
Figure 9: Status badge menu allows you to get the link for the status badge of selected pipeline.
Pressing Status Badge will show you links to render build badges. Usually you can put these links to Readme.md of your repository. If you look at badge Url you can verify that you can specify any branch name; for a gitflow enabled repository at least I’m going to show status for master and develop branches.
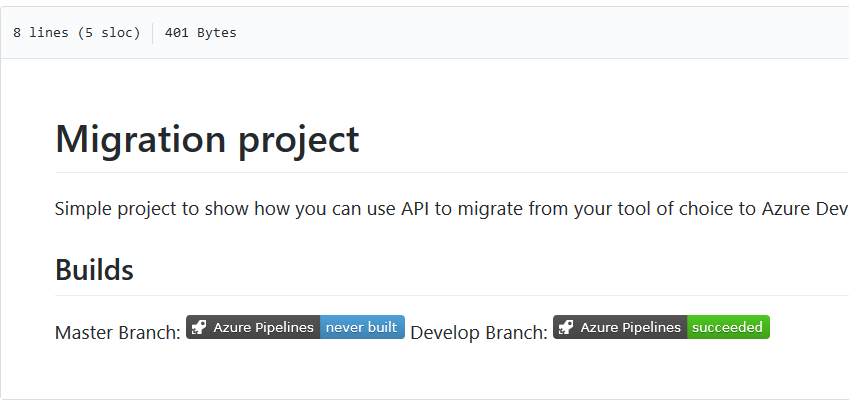
Et voilà, badges can be included in GitHub readme.
Figure 10: Badges in GitHub readme can show the status of the continuous integration for your project.
Thanks to Azure Pipelines I’ve setup with few minutes of work a Continuous integration pipeline; absolutely for free, without the need to install any agent and directly with YAML code.
Gian Maria.