When it is time to design topology of a TFS installation, for small team the single server is usually the best choice in term of licensing (one one Windows Server license is needed) and simplicity of maintenance. Traditionally the only problem that can occur is: some component (especially the Analysis and Reporting services) starts to slow down the machine if the amount of data starts to become consistent.
Single machine TFS installation is probably the best choice for small teams..
The usual solution is moving Analysis Service, cube and Warehouse database on a different server. With such a configuration if the analysis service has a spike in CPU, Disk or Memory usage, the main machine with operational DB and AT continue to work with standard performance. The trick is leaving the core services in a server that is not overloaded with other tasks, this is the reason why running a build agent in TFS machine is usually a bad idea.
With TFS 2017 a new search component is introduced, based on ElasticSearch. ES is de facto the most used and most advanced Search Engine on the market, but it tends to eat CPU RAM and Disk if the workload is big. The suggestion is to start configuring search on the very same machine with AT and DB (Single server installation) and move search components if you start to notice that ES uses too many RAM or is using too much CPU when it is indexing data. Moving search components on another machine is a really simple process.
First of all you need to remove the search feature, using the remove feature wizard as shown in Figure 1 (select the first node in administration console to find the Remove Feature Link)
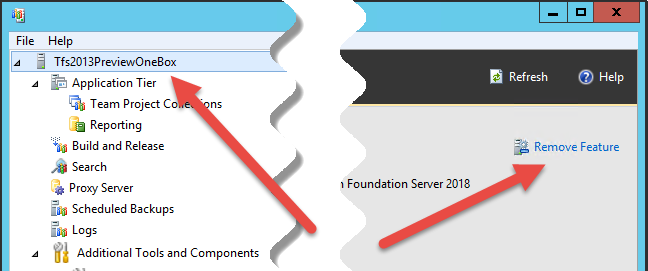
Figure 1: Remove feature from TFS instance
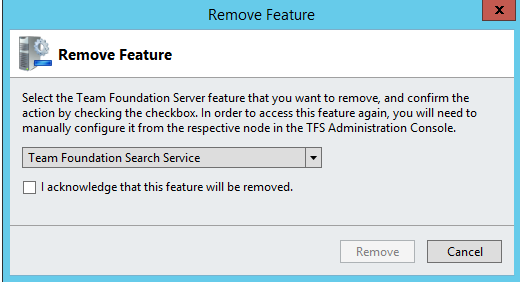
Now you should choose to remove the search feature.

Figure 2: Removing the Search Service functionality
After the wizard finished, you should go to the folder C:\Program Files\Microsoft Team Foundation Server 2018\Search\zip and with powershell run the command
Configure-TFSSearch.ps1 -Operation remove to completely remove Elastic Search from your TFS instance.
Do not forget to use Configure-TFSSEarch PowerShell script to completely remove any trace of Elastic Search from the TFS machine
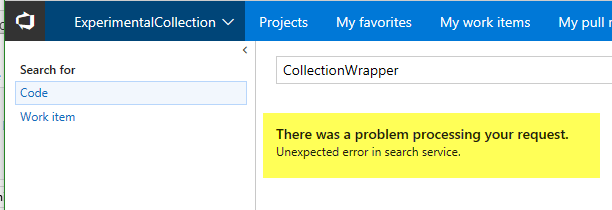
Now search component is not working anymore, if you issue a search you should get a message like shown in Figure 3 :

Figure 3: Search component is not operational anymore.
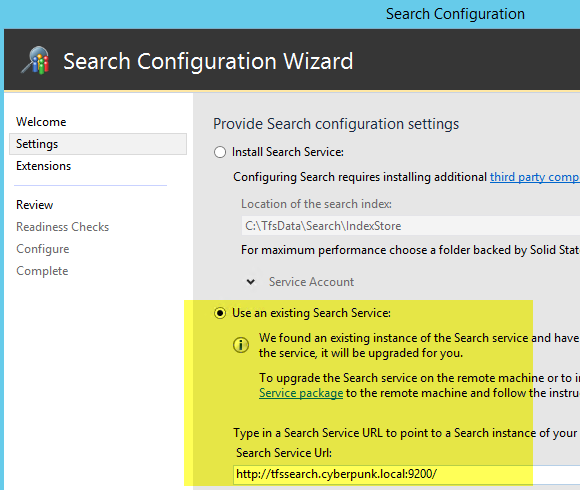
At this point you open TFS administration console and start the wizard to configure the search, but this time, instead of configuring everything on the current machine, you will choose to use an existing Search Service.

Figure 4: Use an existing search service instead of install locally the search service
If you see in Figure 4 , the instructions to install search service on another computer are really simple, you need to click the “search service package” link in the wizard to open a local folder that contains everything to setup ElasticSearch and the search service. Just copy content of that folder on another machine, install java and set the JAVA_HOME environment variable and you are ready to install Search Service. You can find a README.txt file that explain how to configure the search service, just open a PowerShell console and then run the command
Configure-TFSSearch.ps1 -Operation install -TFSSearchInstallPath C:\ES -TFSSearchIndexPath C:\ESDATA
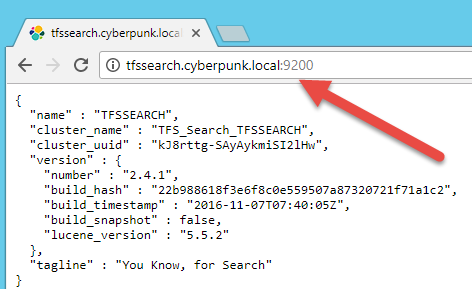
Please change the two folder if you want to change the location of ElasticSearch binary and ElasticSearch data. After the script ran without any error, it is time to verify that ElasticSearch is correctly installed and started. As usual, please create a DNS entry to avoid using the real name of the machine where you installed the service. In my installation I’ve configured the name tfssearch.cyberpunk.local to point to the real machine where I configured search services. Just open a browser and issue a request to http://tfssearch.cyberpunk.local:9200

Figure 5: Try to access local instance of ElasticSearch using DNS name
Please pay attention at firewall configuration, because ElasticSearch has no security in base installation and everyone can mess up and read data just browsing in port 9200
Now you should open your firewall to allow connection to port 9200 from every machine where an Application Tier is running. In my situation the machine with TFS installation has IP number 10.0.0.116. Remember that Elastic Search has NO Authentication (it is a module that is not free, called shield), thus it is really better to allow connections only from the TFS machine. All you need to do is creating a rule to open port 9200, but allowing connection only from the IP of the TFS machines.
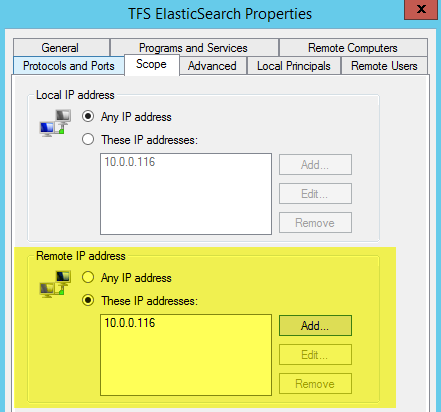
Figure 6: Firewall configuration, the machine with the search service opens port 9200 only from the IP of the TFS machine.
Now remote desktop to TFS machine, and verify that you are indeed able to browse http://tfssearch.cyberpunk.local:9200, this confirm that configuration of the firewall allows TFS to contact the search service. Then try to access the very same address from another computer in the network and verify that it CANNOT access ElasticSearch instance. This guarantees that no one in the network can access Elastic Search directly and mess up with its data.
Now you can proceed with the Configuration Wizard in TFS instance, specifying the address of your new Search Server

Figure 7: Configure new search service in TFS.
Proceed and finish the wizard. At the end TFS machine will re-index all the data in the new search server, just wait some minutes and you will be able to use again search, but now all Search Components are on a dedicated server.
Gian Maria.