YAML build in VSTS / TFS is one of the most welcomed feature in the Continuous Integration engine , because it really opens many new possibilities. Two of the most important advantages you have with this approach are: build definitions will follow branches, so each branch can have a different definition, then, since the build is in the code, everything is audited, you can pull request build modification and you can test different build in branches as you do with code.
Given that build definition in code is a HUGE steps forward, especially for people with strong DevOps attitude, the common question is: how can I convert all of my existing builds in YAML Build? Edit: This is the nice aspect of VSTS, it moves really forward, I’ve prepared this post while this feature was in preview, and converting was a little bit of effort, now converting a build is really simple, you have a nice View YAML Button during build edit.

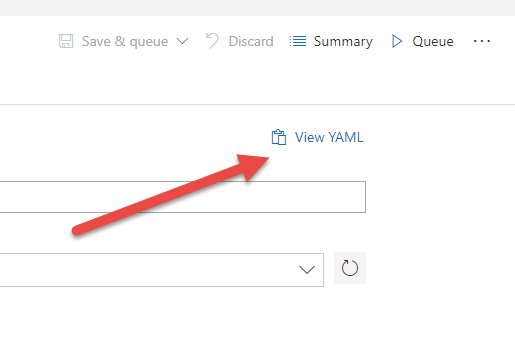
Figure 1: YAML definition of an existing build can be seen directly from build editing.
This button will open the corresponding YAML build definition for current build, thus making straightforward to convert existing builds.
This is VSTS, it moves forwards so fast :) and if you want to do a post about a Preview Feature, often you should be really quick, before new functionalities makes the post old.
Old Way (before the View YAML) While the feature was in early preview, converting is more manual, we did not have an automatic tool that does this, but if you got a little bit of patience, the operation wasnot so complex.
First of all the engine of the YAML build is the very same of standard build , only the syntax is different, thus, every standard build can be converted in YAML build, you only need to understand the right syntax. This is how I proceeded to convert a definition.
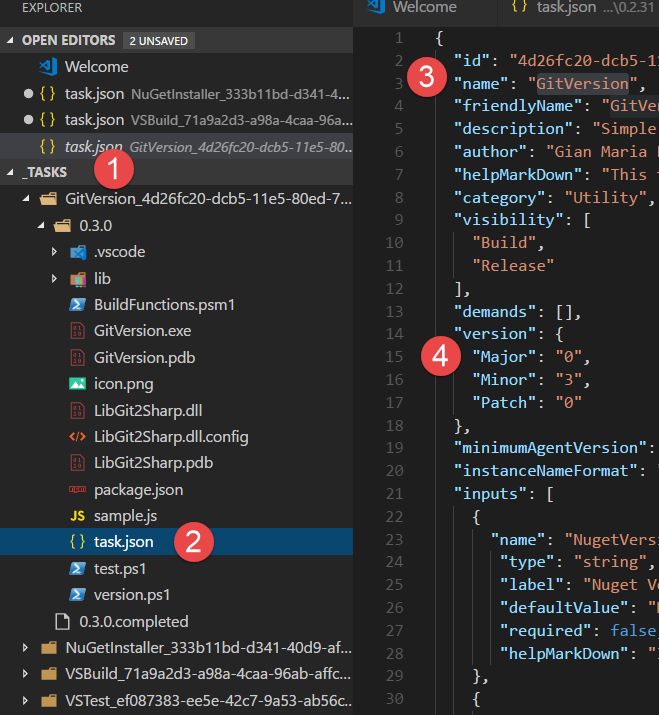
First Step: Install an agent in your local machine, it is a matter of minutes, then delete everything in the _work folder and finally schedule a build with agent.name request equal to the name of the agent. This will schedule the regular build in your machine, and in the _work folder you will have a subfolder _tasks that contains all the definition of all the tasks used in your build. This will greatly simplify finding name and version of task used in your build, because you can easily open the folder with Visual Studio Code and you can browse everything.

Figure 2: List of tasks downloaded by the agent to execute the build. ** ** Then you can simply move to the History tab of the original build, where you can choose to “Compare Difference” so you can easily view the json definition of the build , where you can find all the parameters of the task and the value in the build in a Super Easy way.
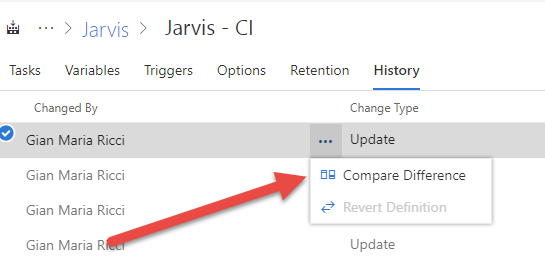
Figure 3: Thanks to the Compare difference you can quickly have a look at the actual definition and all the parameters.

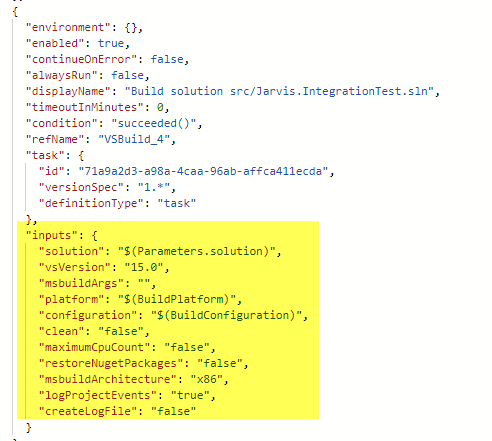
Figure 4: All tasks parameters are included in the definition and can be used to generate YAML build file.
Happy building.
Gian Maria.