Running UAT tests in a VSTS TFS release
I’ve blogged on how to run UAT and integration tests during a VSTS Build; that solution works quite well but probably is not the right way to proceed. Generally speaking that build does its work but I have two main concerns.
Executing test with remote execution requires installation of test agent and involves WinRm , a beast that is not so easy to tame outside a domain
I’m deploying the new version of the application with an XCopy deployment, that is different from a real deploy to production.
The second point is the one that bothers me, because we already deploy in production with PowerShell scripts and I’d like to use the very same scripts to deploy on the machine used for the UAT testing. Using the same script used for real release will put those script also under testing. > If you want to run UAT and integration testing, the best scenario is when you install the new version of the application with the very same script you use to deploy on production.
If you have a (script, whatever) to automatically release a new version of your application, it is really better to use a different strategy to run the UAT test in VSTS / TFS: instead of using a build you should use release management. If you still do not have scripts or whatever to automatically release your application, but you have UAT tests to run automatically, it is time to allocate time to automate your deployment. This is a needed prerequisite to automate running of UAT and will simplify your life.
The first step is a build that prepare the package with all the files that are needed by the installation, in my situation I have a couple of.7z files: the first contains all the binaries and the other contains all updated configurations. These are the two files that I use for deployment with PowerShell script. The script is quite simple, it stops services, backup actual version, deletes everything, replace binaries with latest version, then update configuration with the new default values if any. It is not rocket science, it is a simple script that automate everything we have on our release list.
Once you have prerequisites (build creating binaries and installation scripts), running UAT tests in a release is really simple, a simple dependency from build artifacts, a single environment and the game is done. 
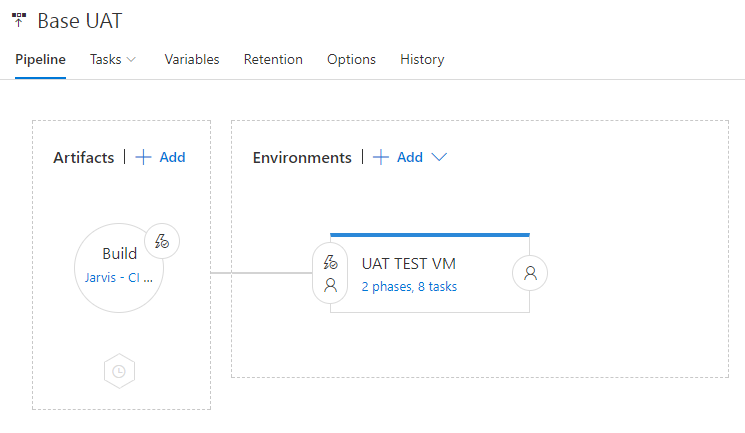
Figure 1: General schema for the release that will run UAT tests.
I’m depending by the artifact of a single build, specially crafted for UAT. To run UAT testing I need the.7z files with the new release of the software, but I need also a.7z file with all the UAT tests (nunit dll files and test adapter) needed to run the tests and all installation scripts.
To simplify everything I’ve cloned the original build that I used to create package for new release and I’ve added a couple of tasks to package UAT test files.
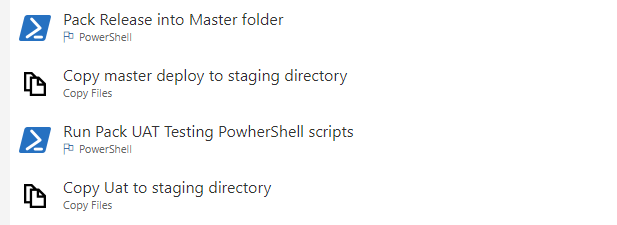
Figure 2: Package section of the build
I’ve blogged a lot in the past of my love with PowerShell scripts to create package used for release. This technique is really simple, you can test scripts outside of build management, it is super easy to integrate in whatever build engine you are using and with PowerShell you can do almost everything. In my source code I have two distinct PowerShell package script, the first creates package with the new binaries the second one creates a package with all UAT assemblies as well as NUnit tests adapters. All the installation scripts are simply included in the artifacts directly from source code.
Build for UAT produces three distinct artifacts, a compressed archive with new version to release, a compressed archive with everything needed to run UAT tests and the uncompressed folder with all installation scripts.
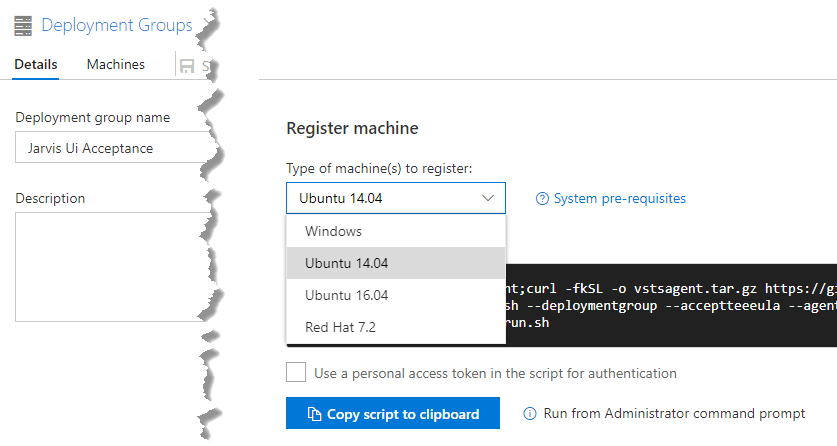
When the build is stable, the next step is configuring a Deployment Group to run UAT. The concept of Deployment Group is new in VSTS and allows you to specify a set of machines, called deployment group, that will be used in a release definition. Once you create a new Deployment Group you can simply go to the details page to copy a script that you can run on any machine to join it to that deployment group.

Figure 3: Script to join a machine to a Deployment Group
As you can see from Figure 3 , you can join Windows machines or a Ubuntu or RedHat machines to that group. Once you run the script that machine will be listed as part of the Group as you can see in Figure 4.
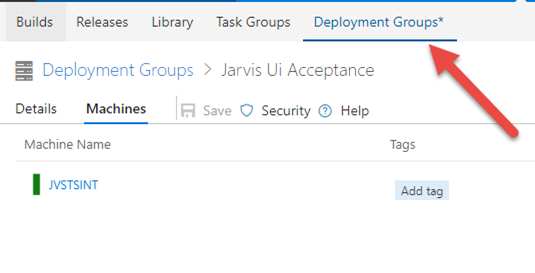
Figure 4: Deployment groups to run UAT tests.
The concept of Deployment Group is really important, because it allows for pull deployment instead of push deployment. Instead of having an agent that will remotely configure machines, we have the machines of Deployment Group that will download artifacts of the build and runs the build locally. This deployment method will completely remove all WinRM issues, because the release scripts are executed locally. > When designing a release, a pull model allows you to run installation scripts locally and this lead to more stability of the release process.
There are another advantages of Deployment Groups, like executing in parallel to all machines of a group. This MSDN post is a good starting point to learn of all the goodness of DG.
Once the Deployment Group is working, creating a release is really simple if you already created PowerShell scripts for deployment. The whole release definition is represented in Figure 5. 
Figure 5: Release definition to run UAT testing
First of all I run the installer script (it is an artifacts of the build so it is downloaded locally), then I uncompress the archive that contains UAT tests and delete the app_offline.htm files that was generated by the script to bring the IIS website offline during the installation.
Then I need to modify a special.application files that is used to point to a specific configuration set in the UAT machine. That step is used because the same machine is used to run UAT tests during a release or during a Build (with the technique discussed in previous post) so I need to run the UAT testing with two different sets of parameters.
Then I run another PowerShell script that will change the Web.config of the application to use Forms Authentication instead of Integrated authentication (we use fake users during UAT). After this steps everything is ready to run UAT tests and now I can run them using standard Visual Studio Test task, because the release script will be run locally in the machines belonging to deployment Group.
Most of the steps are peculiar to this specific application, if your application is simpler, like a simple IIS application, probably the release will be even simpler, in my situation I need to install several windows services, updating an IIS application another angular application, etc etc.
If you configure that release to start automatically as soon as new artifacts is present, you can simply trigger the build and everything will run automatically for you. Just queue the build and you will end with a nice release that contains results of your UAT tests.
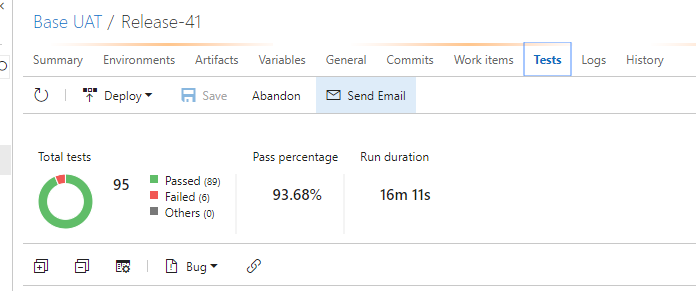
Figure 6: Test result summary in release detail.
This technique is superior respect running UAT tests during a standard build; first of all you do not need to deal with WinRM, but the real advantage is continuously testing your installation scripts. If for some reason a release script does not work anymore, you will end with a failing release, or all UAT tests will fail because the application was not installed correctly.
The other big advantage is having the tests running locally with the standard Visual Studio Test runner, instead of dealing with remote test execution, that is slow and more error prone.
The final great advantage of this approach, is that you gain confidence of your installation scripts, because they are run constantly against your code, instead of being run only when you are actually releasing a new version. As a final notice, Deployment Groups is a feature that, at the time I’m writing this post, is available only for VSTS and not for TFS.
Gian Maria.