In previous post I described how to create a simple PowerShell scripts that is capable of installing a software starting from a zipped file that contains the “release” of a software (produced by a build) and some installation parameters. Once you have this scenario up and running, releasing your software automatically is quite simple.
Once you automated the installation with a PowerShell script plus an archive file with Everything is needed to install the software, you are only a step away from Continuous Deployment.
A possible release vector is Chocolatey , a package manager for Windows based on NuGet. I’m not a Chocolatey expert, but at the very basic level, to create a chocolatey package you should only have a bunch of files and a PowerShell script that install the software.
The most basic form of a Chocolatey package is composed by files that contains artifacts to be installed and a PowerShell script that does the installation.
The very first step is creating a.nuspec file that will define what will be contained in Chocolatey package. Here is a possible content of release.nuspec file.
<package>
<metadata>
…
</metadata>
<files>
<file src=”Tools\Setup\chocolateyInstall.ps1″ target=”Tools” />
<file src=”Tools\Setup\ConfigurationManagerSetup.ps1″ target=”Tools” />
<file src=”Tools\Setup\JarvisUtils.psm1″ target=”Tools” />
<file src=”release\Jarvis.ConfigurationService.Host.zip” target=”Artifacts” />
</files>
</package>
The real interesting part of this file is the <files> section, where I simply list all the files I want to be included in the package. ConfigurationManagerSetup.ps1 and JarvisUtils.psm1 are the original installation script I wrote, and Jarvis.ConfigurationService.Host.zip is the name of the artifacts generated by the PackRelease.ps1 script.
To support Chocolatey you only need to create another script, called chocolateyInstall.ps1 that will be called by chocolatey to install the software. This script is really simple, it needs to parse Chocolatey input parameters and invoke the original installation script to install the software.
| |
This script does almost nothing, it delegates everything to the ConfigurationManagerSetup.ps1 file. Once the.nuspec file and this script are writenn, you can use nuget.exe to manually generate a package and verify installing in a target system. When everything is ok and you are able to create and install a chocolatey package locally, you can schedule Chocolatey package creation with a TFS Build. The advantage is automatic publishing and SemVer version management done with Gitversion.exe.
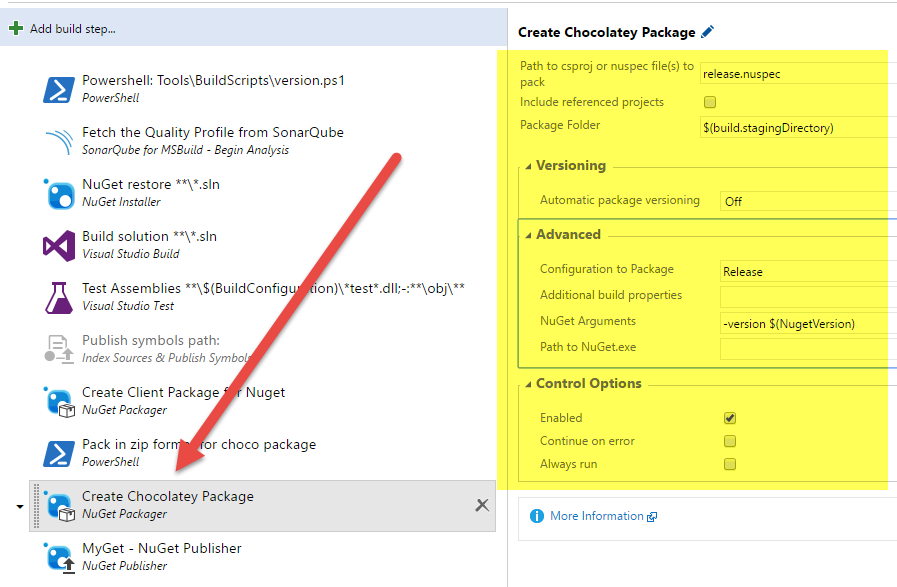
Figure 1: Task to generate Chocolatey Package.
To generate Chocolatey Package you can use the standard NuGet Packager task, because Chocolatey uses the very same technology as NuGet. As you can see from Figure 1 the task is really simple and needs very few parameters to work. If you like more detail I’ve blogged in the past about using this task to publish NuGet packages.
Publish a Nuget Package to NuGet/MyGet with VSO Build
This technique is perfectly valid for VSTS or TFS 2015 on-premises. Once the build is finished, and the package is published, you should check on NuGet or MyGet if the package is ok.
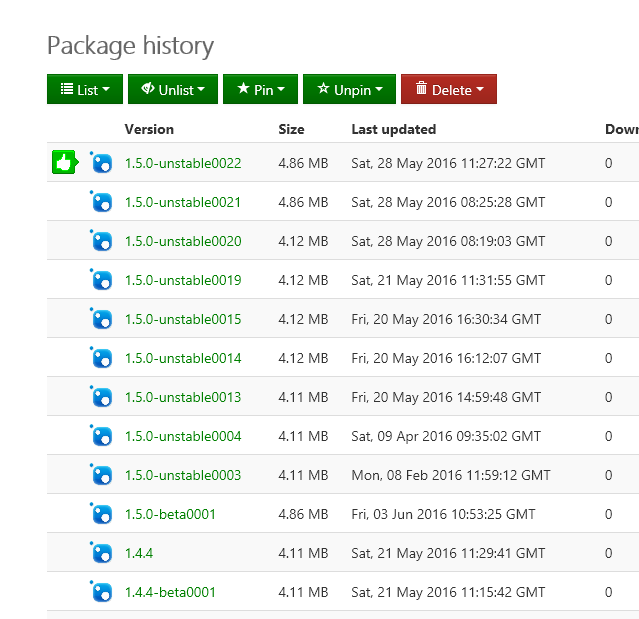
Figure 2: Package listing on MyGet, I can verify all published versions
Now you can install with this command
| |
All parameters needed by the installation scripts should be specified with the –packageParameters command line options. It is duty of chocolateyInstall.ps1 parsing this string and pass all parameters to the original installation script.
If you want to install a prerelease version (the ones with a suffix) you need to specify the exact version and use the –pre parameter.
A working example of scripts and nuspec file can be found in ConfigurationManager project.
Gian Maria.