This is the end of the journey of the last serie of posts. I’m now at the situation where I have a build that produces a single zip file with everything I need to deploy the software and a bunch of PowerShell scripts that relase the software using that zip as a source artifact.
Now it is time to automate the process with Release Management. I want to use RM because the process is automated on a chain of environments, but also I have traceability, auditing, and verification of the release procedures. I’m not going to cover all the steps needed to create the a release definition, I want to focus on how simple is creating a Release Process when you adopt Zip+PowerShell approach. I strongly suggest to have a look at official site if you never heard of VSTS / TFS Release Management.
If you have a zip and PowerShell files that release the software using only the zip, you are ten minutes away from a working Release Management definition
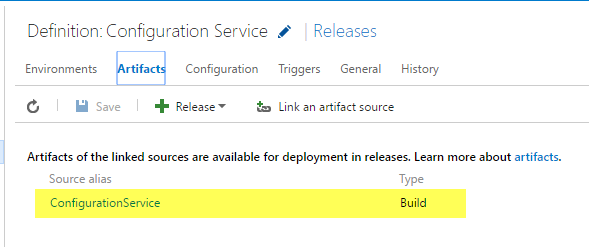
Let’s start creating a first release, the most important aspect is adding a build as Artifacts source, this allows the release to consume what is produced by the build.

Figure 1: Add your build as a artifacts source for the release process
This build produces a couple of artifacts, the zipped file with everything and the set of PowerShell scripts needed to run the software (as I suggested they should always be stored in source control and moved as build artifacts). Thus the release process is really simple and is composed by only three steps. 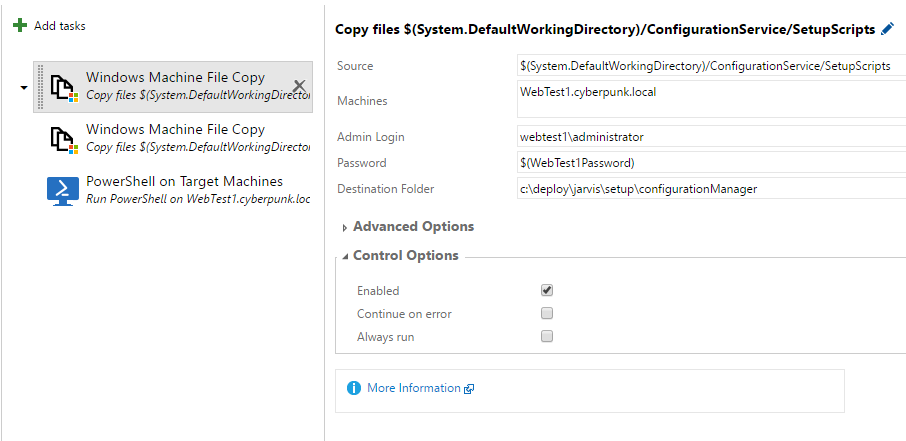
Figure 2: The entire release process is composed only by three scripts
First two steps are used to copy zip file and installation scripts in a folder of the target machine (c:\deploy\jarvis\…). as you can see I’m using local administrator user, so this technique can be used even if the machine is not in the domain. You should now run this script on the machine where the agent is running.
| |
This instruction should be run to the machine where the build agent is running, and specify that the target machine is a Trusted Hosts. If you are using domain credentials, this is not needed. The password is stored inside a Release variable, to use secret variable feature, so noone that can edit this release can see the password in clear text.
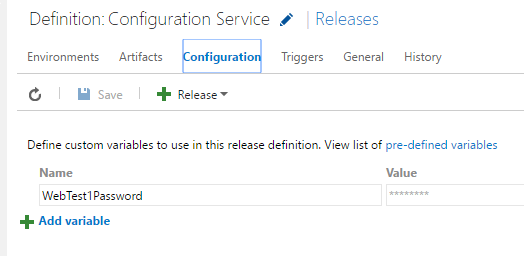
Figure 3: Password for target machine is stored as secret variable in Configuration section
Final step in Figure 2 is using the task to run the installation script in a remote machine machine.
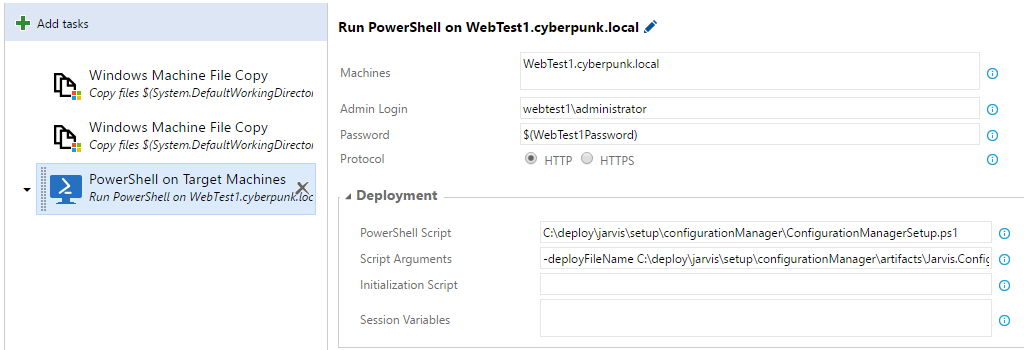
Figure 4: Run PowerShell in a remote machine to install software
If you already tested the script manually, there is no reason why it should fail in RM process. Remember that you should never use command that interact with the shell, and you should use Write-Output instead of Write-Host in your PowerShell script to be sure that no shell is used.
With only three task I’ve created a release definition for my software
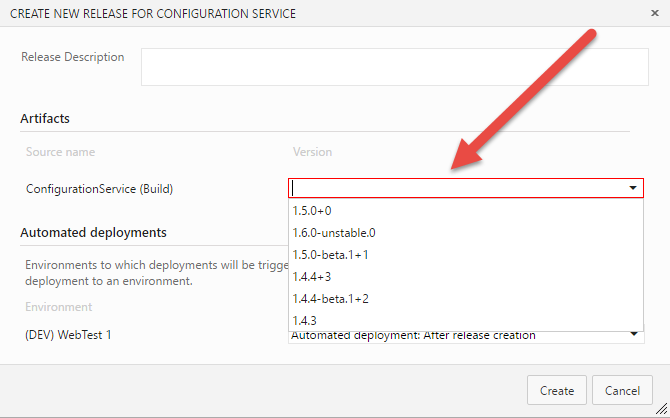
Now you can trigger a new release, or have each build trigger a new release on the dev machine. The really interesting aspect is, using GitVersion and GitFlow, when you select the build you want to release, you can choose the branch you want to deploy instead of understanding what is in a build from its number.

Figure 5: Trigger a release manually allows to specify the build you want to release
Ad you can see from Figure 5, you can easily choose the version of the software you want to release, it is really clear from the name of the build. Once the Release is started, if the deploy is set to occur automatically, the release immediately starts
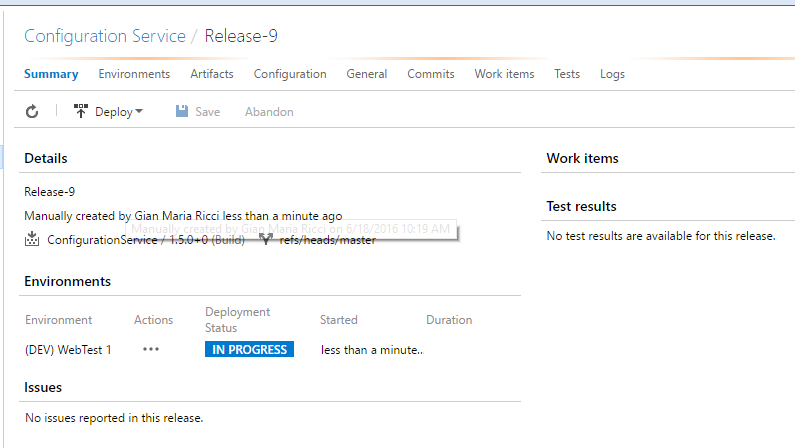
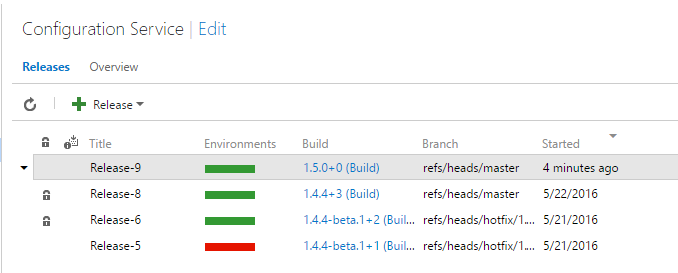
Figure 6: Relase is in progress
Once the release is in progress, from the summary you can verify what version of the software is released in what environment. I have only one environment for this demo, and I can verify that 4 minutes ago the version 1.5.0 is deployed in that environment.

Figure 7: New release was deployed successful
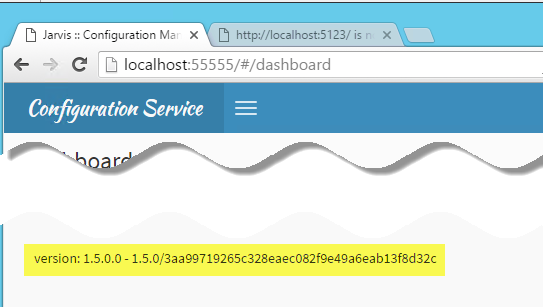
I can now verify that the new version was really deployed correctly opening the software in target machine.

Fgiure 8: New version of the software is correctly deployed
Once you have everything in place and use simple PowerShell approach, setting up a release management process is really straightforward.
Gian Maria.