Artifacts and Build vNext
Another big improvement of Build vNext in TFS and VSO is the ability to **explicitly manage the content of artifactsduring a build **. With the term Artifacts in Continuous Integration we are referring to every result of of the build that is worth publishing together with build result, to be further consumed by consumers of the build. Generally speaking think to artifacts as build binary outputs.
The XAML build system does not give you much flexibility, it just use a folder in the build agent to store everything, then upload everything to the server or copy to a network share.
To handle artifacts,** vNext build system introduces a dedicated task called: Publish Build Artifacts **.
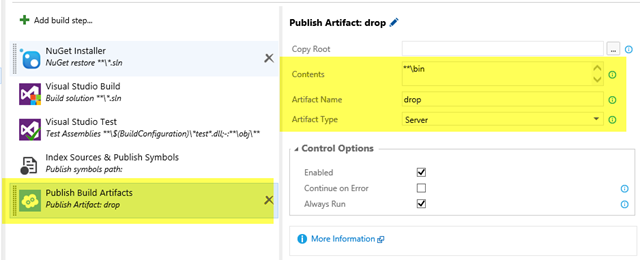 ** Figure 1: **Publish artifacts task
The first nice aspect is that we can add as many Publish Build Artifacts task we want. Each task requires you to specify contents to include with a default value (for Visual Studio Build) of **\bin to include everything contained in directories called bin. This is an acceptable default to include binary output of all projects, and you can change to include everything you want. Another important option is the ArtifactName, used to distinguish this artifacts from the othter ones. Remember that you can include multiple Publish Build Artifacts tasks and Artifact Name is a simple way to categorize what you want to publish. Finally you need to specify if the artifact type is Server (content will be uploaded to TFS) or File Share (you will specify a standard UNC share path where the build will copy artifacts).
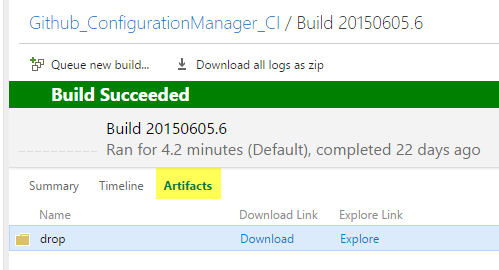
Artifacts browser
With a standard configuration as represented in Figure 1, after a build is completed, we can go to the artifacts tab, and you should see an entry for each Publish Build Artifacts task included in the build.

Figure 2: Build details lists all artifacts produced by the build
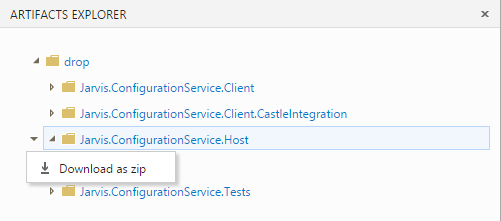
You can easily download all the content of the folder as a single zip , but you can also press button Explore to explore content of the artifacts container directly from web browser. You can easily use Artifacts Explorer to locate the content you are interested into and download with a single click.

Figure 3: Browsing content of an artifact
Using multiple Artifacts Task
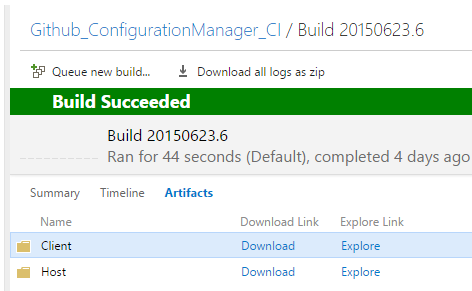
In this specific example, **using **\bin approach is not probably suggested approach **. As you can see from previous image, we are including binaries from test projects, wasting space on server and making more complex for the consumer to find what he/she needs.
In this specific situation we are interested in publishing two distinct series of artifacts, an host program and a client dll to use the host. In this scenario the best approach is using two distinct publish artifacts task, one for the client and the other for the host. If I reconfigure the build using two task and configure Contents parameter to include only the folder of the project I need, the result is much better.
 ** Figure 4: **Multiple artifacts for a single build output
As you can see from previous image, using multiple task for publishing artifacts produces an improved organization of artifacts. In such a situation it is simple to immediately locate what you need and download only client or host program. The only drawback is that we still miss a “download all” link to download all artifacts.
Prepare everything with a Powershell Script approach
If projects starts to become really complex, organizing artifacts can start to become a complex task. In our situation the approach of including the whole bin folder for a project is not really good, what I need is folder manipulation before publishing artifacts.
- We want to remove all.xml files
- We want to change some settings in the host configuration file
- We need to copy content from other folders of source control
In such a scenario, Publish Artifacts task does not fulfill our requirement and the obvious solution is adding a Powershell Script in your source code to prepare what you are calling a “release” of artifacts. A real nice stuff about PowerShell is that you can create a ps1 file with the function that does what you need and declare named parameters
| |
In my script I accepts three parameters, the configuration I want to release (Debug or Release), destination directory where the script will copy all the file, and finally if you want the script to delete all uncompressed files in DestinationDirectory.
The third option is needed because I’d like to use 7zip to compress files in output directory directly from my script. The two main reason to do this are
- 7zip is a better compressor than a simple zip
- It is simpler to create pre-zipped artifacts
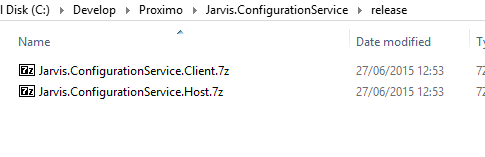
Using Powershell script has also the great advantage that it can be launched manually to verify that everything goes as expected or to create artifact with the exact same layout of a standard build , an aspect that should not be underestimated. Once the script is tested on a local machine (an easy task) I have two files in my output directory.
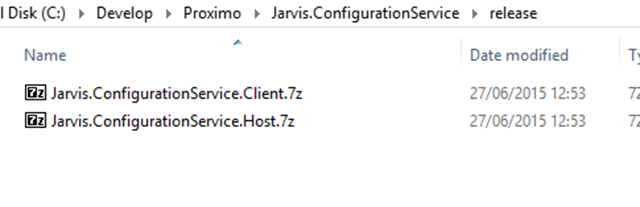
Figure 5: Content of the output folder after PowerShell script ran
One of the biggest advantage in using PowerShell scripts, is the ability to launch it locally to verify that everything works as expected, instead of standard “modify”, “launch the build”, “verify” approach needed if you use Build Tasks.
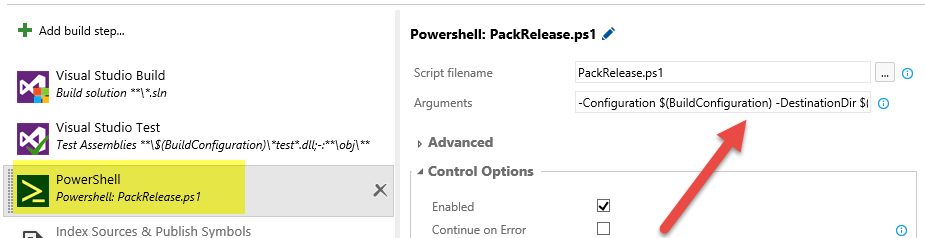
Now I customize the build to use this script to prepare my release, instead of relying on some obscure and hard to maintain string in Publish Artifact Task.
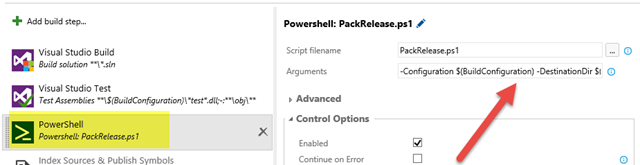
Figure 6: PowerShell task can launch my script and prepare artifacts directory
Thanks to parameters I can easily specify: current configuration I’m building (release, debug), DestinationDir (I’m using the $(build.stagingDirectory) variable that contains the staging directory for the build). You can use whatever destination directory you want, but using standard folder is probably the best option.
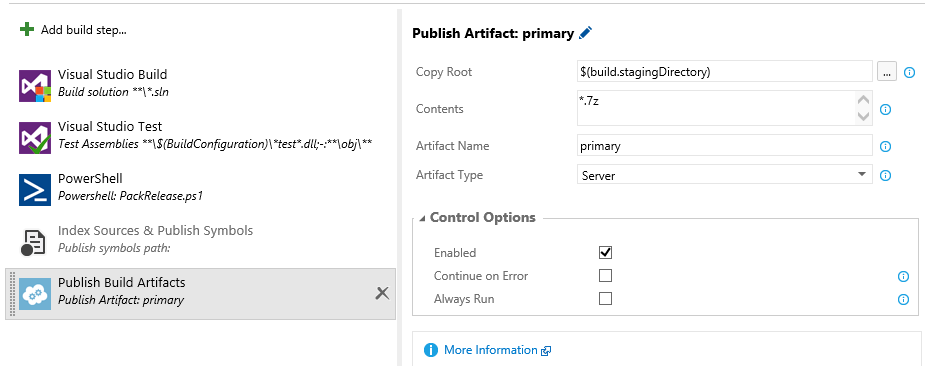
After this script you can now place a standard Publish Build Artifacts task, specifying $(build.stagingDirectory) as the Copy Root folder , and filtering content if you need. Here is the actual configuration.

Figure 7: Include single Publish Build Artifacts to publish from directory prepared by PowerShell script
The only drawback of this approach is that we are forced to give an Artifact Name that will be used to contain files, you cannot directly publish pre-zipped file in the root source of build artifacts. If you want you can include multiple Publish Build artifacts to publish each zipped file with a different Artifact Name.
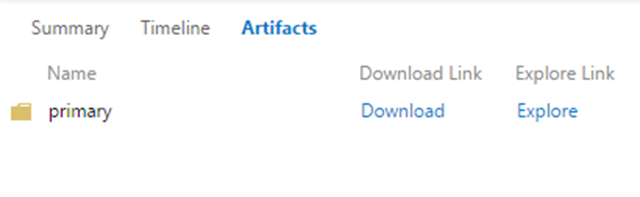
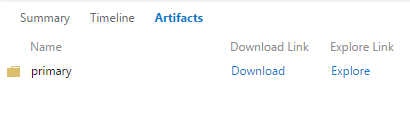
Figure 8: Output of the build
But even if this can be a limitation, sometimes can be the best option instead. As you can see from previous image, I have a primary artifact and you can press the Download button to Download Everything with a single click. Using Artifact Explorer you can download separate packages, and this is probably the best approach.

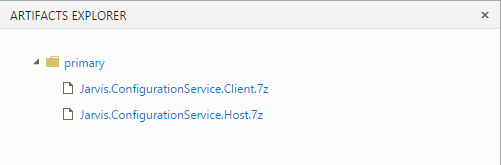
Figure 9: Artifact browser shows distinct zip file in the output
If you use a Script to create one separate pre-compressed package for each separate artifacts, your publish experience will probably be better than any other approach.
Conclusions
Build vNext gives us great flexibility on what to publish as artifacts, but even if we can manage everything with dedicated task, if you want a good organization of your artifacts, using a PowerShell script to organize everything and pre-compressing in single files is usually the best approach.
Gian Maria.