One of the great news of build vNext is the ability to create a build that targets source on GitHub project , not only on Git or TFVC repositories that are in current TFS or VSO instance. Given this, plus the fact that VSO has a 5 basic user license for Free, and you can use VSO as Continuous integration Engine for your GitHub projects.
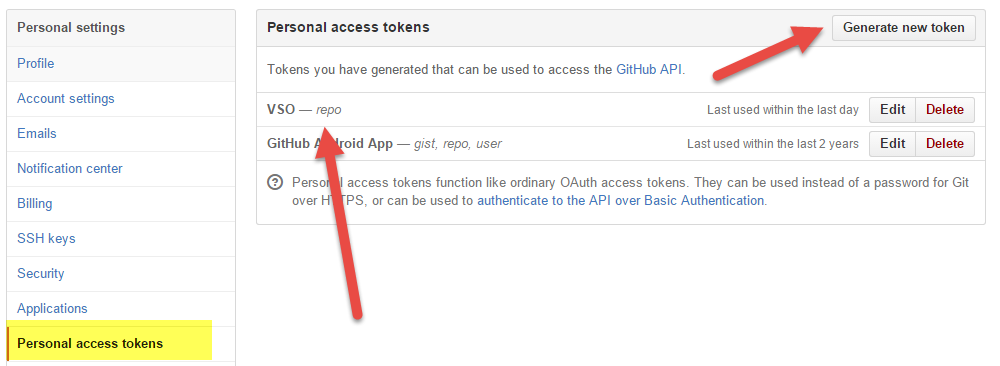
To create a build that targets GitHub source code, you should simply login into your GitHub account, then navigate in your personal settings and finally choose “Personal Access tokens”
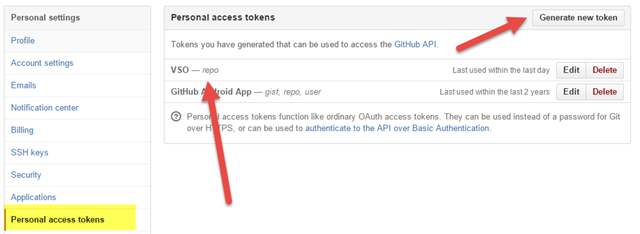
Figure 1: Personal access tokens in GitHub
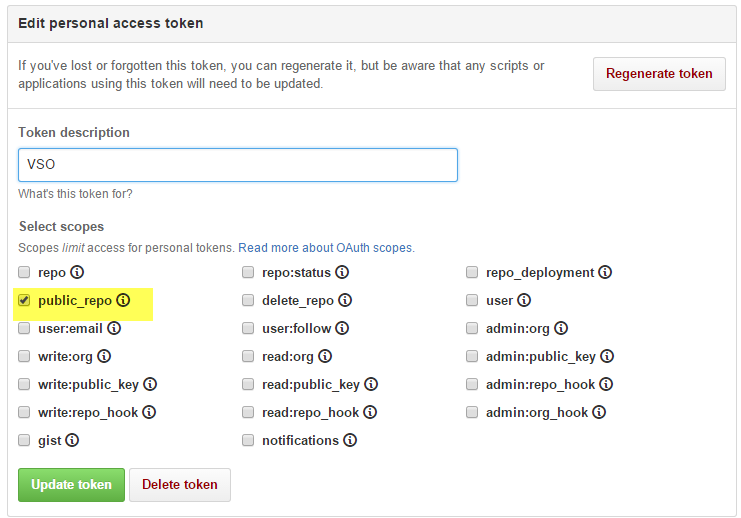
I do not want to cover how GitHub tokens works, but basically each token has a set of capabilities associated with it, so you can decide the level of access bounded with each token. This is particularly important if you want to use that token to access only your public repositories and not the private ones.
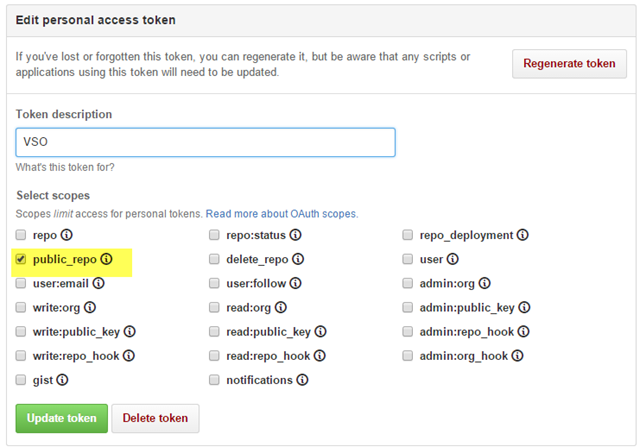
Figure 2: Access levels associated to your token
Once you have a valid token you should write it down securely in some tool (I use KeePass) because the UI of GitHub will not give you way to easily retrieve that token. Once you have the token you can instruct VSO to create Continuous Integration build.
The first step is having a VSO account and create a Team Project , I’ve called my team Project GitHub, then navigate to the Build Tab. Once you press the Green Plus Button you are asked for the type of the build, I choose Visual Studio for this example because my GitHub Project contains Visual Studio solution.
Once the build editor is opened, you can go to Repository tab, then choose GitHub as repository type, and insert previously generated Access token. If the token is good, just wait for few seconds, and you should be able to see the list of GitHub repositories you have access to.
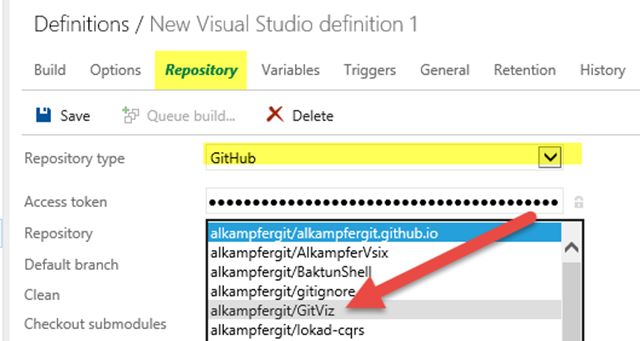
Figure 1: Configure the build to take sources from GitHub
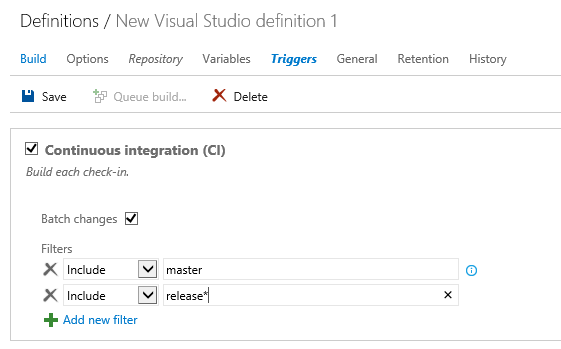
Thanks to the access token, VSO build infrastructure can check if the repository gets new push, if you go to the Triggers tab you can ask VSO to trigger a build for each push in all the branches you want to monitor.

Figure 2: You can use CI even if the repository is on Git Hub
This is all you need to create a build. To verify that everything is ok you can simply trigger a new build, and, if the build has no specific requirement, you can use the Hosted Agent offered by VSO to build your project.
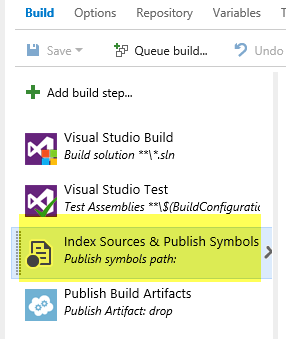
You can safely remove the Index Sources & Publish Symbols, because VSO cannot index source code outside your account. If you leave this task on the build, you will have warning during build.
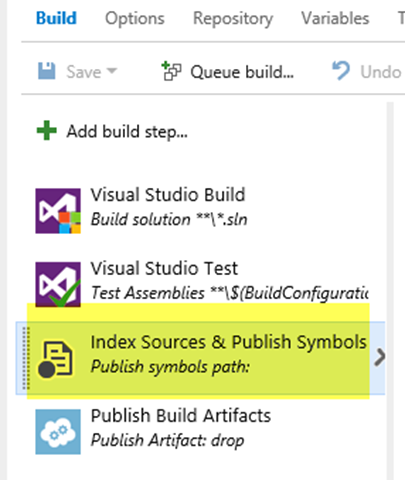
Figure 3: Remove Indexing Sources task from your GitHub build.
Finally, in the General Tab, you can ask VSO to generate a Badge for the build.
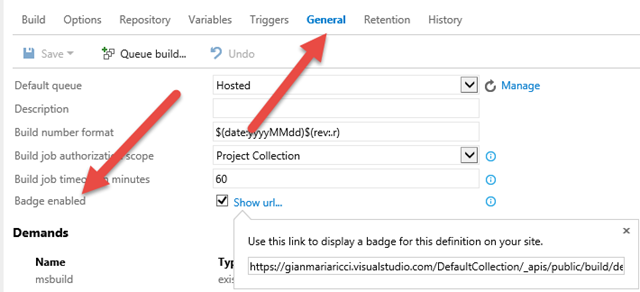
Figure 4: Badge build
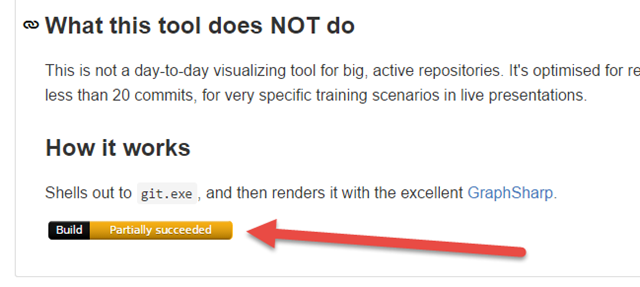
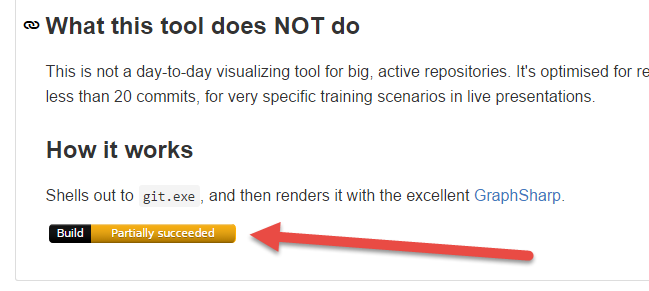
A badge is a simple url that renders an image that specify if the latest build succeded, failed or partially succeeded. Once you have a badge, you can include on the wiki page of your project in GitHub, simply including in the Readme.MD file in project root.
Figure 5: Build badge in action.
Et voilà, with few clicks you have Continuous Integration for GitHub Project using Visual Studio Online.
Gian Maria.