One of the reason why Mongo is gaining a lot of momentum in the industry is the easy of use. Just download the package, start mongod and you are donw. When you are in production, you cannot surely simply install your mongo as a service, start it and then forget it without any kind of monitoring, because this will surely lead to problems. When is time to create more complex topologies, like sharding or replica set you can commit some mistakes and you have some tedious work to do. I strongly suggest you to have a look at Mongo Mms, because the online version offers a lot of functionalities for free, and every developer can use it to simplify even deployment of dev servers.
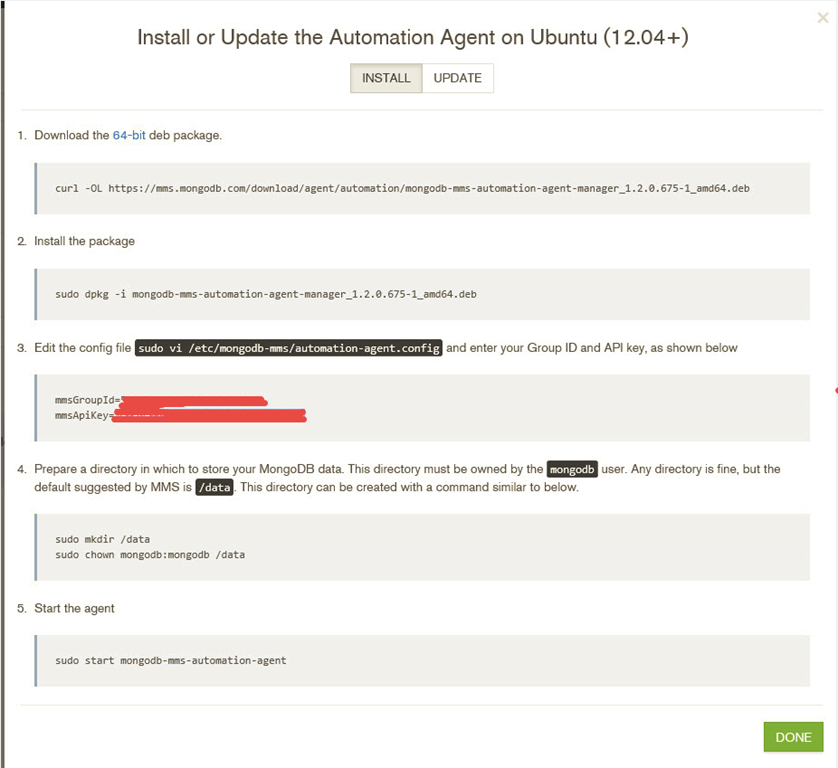
The new version introduced some interesting capabilities to automatically deploy and manage your mongo instances with few clicks of your mouse. Suppose you want to create a classic replica set of 3 machines using 3 VM with Linux Ubuntu. After you register with MMS you can simply proceed to install the MMS automation agent on your machine with few steps

Figure 1: Instruction to install automation agent on Ubuntu
Once you installed the automation agent on all of your machines, you can simply start creating your mongo deployment using MMS web interface. Agents poll server periodically for instructions, this implies that mms only requires your machines to be able to reach mms site to poll instructions and to send monitoring data. All of your machines can be in a private NAT network. If you go in the Administration section of MMS web interface you can check status of your agents.
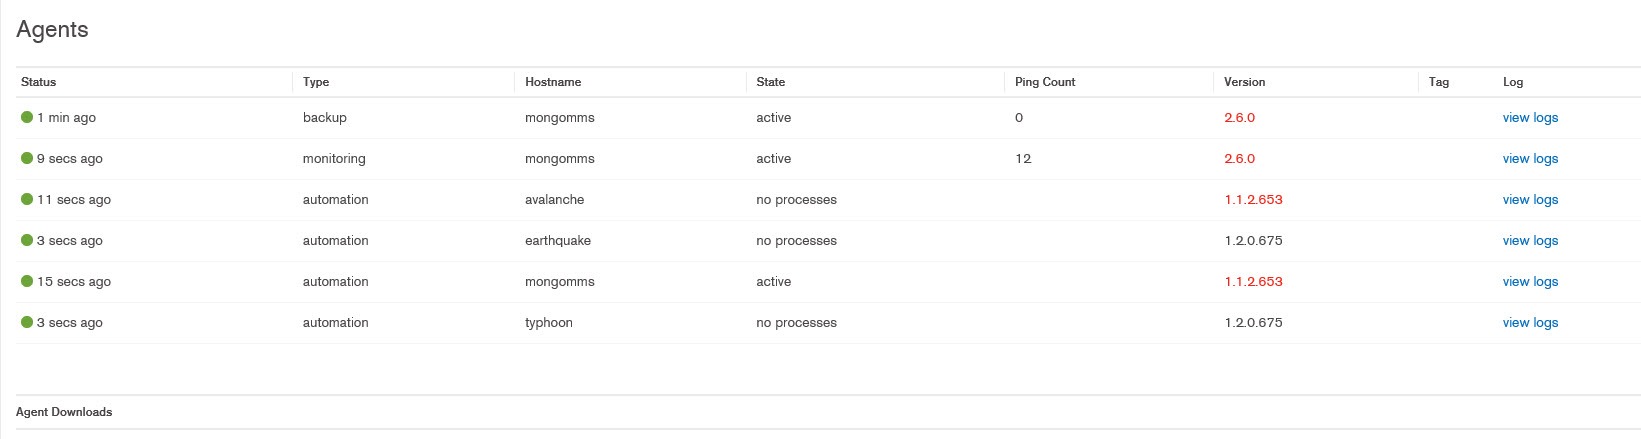
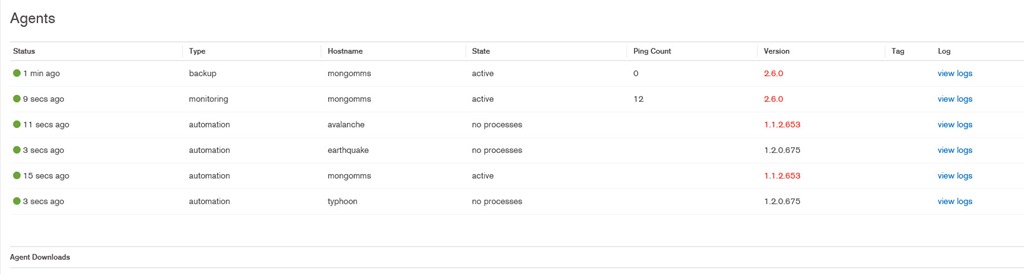
Figure 2: List of all of your active agents
In this picture you can check not only automation agents, but also monitoring and backup ones. The automation one is the most important, because is the responsible for installing other agents and configuring your mongo instance. Now you can move to the deployment tab, and if some of your agents are out of date you can simply upgrade with a simple click.

Figure 3: List of all of your deployment servers and in the top area of the page you can check if some of the agents are old
In the upper right part of the deployment area, there is a button called Add that can be used to create a new deployment of Mongo, in this example I want to create a new Replica Set.
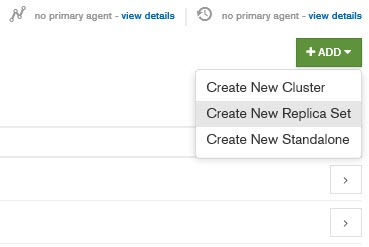
Figure 4: Create a replica set from the web interface.
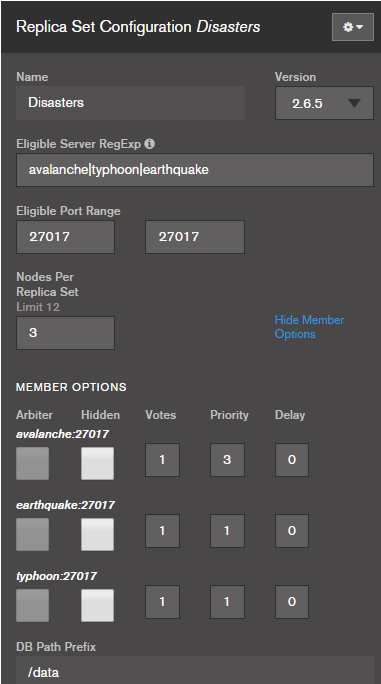
Now it is just a matter of configuring all the options. The most important one is the Elegible Server RegExp where you should specify a regex that will select all the servesr that will take part of the replica set. In this example I used three distinct names, and I separated with a pipe to create a regex that choose all the servers, you can use prefix for convenience.
 Figure 5: Options to create a replica set.
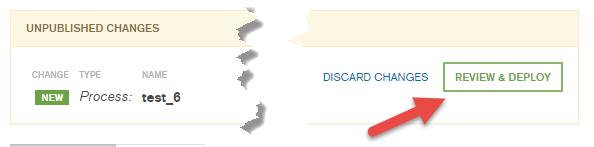
You can configure a lot of options and once you are done you can simply press Apply. This will create a script to create your new deployment, and you can review it before agents starts applying it to destination machines.

Figure 6: Pressing apply creates the script but you still have time to review before starting deploy

Figure 7: Reviewing the script tells you every operation that will be triggered in your environment
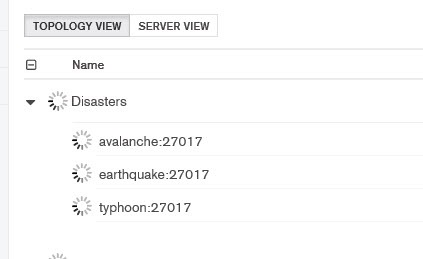
Pressing Confirm & Deploy activates the script, and the web interface starts showing you the status of the various machines that will take part of the deploy.

Figure 8: Deploy starts and the web interface starts waiting for it to finish.
** ** The status is pushed from the automation client to the mms server and you can see the status of the single machines.

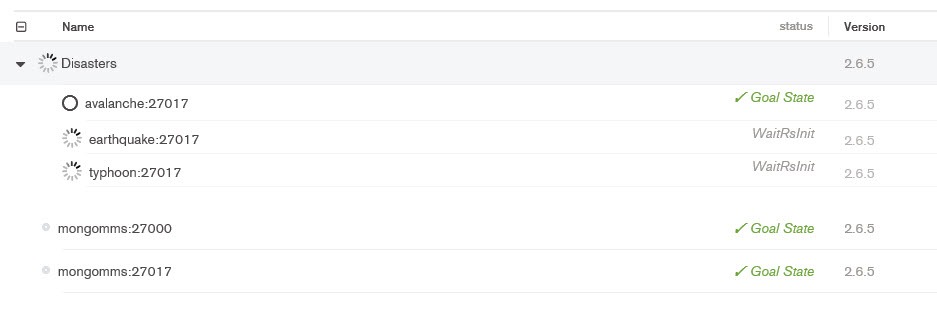
Figure 9: One of the machine is in goal state, the other two still needs time
In Figure 9 you can see that the machine avalanche reached Goal State, this means that the automation agent finished applying modification to the system. The other two machines are in WaitRsInit, this means that mongo is started and they are starting the replica set. Once everything is ok, all the machines are in the Goal State and the version of mongo installed in shown in Version column.
Now you can switch to View mode, where you can look at your deployment.
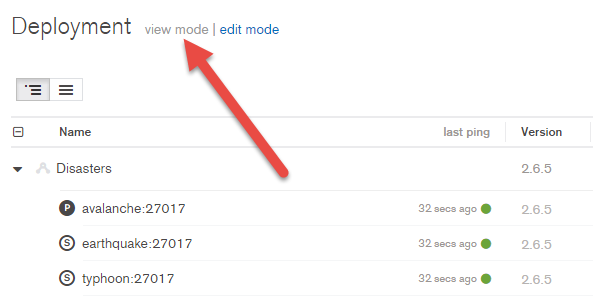
Figure 10: View mode shows the status of your servers, as well as witch instance is primary and which instance is secondary
You can change every aspect of your deployment after it was provisioned, as an example I decided to change priority of one of my server after the replica set was up and running because avalanche VM is stored on an SSD and writing speed is higher than the other two VM.

Figure 11: Changing options after replica set is created.
You can also change the installed version of mongo, and the automation agents will take care of all operations needed to update or downgrade your instance of mongo.
If you use Amazon AWS, Mongo MMS will be also able to automatically provision your virtual machines in the cloud, automatically installing automation agents on it, so you can really deploy everything, from virtual machines to mongo with few clicks.
I must admit that I’m really impressed from deployment capabilities of Mongo MMS especially because you can manage up to 8 servers for free.
Gian Maria.