Previous post on the series
- Versioning assembly during TFS 2013 build with Powershell Scripts
- Automatically Build and Publish NuGet Packages during TFS Build
- Manage Symbol Server on Azure (or on-premise) VM and TF Service
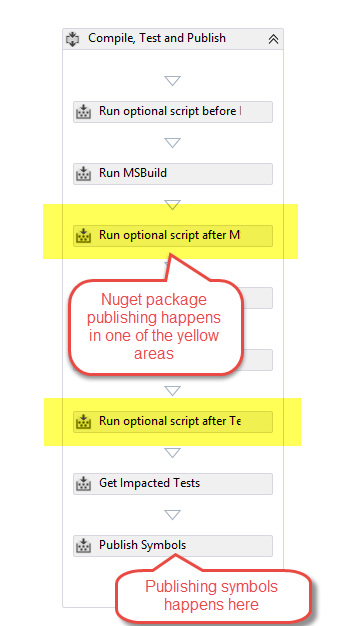
After you set automatic publishing of NuGet packages with automatic assembly and NuGet version numbering in a TFS Build, you surely want to * enable publishing symbols on a Symbol Server *. This will permits you to put a reference to your NuGet Package and then being able to debug the code thanks to Symbol Server support with TFS. Publishing symbols is just a matter of specifying a shared folder to store symbols in build configuration, but if you enable it in previous build where you publish with Powershell, it does not work. The reason is, you are running PowerShell script that publish NuGet package after build (or after test), but in the build Workflow, source indexing happens after these steps.

Figure 1: Build workflow sequence showing that publish of symbols takes place after NuGet package is published
The problem happens because you should publish your NuGet package after publishing took place and your.pdb files are modified to point to sources in TFS. To fix this problem you simply need first to download the Build Workflow, (in TFS 2013 default build Workflows are not stored directly in Source Control and they should be downloaded if you want to customize them) and create a custom build.

Figure 2: Downloading the standard Workflow Template in your machine to create a custom Workflow
You can just download to your computer, change name of the file, change inner workflow and check-in in Source Control as you would have done with previous version of TFS. My goal is adding the ability to run another script at the very end of the workflow , so I opened the workflow and simply copy and paste the Run optional script after Test in the end of the sequence and change name to Run optional script at the end of the Build.
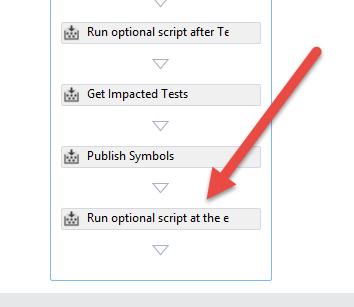
figure 3: Copy and paste script execution block to enable executing script at the end of the Workflow
Now I added two other Workflow Arguments , to allow the user to specify the location and arguments of this script.
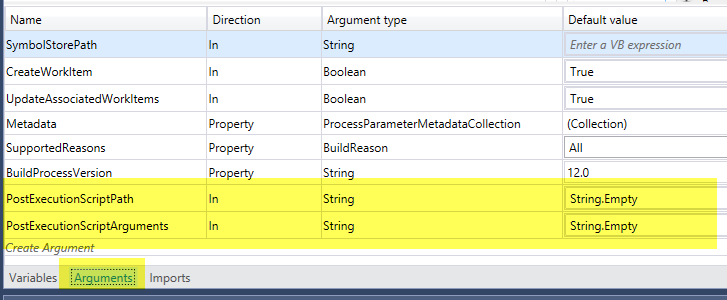
Figure 4: Adding arguments to pass to the new script execution block.
Now you should change the Run optional script at the end of the Buildblock to reference these two new arguments instead of the original ones.
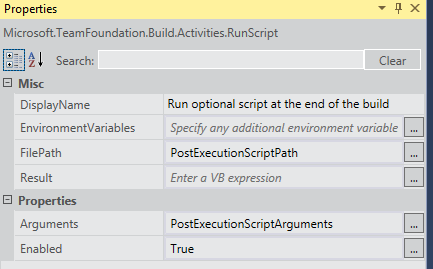
Figure 5: Referencing the new arguments in copied block
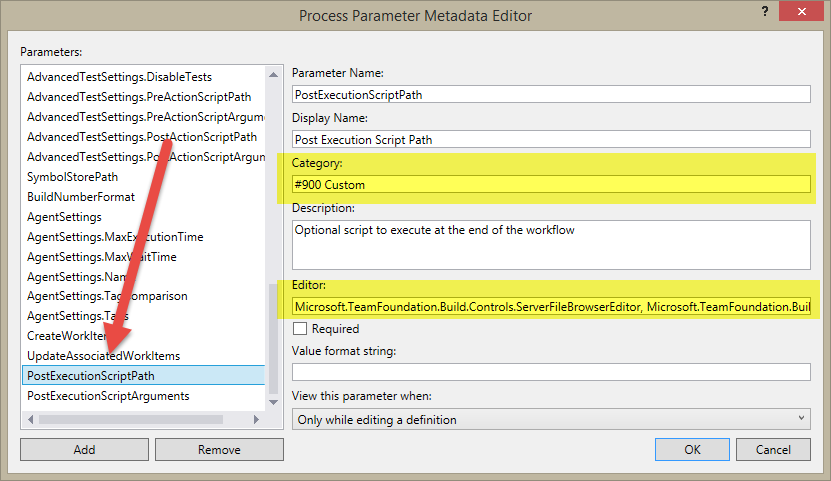
Finally you need to return to Arguments of the Workflow and change the Metadata argument, to specify some additional data about these two arguments.

Figure 6: Adding Metadata for your custom arguments.
Here you can give name and description to your arguments, but the most important part is giving a category and the Editor. In this example the PostExecutionScriptPath should be a Source Control path like $/TeamProjectName/xxx and if you specify
Microsoft.TeamFoundation.Build.Controls.ServerFileBrowserEditor, Microsoft.TeamFoundation.Build.Controls
As Editor, the user would be able to browse the source control as for the other script in the build. You should check-in the new workflow in source control, edit the build definition and in Process tab choose the new workflow. You should be able now to see the new arguments to specify the script that should be run at the end of the Build.
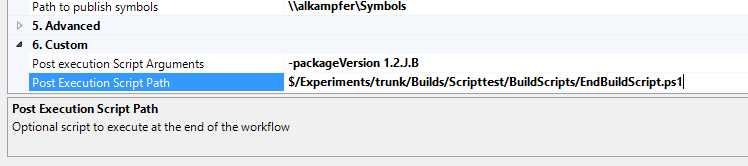
Figure 7: You can now specify a script that will be executed at the very end of the build.
Thanks to the Editor, if you select the Post Execution Script Path, you will find an ellipsis button that permits you to browse the source to specify file location.

Figure 8: Thanks to the Editor property in metadata you are able to browse the source to specify the script.
You can now use the very same script of NuGet publishing, but since it is executed after symbols publishing, now your NuGet package contains indexed pdb and everything works as expected.
Gian Maria.