Many people asked me during course if the ability to automatically deploy to Windows Azure Web Sites is restricted only to those people that are using TF Service (TFS on the cloud), or if they can deploy with an on-premise installation of TFS.
The answer is clearly YES, and I strongly suggest you to watch the Continuous Deployment with Microsoft Visual Studio session of Brian Randell to have a deep explanation of all the possibilities you have to achieve automatic deployment of your applications from Team Foundation Server.
Deploying from on-premise TFS to Azure Web Site is simple , because it is only a matter of configuring msbuild to use the right publish file. The difference from an automatic deploy with TF Service is: when you publish from TF Service, the web site has a nice “deployment” tab listing all the deployment done with TF Service and a connection with Build Details, while if you publish from on-premise you loose this data and the Web Site completely ignores who and when the site was deployed.
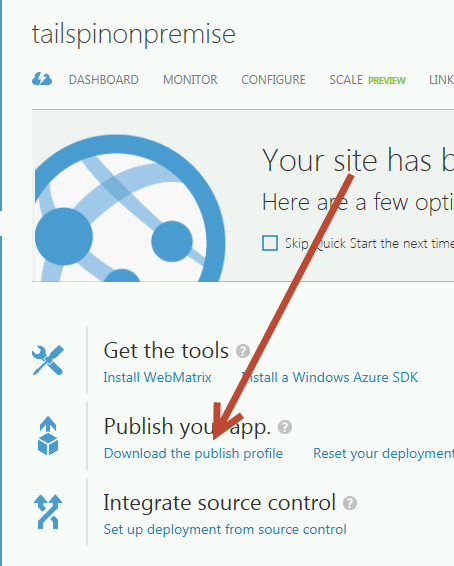
To deploy on Azure from on-premise TFS you just need to download the publish profile of the Web Site into a local folder.

Figure 1: Download the publish profile
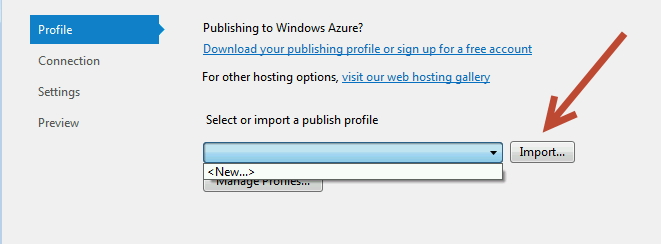
Then you can right-click your web project node from the Solution Explorer in Visual Studio and choose “publish”, from there you can “import” the file you just downloaded.

Figure 2: Import the publish profile
This file contains all the information needed to publish against that Web Site, you can modify as you need
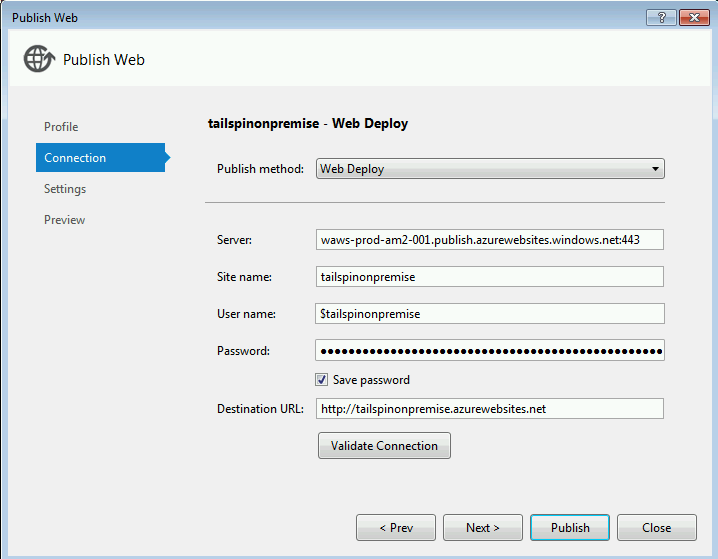
Figure 3: Details of the publish definition.
From the list of definition ( Figure 2 ) I usually rename the publish file to something more useful, as an example AzureDemoWebSite.
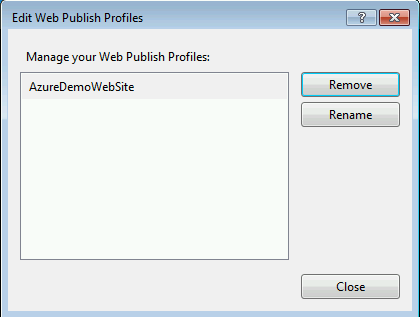
Figure 4: Rename your publish file
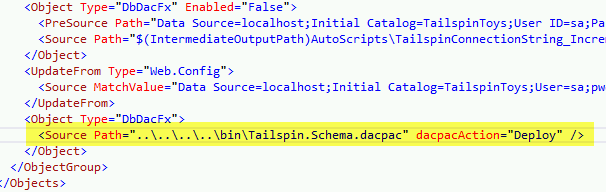
I usually modify the publication file to include publishing the database to the Azure Database, you do not need to specify the connection string of the database, it will be taken from the profile and the only piece of information that the script needs is the relative path of the.dacpac file to deploy.

Figure 5: Modification done to the publishing profile to deploy a database project
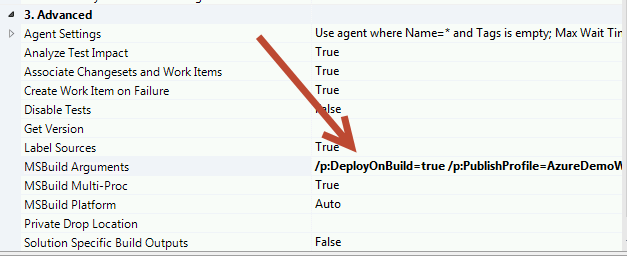
Now you should check-in everything and you are only one step away from publishing from azure. Just create a standard build, but instruct MSBUILD that you want to also deploy with a specific publication profile. This can be done in the Advanced section of the Build Process

Figure 6: Instruct MSBuild with custom Arguments to deploy the site.
The whole string is this one
/p:DeployOnBuild=true /p:PublishProfile=AzureDemoWebSite /p:AllowUntrustedCertificate=true
/p:UserName=$tailspinonpremise /p:Password=2Xocq…
The tricky part is specifying correct credentials. You can find username and password directly opening the original publication profile file you downloaded from azure. Publish file in Visual Studio or your standard Azure credential wont work. The username is usually in the form $websitename and the password is a long sequence of characters and numbers, you cannot miss it.

Figure 7: The original content of the publication profile, it contains the username and password that you need to publish to that web project
Now you can simply fire the build, wait for it to complete and your web site will be automatically deployed.

Figure 8: Build succeeded and site was deployed

Figure 9: Site was deployed
Publishing on on-premise IIS is quite the same, it is just a matter of creating the right publish file and use it to deploy during a build.
Gian Maria.