Installing on-premise component against TFS Service TFS On Azure
Tfs on azure is a a perfectly valid solution to have your TFS hosted by Microsoft , no worries about upgrading, maintaining, backup and most important, it is available from every computer that has an internet connection. This last factor can be really interesting for companies where people sometimes works from home, or from an hotel during transfers because the only solution with an On-Premise server is exposing the server as Https, or using a VPN, but with TFS on Azure all that you need is a simple internet connection.
The most important aspect is that TFS is not a single software, but it is an environment of services. As an example you can consider the section devoted to Continuous Integration, in such a scenario you can choose to use azure to host your build servers, or you can install a build environment on premise or you can create a mix of these.
Installing a Build environment to build solution on team project hosted on azure is really simple, and it is not different from configuring for an On-Premise TFS. First of all insert DVD of TFS and start a normal installation, after you installed TFS you are presented with a series of wizard to configure the various roles that compose a TFS environment. To install a Build Environment you should choose “Configure Team Foundation Build Service”
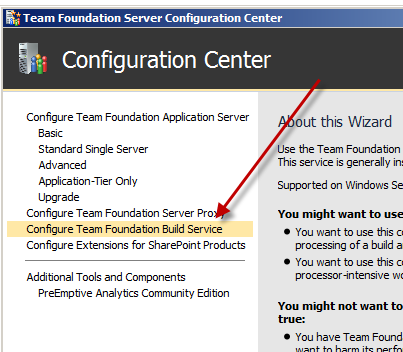
Figure 1: First step, choose the wizard to configure the Build Service
The very first information is the Team Project Collection to bind the Build controller to, you can choose from the standard UI “Connect to Team Project Collection”, in my example gianmariaricci.tfspreview.com, login to the service and the game is done.
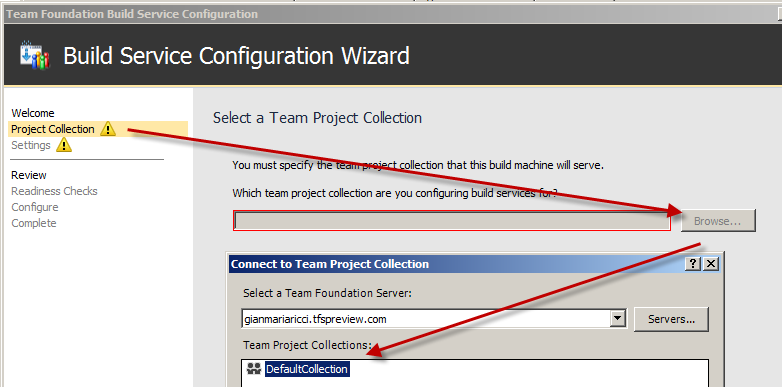
Figure 2: Specify Project Collection used by the Build Server, remember each build server can be used for only a Project Collection.
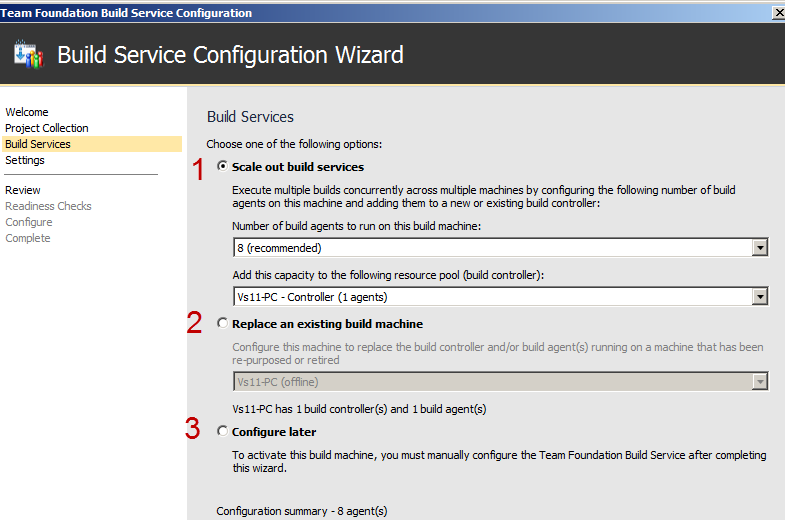
Now the wizard check the Team Project Collection to verify if there are already some Build controlled configured. In Figure 3 I got a screenshot of my installation that has already a Configured Build Controller based on Dev11 Developer preview, so you have all three option enabled.

Figure 3: The three options you got if another Build Controller is already configured for this Project Collection
The first option is the * scale out *, basically it adds this machine under control of another previously installed build controller and it is used to add more build power to a specific controller. You can verify from the screenshot that it suggests you to install 8 build agents, because this machine has 8 core. You can choose whatever number you want, as an example maybe this machine is used not only as a build agent, so you can choose to install a number of build agent less than the number of core. The combo permits you to choose the Build Controller to scale out, in case you have already more than one Build Controller bound to the same Project Collection.
The option number two basically is used to * replace * an existing build machine , this is the option I choose, because the old Build Controller named Vs11-PC, is based on dev11 developer preview and I want it to be replaced with this new installation based on beta bit.s As you can see even this option has a combo to specify the Build Controller to replace and in the combo you got also an indication on the status of the Build Controller (in Figure 3 you can see that it is offline).
Third option permits you to only install the bits, but leaving the configuration to a further moment, it can be useful to prepare template virtual machine to be used as “fast deploy” build agents. Now I need only to specify the user that will be used to run the service, in most situation I can leave the Local Service as suggested by the wizard.
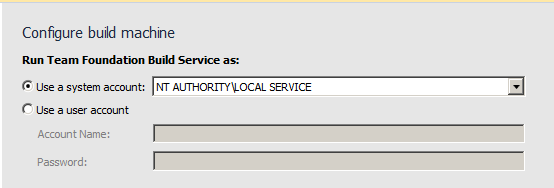
Figure 4: Choose the user that will be used to run the Windows Service of the Build Controller, you can simply leave default Local Service
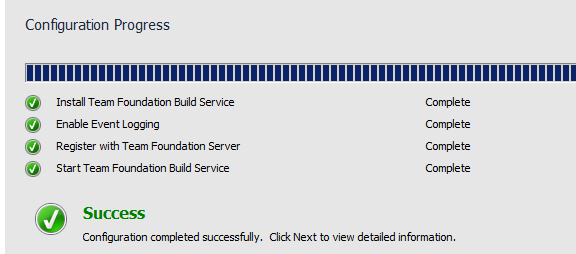
Now you should verify the configuration and proceed to the configuration. When the wizard finishes, congratulations, you have installed a build controller on-premise to build Team Project hosted in TFS Service.

Figure 5: Congratulation, with few clicks you now have an on-premise build controller bounded to a Project Collection in Windows azure
Now you can simply manage your build controller from the standard Team Foundation Server Administration Console; the cool part is that installing a Build Server on-premise is a matter of pressing Next –> Next –>Next.
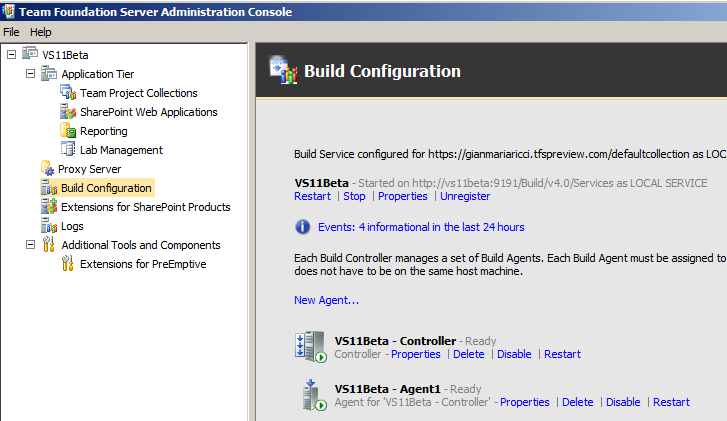
Figure 6: You can monitor the status of the Build Controller directly from the Team Foundation Server administration Console.
If you prefer, Brian Harry confirmed in his blog that a Build Service for Team Foundation Service is now available on TFS Service, so you can simply rely on it to build your software. The only drawback is that you do not have control over the build machines, so if you need specific software installed on the build machines in order to build your project, having an on-premise build machine is a valid approach. Another option is the creation of a Build Service directly on Windows Azure, to have full control over the build controller, but avoiding having id on-premise.
Once you have your build controller up and running you need to be aware of a potential problem of this configuration: * bandwidth usage. *One of the drawbacks of using TFS Service could be bandwidth usage, especially in country like Italy, where having good connection can be difficult. For everything that regards the new Web UI Interface you will face no problem, because you can use it even with a standard 3G connection from your Cell Phone , because the interface is highly optimized, but for source code the situation is really different.
When developers or build server issue a GetLatest operation, the bandwidth consumption is determined by the size of the files that are requested to the server and even if source codes usually are little text file, it is standard to include in the source control all the libraries and third party control that are needed for the build. For Build server if you configured the build to grab source code for each build you can really have an high bandwidth usage and it can be a real problem in everyday work.
The optimal solution is using a TFS Proxt Server, because it will limit the bandwidth usage from your organization to TFS Service, because when you issue a Get Latest files will be returned by the proxy server and not the TFS Service instance. As for Build configuration, installing a proxy server on-premise is really simple.
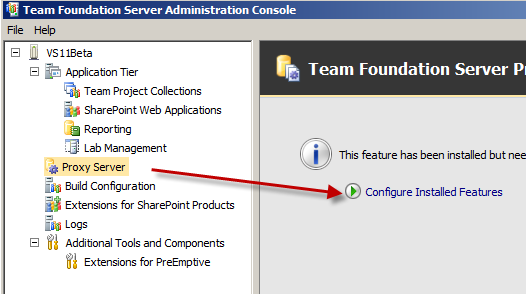
After installing TFS 11 on a computer in your network, open Administration console and locate Proxy Server node, then select Configure Installed Features.

Figure 7: To configure a proxy server just press “configure installed features”
Before starting configuration phase, the wizard shows you a remind of why and when you should use a proxy server; as you can verify the main reason is reducing Bandwidth in download , because each upload operation, like a Check-in, is done directly to the main TFS Server. This is not a problem because the main use of bandwidth is on downloading items.
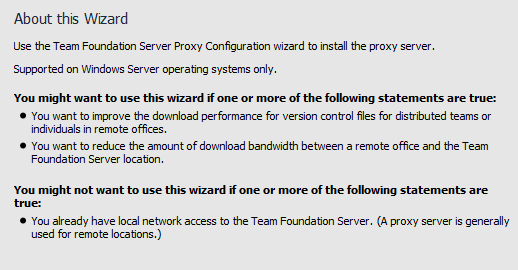
Figure 8: A simple reminder that explain the reason to use a proxy
The first question is the address of the Project Collection to proxy, you can choose your collection on TFS Service and proceed to the next step.
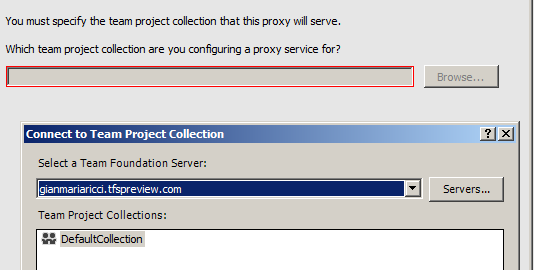
Figure 9: The usual “Connect to Team Project Collection” windows that permits you the server to proxy
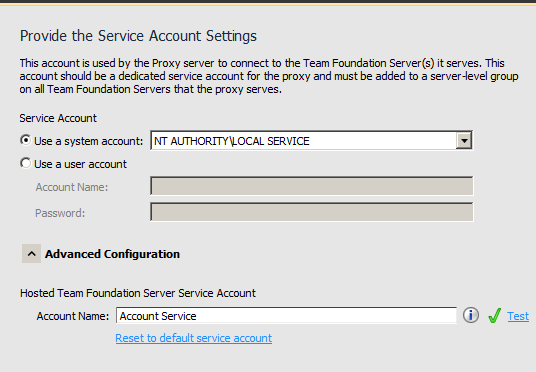
Now you should choose the user that will be used to run the proxy service, as usual you can leave the default.

Figure 10: Specify user of the IIS Application that will run the proxy
Now you need to specify the port of the TFS proxy and the local folder where it will cache files.
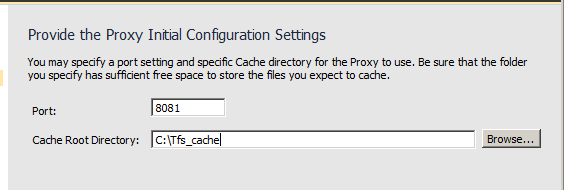
Figure 11: Specify the local folder where the proxy will store the cache.
Now you can finish the wizard and let it configure everything needed.
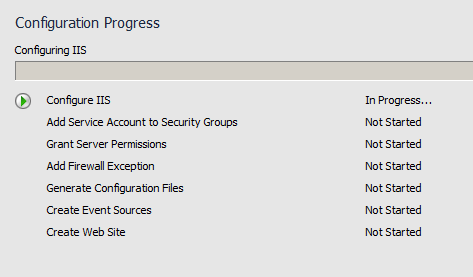
Figure 12: Everything is ready, the wizard will install IIS (if needed) and will configure the proxy
This is really simple, because you need to specify only the project collection and you are ready to go. When configuration finished you should see a success windows likes this one.

Figure 13: The proxy is ready to use, it even modify IIS configuration to optimize performances
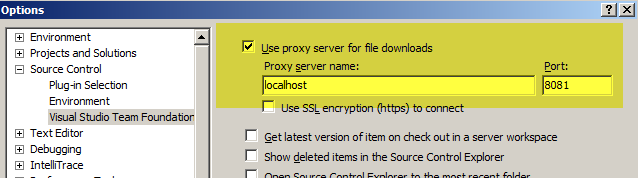
As you can read from the summary, the configuration not only configured the proxy, but configure IIS to have optimum performance, like enabling dynamic compression and since this option is valid for every site, the wizard informs you on what he did. Now you can simply change Visual Studio settings to use the Proxy server to download files.

Figure 14: Configure the use of the proxy in each machine of your organization.
To verify if everything is ok you can simply issue a Get Specific Version to download again the whole source control of a Team Project and verify in the proxy server if the cache folder has file in it. After the Get Specific operation finished you can try it again to verify that this time it sould be really faster, because files are now get from the proxy.
When the proxy is up and running you should go to every on-premise build machines, launch Team Explorer and configure the proxy as in Figure 14, this permits to Build Agents to use proxy during build. This is really important because build server usually do a lot of traffic against TFS Server, especially if you choose to reset the workspace at each build.
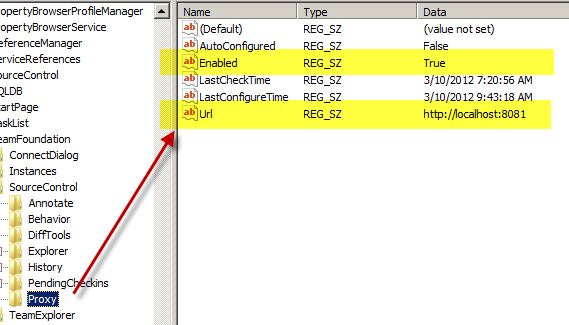
If you have not installed Team Explorer on build machine, you can configure proxy with direct manipulation of the windows registry, simply open the HKCU\Software\Microsoft\VisualStudio\10.0\TeamFoundation\SourceControl\Proxy and add a couple of keys called Enabled and Url and the game is done.
Figure 15: Registry keys to configure TFS proxy for Build Agent machines that does not have Team Explorer Installed.
Now you have configured build and proxy to have maximum benefit from your TFS service account.
Gian Maria