Thanks to Microsoft Test Manager, testing teams have a complete tool to manage every part of testing, but since it is a new tool we need to understand how to use at its best, so I’ll try to explain a typical cycle of a test-bug-fix-test with MTM.
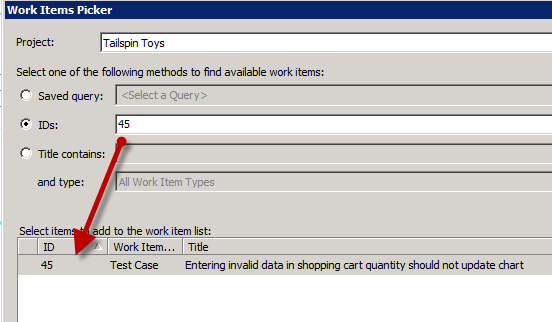
Everything starts with the definition of a Test Case in a Test suite, in this example I want to verify what happens when the user insert some specific quantity in the Chart page of TailSpin toys.
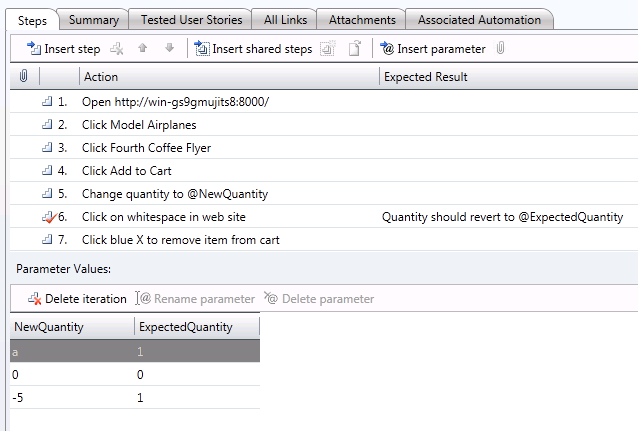
Figure 1: Definition of a test
In this test I’m requesting the tester to: add an item to the chart, change the quantity to @NewQuantity value, and finally verify that the system update the charts showing the value: @ExpectedQuantity. Thanks to parameters, testers can specify more set of data to use in the test to verify boundary values etc etc. In this specific situation the stakeholder requests that a non numeric or negative value should not update the value of the chart, while a quantity of zero should change the quantity to zero, leaving the object in the chart.
A tester now executes the test, the first time he enables the recording asking MTM to record all his actions. This is useful because the recording can be used to do a fast forward during test execution, actually reducing time needed to execute the test.
In the video I show how the tester can use existing action recording to speedup test execution, the tester find an error, creates a bug, and now it is time for developer to fix it.
The developer begins working with the bug and he need first of all to be able to reproduce the bug before starting to understand how to fix it. Thanks to the recording of test execution, he can create a new CodedUI test based on MTM recording just choosing use Existing action recording to create the CUIT; Visual Studio now opens a form to select the Test Case that contains the action recording

Figure 2: Choose the Test Case that contains the action recording to import in the CodedUI test
Since the developer knows that the bug was related to a failure of the Test Case 45, he can import related test execution recording, obtaining this CUIT.
| |
The most interesting part is the DataSource attributes that makes the test connect to TFS and grab all parameters value directly from the test case definition. Since the CUIT is generated from an action recording it has no assertions, but the developer knows that, since verification steps requires the user to only check a value in the textbox, he can write a CodedUI test assertion to fully automate the test.
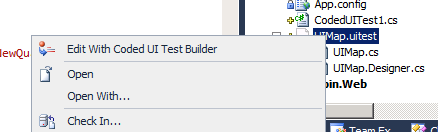
First of all the dev executes manually all the steps of the test, until he reach the chart page. Now he can edit the UIMap, just Right Click on the UIMap.uitest file and chooseEdit Wit Coded UI Test Builder

Figure 3: Editing the UIMap
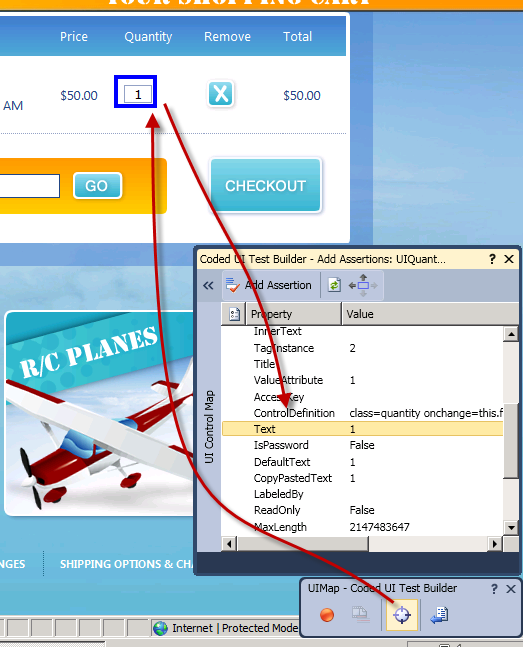
Now it is really easy to create an assertion. As you can see in Figure 4 you can simply drag and drop the Crosshair to the quantity textbox control, CUIT Builder shows all properties of the control, now find and select the Text property and press the Add Assertion button to create an assertion.

Figure 4: Adding an assertion thanks to Coded UI Test Builder.
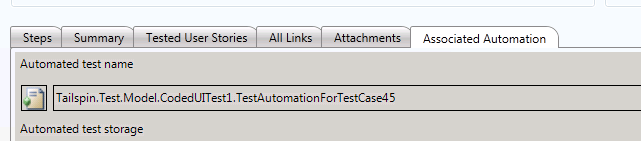
Now that the assertion is added, since this is the only condition we want to assert, we can: press the Generate Code, give a name to the assertion and press the button Add and Generate, as visible in Figure 5. 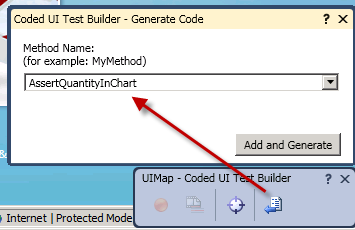
Figure 5: How to add the assertion to coded UI map.
Now this assertion can be used in the CodedUI test:
| |
I added lines 12-15. Lines 13-14 is where I set the expected quantity of the assertion. Each time you record an assertion, Coded UI Test Builder tools try to parametrize generated UIMap when possible. When we created the assertion, test builder parametrizes the ExpectedValue, thanks to this feature I’m able to set expected value to the value of the parameter @ExpectedQuantity (see Figure 1 ) of MTM, finally line 15 executes the assertion. Now if the developer runs the test he got this output.

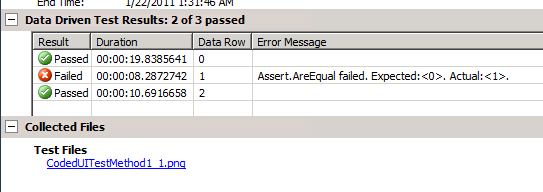
Figure 6: Result of CUIT execution after the assertion
As you can see in Figure 6 the test got executed three times (once for each parameter set), and the test failed on run number 1, because we expect the value of the textbox quantity in the Chart to have the value 0 but it has the value 1.
This is a great achievement, because the developer, with few clicks, was able to create an automated CUIT test that guarantee bug reproducibility. Now the dev can inspect the code, find the reason of the bug, try to fix it and verify if the fix is ok running the above CodedUI Test. Since developer usually uses local IIS to test local build, he just need to change the url used by the test ,adding this line at the head of the test
| |
Usually this line is removed once the bug is fixed so the test will point to the original test server. Once the bug is fixed, the developer check-in the code, opens the definition of Test Case, and automate the test with the new CUIT just created. This operation is really important, because now we does not need anymore to do a manual execution of this Test Case, but we can simply run the CUIT to obtain the same result.
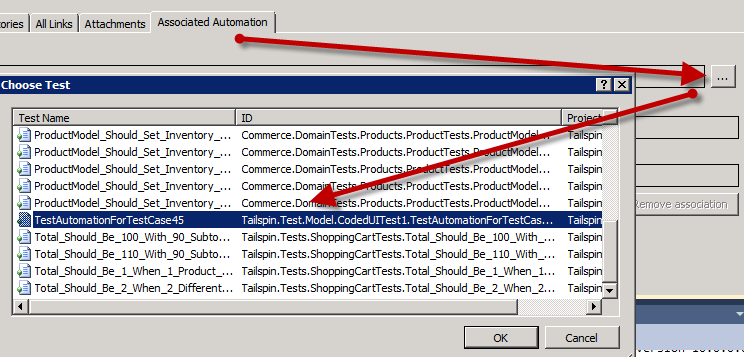
Figure 7: The CUIT just created is added to the Test Case as associated automation
After some time, test manager decides to test a new build. He deployed the new build in all test environments, then testers looks at test impact or at the list of closed bug to see what is changed and what to test. When a tester verifies that the bug related to test case 45 is marked as resolved, he needs to verify that the bug is really fixed running test again and if everything is ok close it. When he opens MTM and looks at the the test case he see that now this test is automated.
Figure 8: Test case 45 now contains a related automation
Now he can simply right click the test and ask for automatic execution in all compatible environments.
This bug lifecycle shows how useful MTM is, because it guarantees seamless interaction between testers and developers. Test manager write a test, a tester executes it and creates a bug if a failure occurs, developer uses MTM recording to create a CUIT and add assertion to it, the bug got fixed and the test automated, so it can be automatically executed during a Lab Management build.
The main advantage of this workflow is that, thanks to action recording, the developer can replicate tester actions, thus reducing drastically the time needed to reproduce the bug. Another strength point is the ability to create and automate a CUIT, that will be added to the suite of automated test.
alk.