It is time to connect together a couple of posts of mine, in the first I simply explained how to deploy a web application to a remote machine with the use of Beyondexec2, in another one I explained how to create a simple tfs build, that actually does not build anything, but execute a simple workflow.
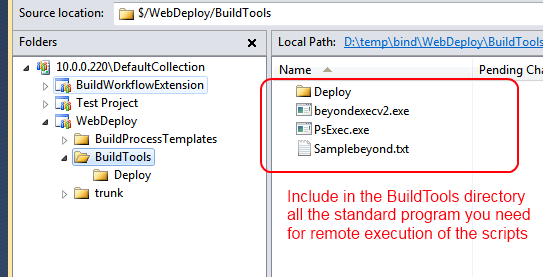
In this post I’ll cover a primitive build workflow to deploy the result of another build. The starting point is having a build called Demo that builds a web site and create the installer package, plus the script described here. You need to insert the scripts and the PsExec utility in the source code of your team project, to be available from the build agent during the build, as shown in Figure 1. Note: in this example I’ll use the PsExec tools instead of beyondexecv2, but they are exactly equivalent, PsExex is more maintained tool and works better when execute in services.

Figure 1: Include deploy related files into source control system
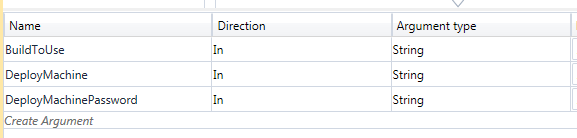
Now you need to modify the deploy script created in the other blog post, adding all the operations needed to deploy a build, first of all you need to define some more parameters ( Figure 2 ). These one are the number of the build to use (Es. demo_20100607.3) machine name where you want to install and the password of the administrator account of that machine.
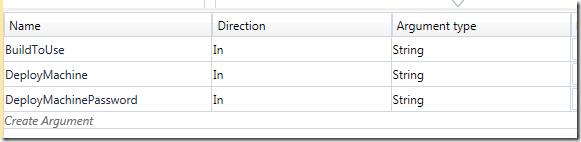
Figure 2: Parameters of the workflow
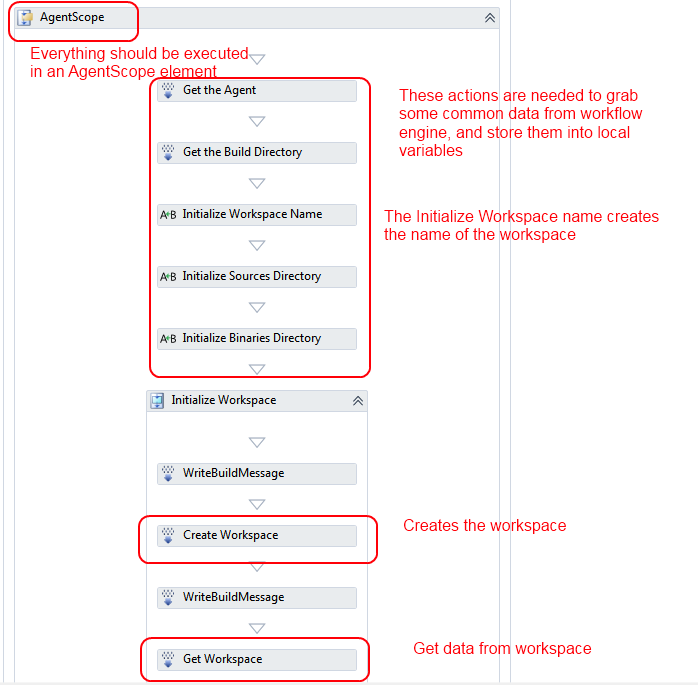
Now, since the tools and script to do remote deploy are stored in source control system, the build scripts needs to create a workspace and do a getlatest; to do this, you can reuse the relative section of the standard workflow showed in Figure 3.
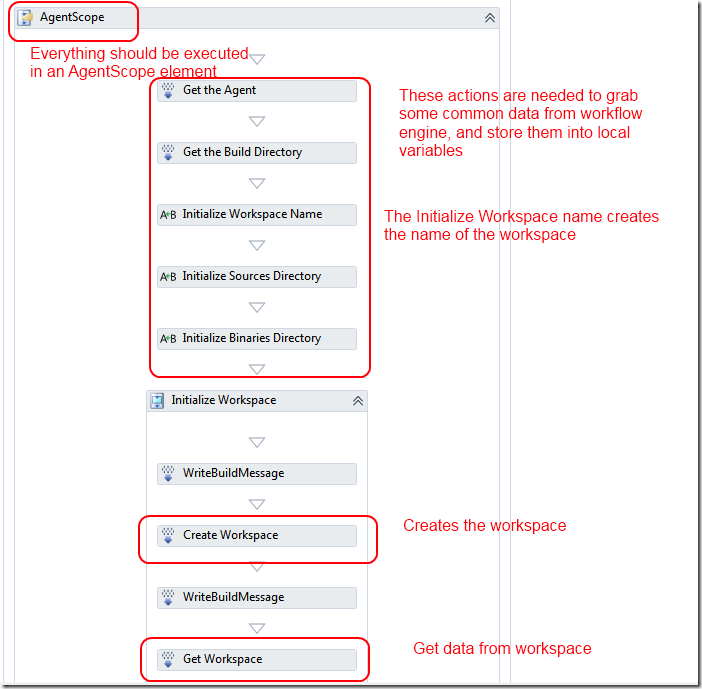
Figure 3: Details of workspace management
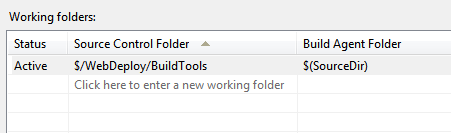
The steps from Figure 3 is taken from the standard workflow, and it is a common sequence of operation to create a workspace and do a getlatest plus managing some variables. If you run this workflow, as is, you can verify that in the build machine a new workspace is created, and you can browse to the build directory (usually c:\builds\1\teamprojectname\etcetc) to see downloaded files. But before doing this, you need to specify folder to grab in the workspace section of build configuration. As you can see in Figure 4 , I simply need to grab the BuildTools subdirectory, because there is no need to do a get latest of project sources, but only of the deploy scripts.
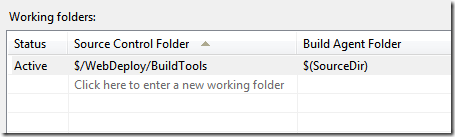
Figure 4: Configuration of the workspace
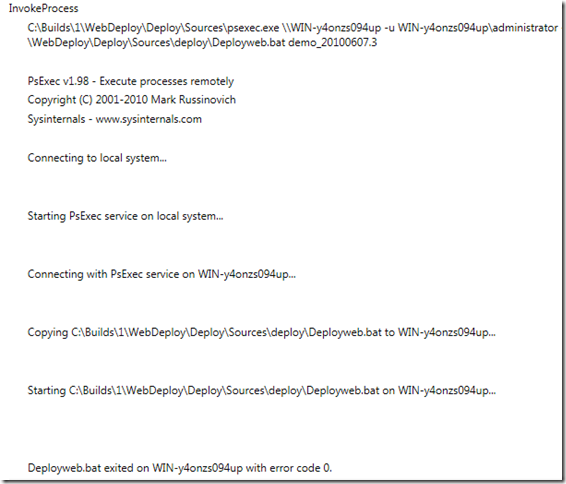
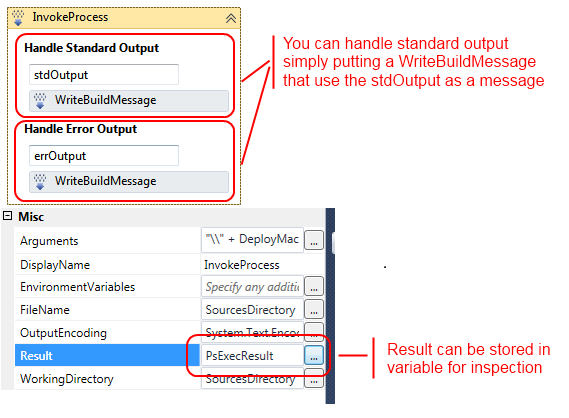
Now I need only to execute the PsExec process to do a remote execution of the script in the machine where I want my web application to be deployed, and this can be done thanks to a simple Invoke Process Activity, as shown in Figure 5.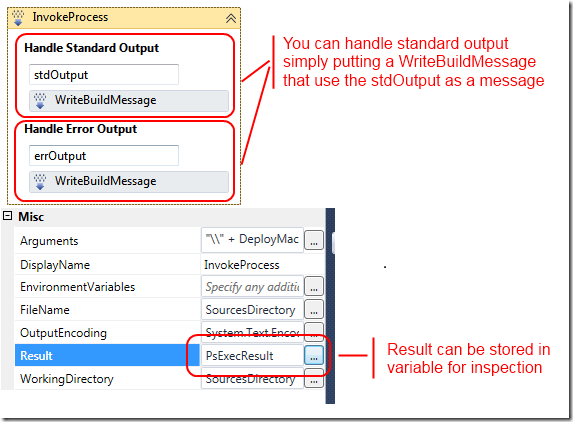
Figure 5: Invoke Process activity permits execution of an external process.
FileName property specify the process to execute, for this example is
SourcesDirectory + "\psexec.exe"
Since SourcesDirectory is the one used to map the workspace, I can execute the psexec directly from there. The other important property is the Arguments one:
"\" + DeployMachine + " -u " + DeployMachine + “\administrator -p " + DeployMachinePassword +
" /accepteula -i -f -h -c " + SourcesDirectory + “\deploy\Deployweb.bat " + BuildToUse
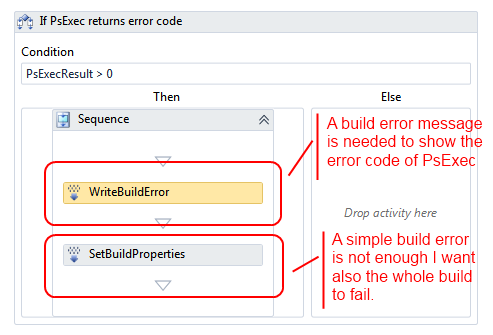
This is only a combination of Workflow Parameters to create the argument list, the /accepteula parameter is needed because the psexec shows an eula that should be accepted, and clearly there is noone to click on accept when executed on a service  , then the option –c force a file to be copied to remote computer and executed. After the Invoke process, in Figure 6 I showed the end of the workflow, with a condition that verifies if the PsExec return value is zero (success) or greater than zero (error).
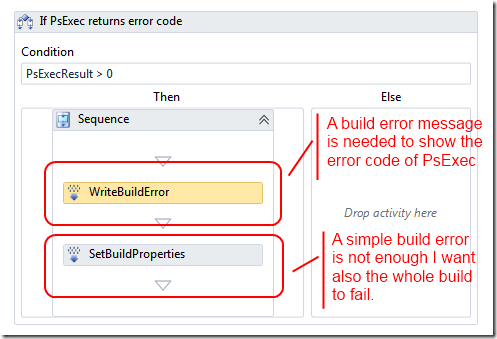
Figure 6: Check return value of PsExec and fail the build if greater than zero.
The SetBuildProperties activity permits to set a property of the build, in this situation I set the status as Failed. Now you can configure a build, configure parameters and see the result.
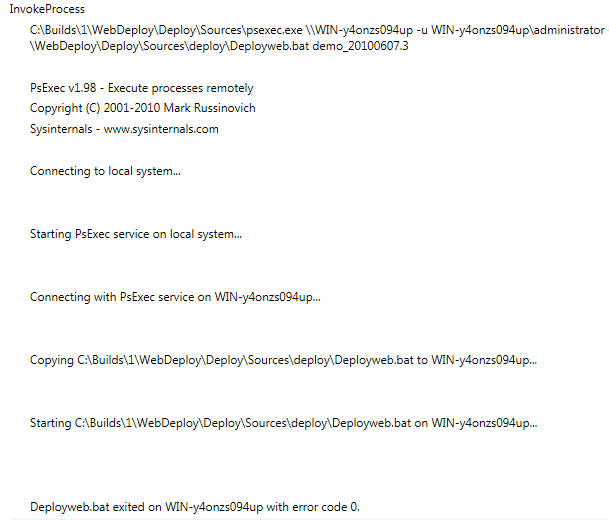
Figure 7: Log of a successful build.
The only drawback is that you only see output of the psexec program and does not see the output of the execution of DeployWeb.Bat on remote machine. Since you can specify, machine and build number to use, this is a good build script to deploy something on remote machine with a simple click.
alk.
P.S. this is the first post following Adam Cogan’s SSW Rules (thanks Adam, you rock)
– the balloon rule, instead of walls of text
http://sharepoint.ssw.com.au/Standards/Communication/RulesToBetterEmail/Pages/HowToUseBalloons.aspx
– the figure/caption rule
http://www.ssw.com.au/ssw/Standards/Rules/RulesToBetterWebsitesLayout.aspx#AlwaysAddFiguretoImages