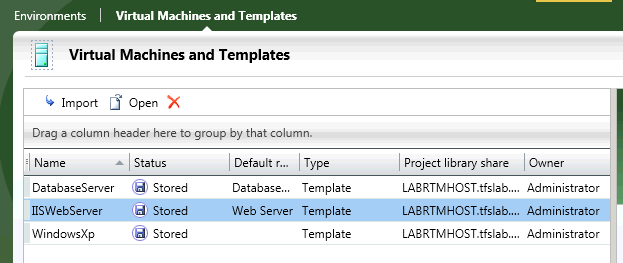
One of the coolest feature of Tfs2010 is Lab Management, an infrastructure tool that permits you to manage Virtual Environment to test your applications. Once you have defined some template machine in SCVMM you can import them into your Lab to be used in defining Virtual Environment.
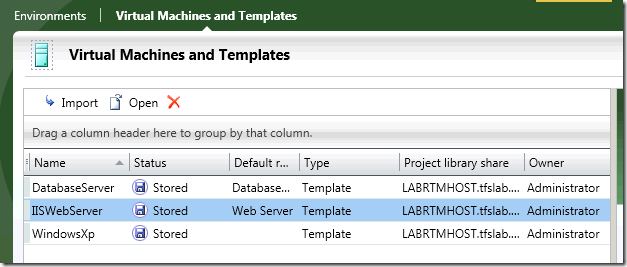
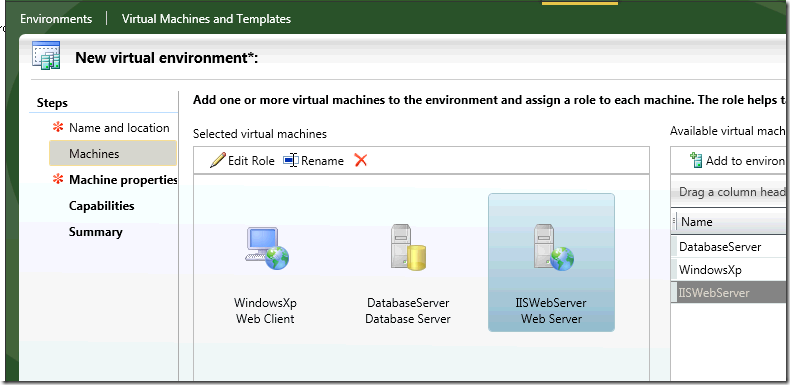
When you imported all the templates you need from SCVMM, to create a new environment you simply need to go to Environment tab, and create new virtual environment, then you can choose VM template to compose a test environment, like in the following picture where I choose three machine, a web server, a db server and a client machine.
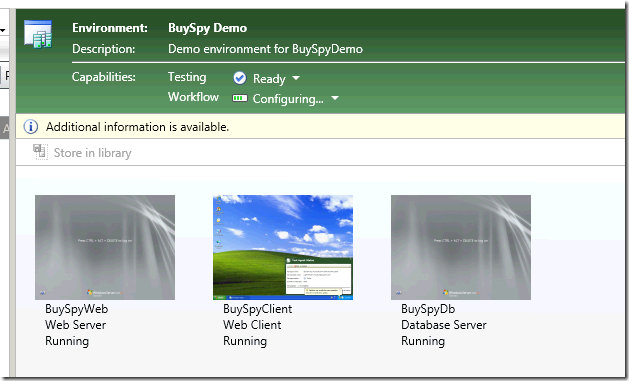
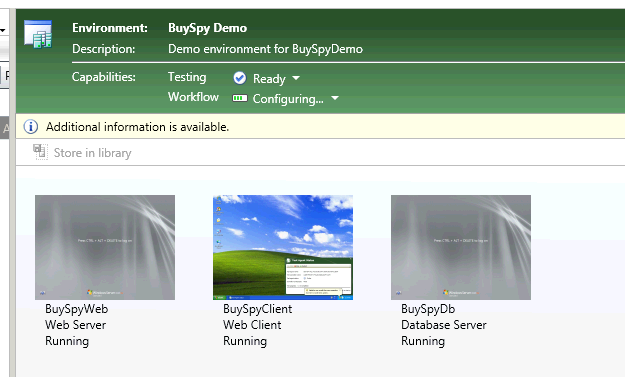
This is the great power of Lab Management, the ability to compose virtual machines to create a test environment that permits you to run tests in a variety of different situations. Once you have deployed an environment you can view it into Lab Management, in this screenshot the environment is starting, so Workflow capability is still not ready. All machine to be used in lab environment should in fact have the necessary agent to be controllable from the lab, you can find a prep tool at this address (http://vslabmgmt.codeplex.com/) that can dramatically cut down the time needed to prepare machines.
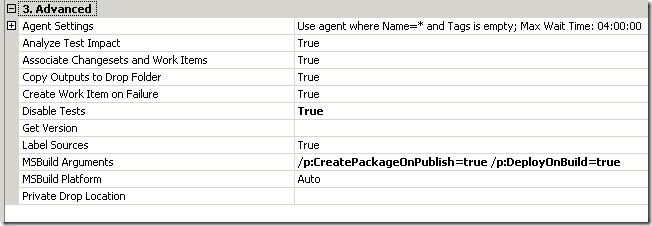
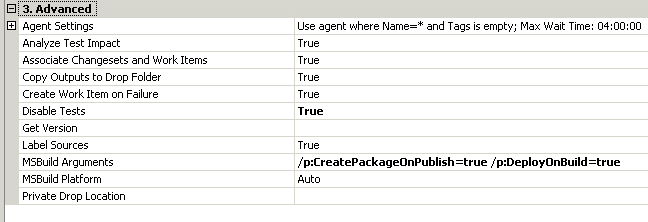
Once an environment is up and running, you can use it to do a lot of interesting operations, but the most interesting one is setup a Lab Management enabled Tfs Build, that has the purpose to compile the application and to deploy the latest version into the virtual environment and running automatic test, everything with a simple click. Defining a Lab Management build is quite simple, first of all I login into database server and IIS machine and prepares them to host my application, I created IIS sites, create the first skeleton of the database, create deploy scripts (they will be examined later), moved to the servers everything is needed to deploy script, and when everything is ready I did a snapshot to save everything. Then I create a standard Tfs Build with this only little difference: I want msbuild to create deploy packages for my web site, so I specify a couple of property to MsBuild.
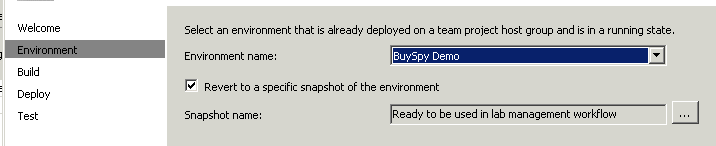
Now I can create another build, this one with the LabDefaultTemplate.xaml, and when you configure the settings you can do very interesting stuff, in the first screenshot I can choose an environment where to run the build, and a valid snapshot to restore before the build take place
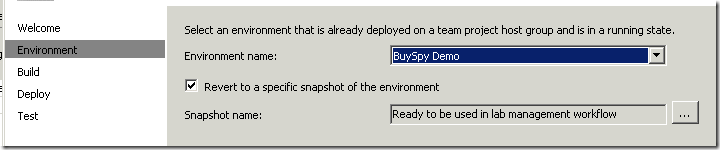
For all those people that does continues integration, you know the pain of maintaining scripts when the test environment can be messed up by dev/tester. I remember situation where the integration fails because a dev had stopped IIS Site to do some configuration then he never restart it again, sometimes they mess the application pool or the machine, etc etc. Having the environment restored to a clean snapshot is a real good thing, because we are sure that deploy scripts will run in a clean and tested scenario.
This is especially interesting for production upgrade, I can setup an environment that is the exact copy of production, then take a snapshot, and verifying that deploy script are able to upgrade production environment without messing things. With this approach, testers will run tests against a copy of production environment upgraded to latest version, and this can give you great confidence with the upgrade procedure.
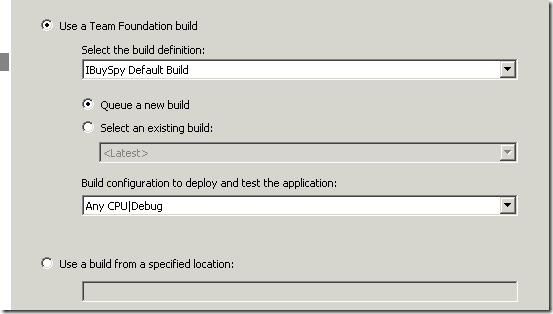
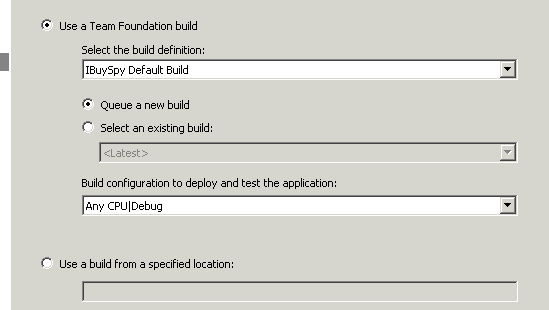
Then you can choose the build to use to generate artifacts, you can choose a build definition and ask to queue another build, or use an existing one, or simply gets a build having a location.
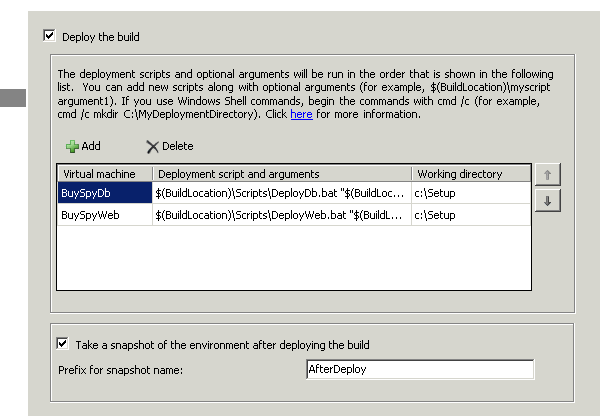
Then it comes the most feared part, the deploy one 
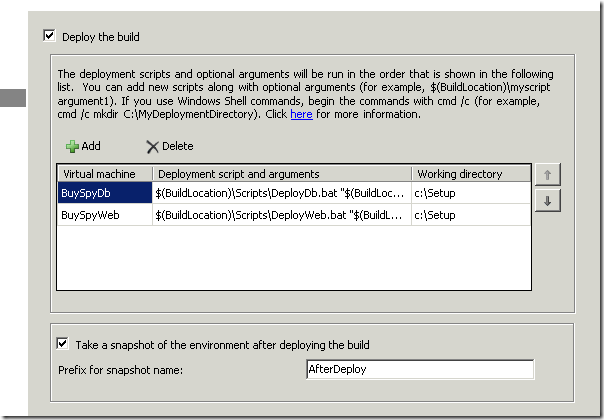
Apart the fact that you can take a snapshot of the environment after the deploy succeeded (useful to having a repeatable test), you need to create deploy scripts.
Scripts are used because each environment could be isolated from other ones thanks to network fencing, so the simplest stuff to install software on an environment is: copy a batch file in one of the machine, run the batch file and let him deploy the application. This part seems to be really complex, but thanks to database project, and new installer capability of VS2010 for Web application, building such a scripts is really straightforward for web application. First of all, the Virtual Machine column listed logical name of the machines in the environment, so lab management is responsible to understand the real name of the machine, then there is the script to launch, and finally in the last column, the directory in the target machine where the script should be run. Here is an example of how to specify the script
- $(BuildLocation)\Scripts\DeployDb.bat “$(BuildLocation)” *
Scripts are located into the web project under the scripts directory, and are part of the solution, so they gets deployed during the build, and are available to the build location. All the scripts accepts only the build location as single argument.
Essentially each script has a first part that is common to each one, it verifies that the directory passed as argument exists, then it creates a local directory where the deploy should take place, setup some variables, and then it does the deploy, for the database we need two lines.
xcopy /c %RemotePath%\IBuySpy*.* %LocalPath%.
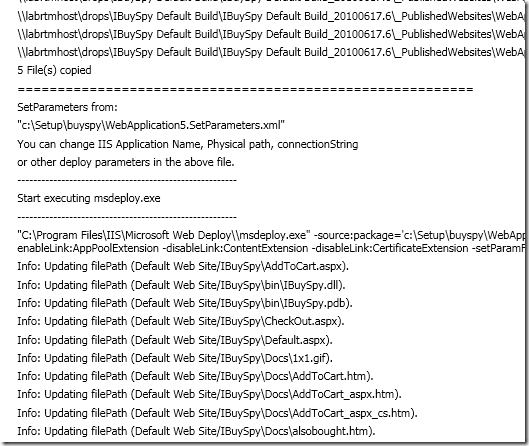
C:\Setup\vsdbcmd\vsdbcmd.exe /a:Deploy /ConnectionString:“xxx” /dsp:SQL /manifest:%LocalPath%\IBuySpyDatabase.deploymanifest /p:TargetDatabase=Store /dd It essentially copy all the database project output files into a local folder, then it run the vsdbcmd.exe command to update local database. The vsdbcmd.exe command was already copied to the server in the preparation phase. The good fact is that deploy is just a matter of a couple of lines of code, for the web application the situation is quite the same. xcopy /c %RemotePath%\_PublishedWebsites\WebApplication5_Package\.* %LocalPath%.
%LocalPath%\WebApplication5.deploy.cmd /Y*
The first line is used to copy the deploy package, from the build location to a local path, the script knows that the build will drop the packages in a _PublishedWebSites subdirectory, and finally it can simply launch the command file to deploy the application to IIS.
As you can see, deploying a solution into a virtual environment can seem complicated as first, but is is only a matter of a couple of lines into a bat file, for standard project. Moreover, having such a script is a good things because you can use them to automatically deploy application even outside of lab management build.
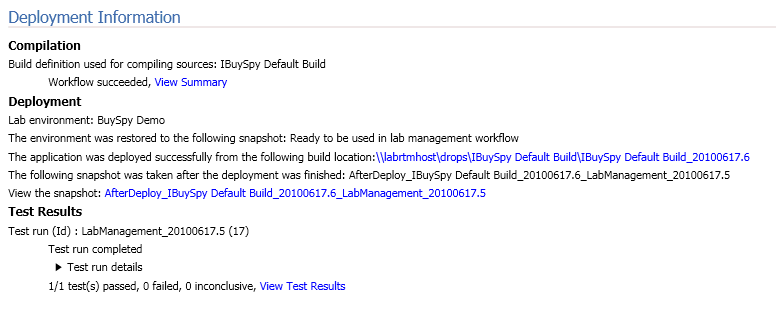
Now you can choose test to run and launch the lab management build, here is a simple result
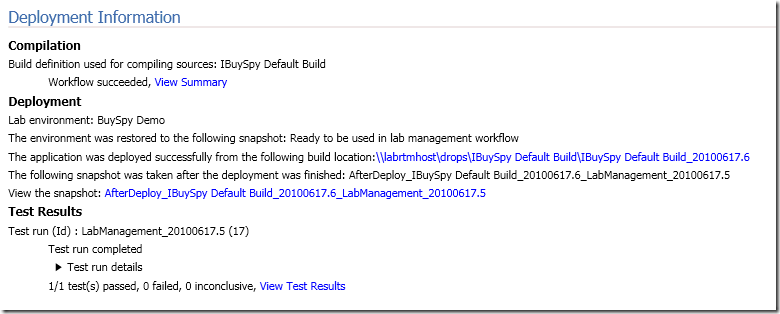
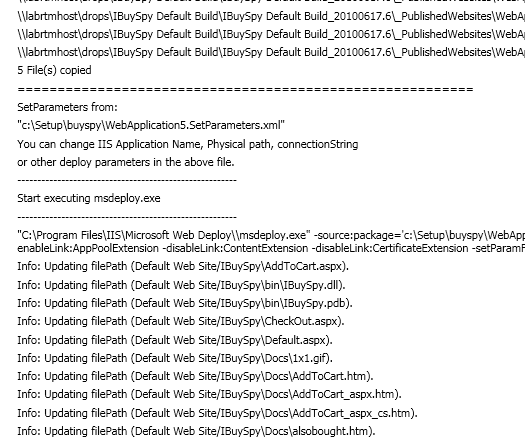
If you look at detailed build output you can find the whole output of the scripts
Thanks to lab management, you can, with a simple click, having your latest source deployed to an environment and be ready to be used from tester. If you have good servers and space on disk, you can build as many environment as you need. As an example you can deploy a environment with two IIS machine, just to test your app in a load balancing scenario.
Managing virtual environment with lab management is really funny and productive, and can cut off dramatically the time and cost needed to test your application.
alk.