Team foundation Build - Share Builds among multiple servers
When you begin to use Team Foundation Server, you will create different builds for all of your company’s projects. Since building complex products can be resource intensive, it is likely that your Team Foundation Server machine starts to perform slowly. This is a typical issue of Continuous integration servers, since they compile projects at each check-in you will end with a lot of builds and a lot of work to do.
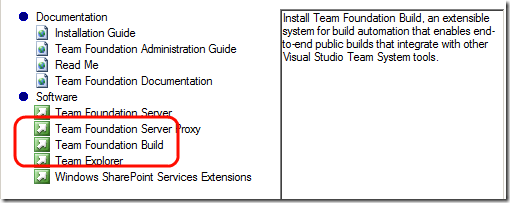
Team Foundation Server addresses this issue separating build machines from Team Foundation Server. If you find that the build machine is becoming slow, you can simply use another machine in the network to execute some of the builds. In real environment you can even avoid to install build engine in the Tfs machine, delegating builds to other servers. First of all go into another machine, fire the installer of Team Foundation Server, and choose to install a Team Foundation Build.
- Note: if you do not have Active Directoryyou Must create in this machine an account with the same name/password of an account of the machine where Team Foundation Server is running and that account must have right to access tfs*. This is a standar requirement, the Build Server needs to access Team Foundation Server to get sources to build and store build result, etc, etc. so it is of vital importance that it runs with sufficient privilege to access TFS server. If you have active directory you do not need to create a specific account, but you must select one AD user that have credential to access TFS during the installation.
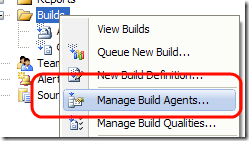
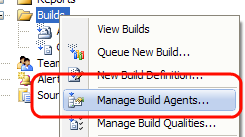
When the installer finished, you can go to Visual Studio, Right Click on the Builds in the Team Foundation Server Explorer Tree, then choose Manage Build Agents
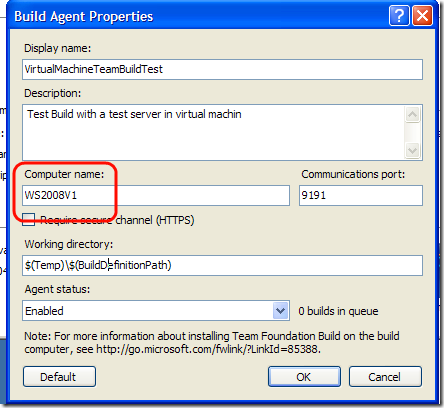
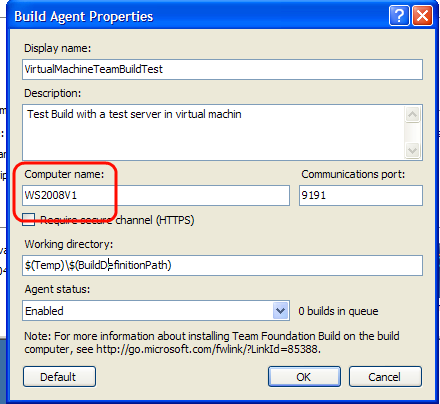
Now you can add additional Build Agent, and you can choose the new machine name, where you had previously installed the Team Foundation Build.
Now you can use this new machine to run Builds simply specifying this agent when you create a Build Definition, or you can use it when you manually queue new build. It is really important that the user credentials used to run the Build Service in the new Build machine has the right to access the Team Foundation Server Machine as stated before.
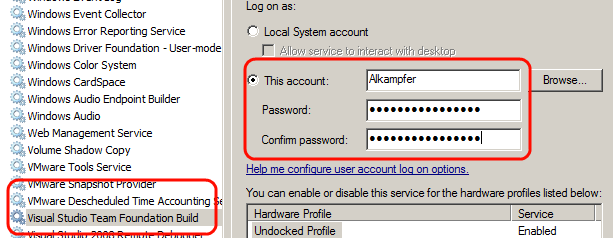
If you had already installed the team Build engine with a wrong user don’t panic, you can still manually change build machine settings to correctly access TFS. Go to Service control panel and change the credential used by the Visual Studio Team Foundation Build service to use an user that has sufficient credential for TFS. Now restart the service.

It is highly possible that when you restart the service you get * access is Denied * error, it means that the new account does not have sufficient rights to run, first of all the user needs rights to access the folder where you install the Build Agent, but this is usually not enough. *The only way to understand exactly what is wrong is going into the Event Viewer *where you can find detailed errors like this one.
| |
This message is one of the most dreadful, it means that the user has no rights to use that url to host a web service. The solution is to run this couple of commands.
| |
With these two lines of code you are giving to user Alkampfer(the one that has right to access Tfs and the one used to run build service) enough rights to create a web service in that url. Now you should be able to start the service. Verify if the Build Agent is running browsing the WebService page (something like http://10.0.0.11:9191/Build/v2.0/AgentService.asmx). Now if everything is ok, you should go to Manage Build Agents menu and reenable agent if necessary. This step is needed because Tfs disables all Agents that are unable to run. If you fire a build with an agent that has no right to access TFS the TFS disables that agent because it is useless. When you correct the problem, you can simply edit the Build Agent definition, and change its status back to active, now you can schedule again builds on it.
With such a configuration you can divide build tasks across multiple machines, and the whole build process is more scalable. The advantage is that you have a single point of access (the Tfs machine), and from that point you can subdivide works between machines. Since you can install how many build server you want, the whole system is highly scalable.
Alk.
Tags: Team Foundation Server