Binding in WPF is really more powerful respect its counterpart in windows forms. Suppose you have to show this hierarchy of classes in an interface.
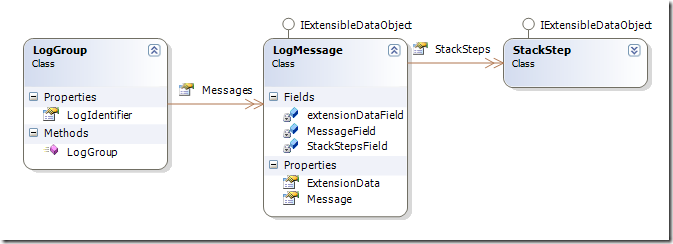
This is a simple structure where a LogGroup have a collection of LogMessages and each LogMessage has a collection of StackSteps. I have a collection of LogGroup and I need to create a three level master detail interface to make the user browse through all objects in hierarchy.
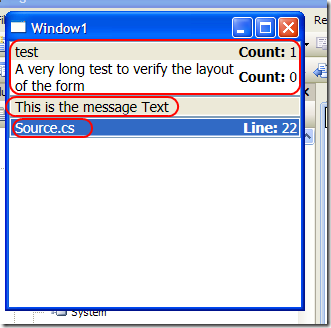
Thanks to powerful WPF binding you can create such an interface without procedural code. I used three ListView enclosed in a StackPanel. The first peculiarity of WPF binding is that you can set an ObservableCollection<LogGroup> object into the BindingContext on the StackPanel that contains the three listviews. The first listview have this declaration.
| |
The IsSynchronizedWithCurrentItem is true to enable automatic synchronization, the binding is set with the instruction {Binding}, that means create a binding object with default properties. A default binding walks controls stack and bind to the first Datacontext property that is not null, in our situation the ObservableCollection<LogGroup> set in the StackPanel that contains the ListView.
Now the second ListView should bind to the property Messagesof the item currently selected in the previous ListView, the solution is really simple
| |
The binding is {Binding Path=Messages} that means, build a Binding object and set the Path Property to the value Messages, since the IsSynchronizedWithCurrentItem is true you get this master detail binding for free. Thus when you change selection of the first ListView the second ListView updates accordingly and shows the element of the Messages collection of selected LogGroup. To bind the third and last ListView I have to use a special syntax of WPF Path binding
| |
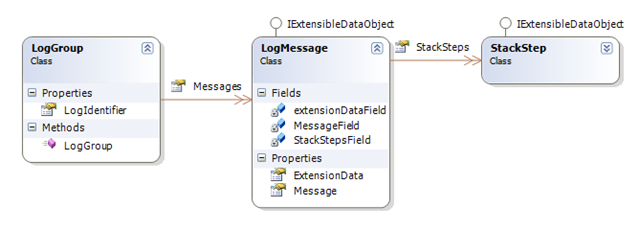
the binding now is {Binding Path=Messages/StackSteps}. If you wonder why I had not written the path Messages.StackSteps take a look back at the object model. Messages is a collection, if you write Messages.StackSteps WPF binding engine throws and errors. Now you need to be aware that every exception that is thrown during binding operation is swallowed by the binding engine, and you should look into the debug windows of visual studio to see binding errors. In fact you can find this error
System.Windows.Data Error: 39 : BindingExpression path error: ‘StackSteps’ property not found on ‘object’ ”List1′ (HashCode=58377472)’. BindingExpression:Path=Messages.StackSteps; DataItem=’ObservableCollection1′ (HashCode=7457061); target element is ‘ListView’ (Name=’GroupsView’); target property is ‘ItemsSource’ (type ‘IEnumerable’)
the binding engine told you that he could not find a StackSteps Property in the object List<Messages>. In such a situation the WPF binding engine permits you to use slash / character to indicate The current selected item in the view (read here for more details). Thus writing the path Messages/StackSteps told the engine to take selected LogGroup from the first level, then take the Messages property, then the slash indicates to take the current selected element of Messages collection and finally bind to the StackSteps collection of that element.
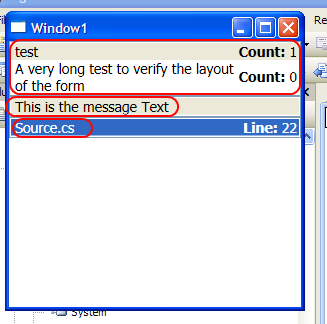
Whoa, you get three level master detail with not a single line of procedural code :D
alk.
Tags: WPF Master Detail Binding Binding
