As you can read directly from GitHub blog post GitHub code scanning is now available and ready to use for your repositories.
To enable code scanning you can just go to the security tab of your repository and choose to enable code scanning.
 Figure 1: Enable code scanning
You are presented with a list of Code Scanning tools at your disposal, clearly the first is CodeQL and it is automatically offered to you by GitHub, then you can find other tool available in the marketplace
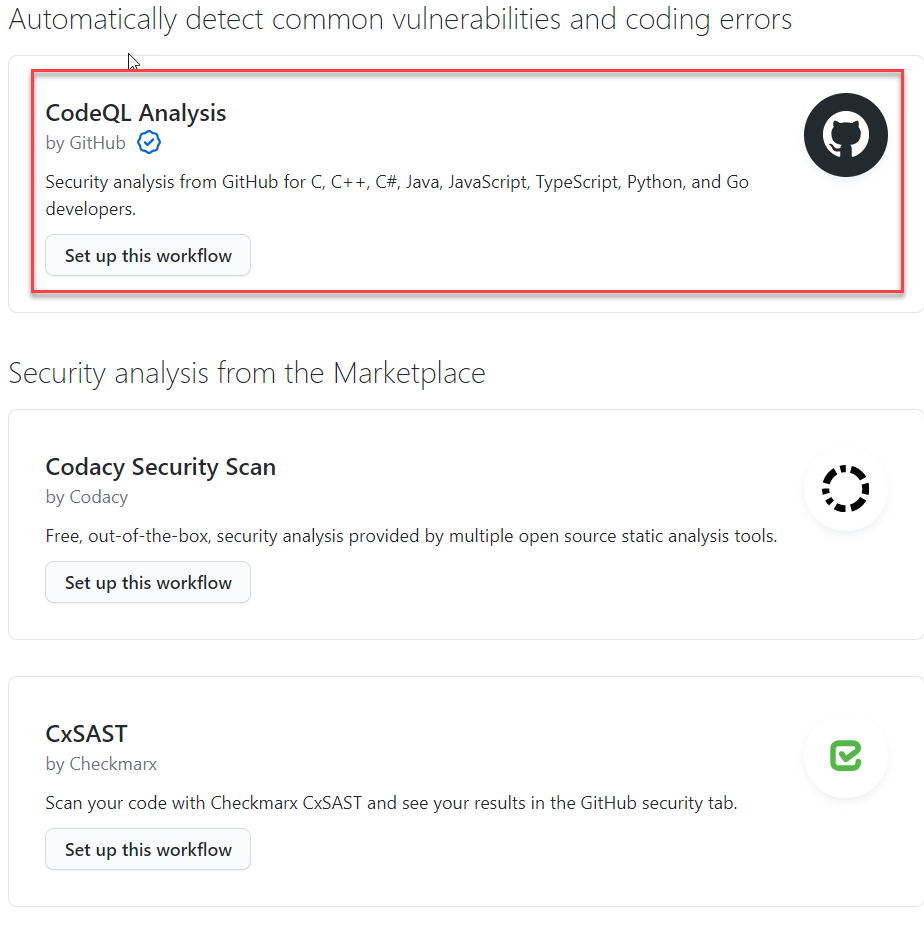 Figure 2: Code scanning tools
If you choose CodeQL you are presented with a new GitHub action file pre filled with all the instructions to analyze your project. This file can be good for simple project, because it tries to automatically detect and build your code, but you usually need to modify for complex project. Nevertheless this is a really good starting point to understand the task you need to include in your GitHub action file to perform the scan.
Starting with Code Analysis is just a matter of a couple of clicks, but you often need to customize autogenerated workflow to match your needs
My first modification would be in the on: section, I’d like my code scanning to happens in develop, master and all hotfix and release branches.
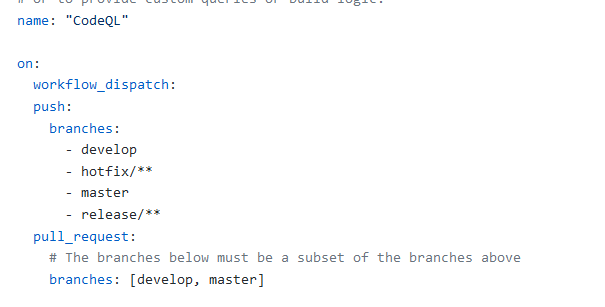 Figure 3: Branch trigger changes
After you change trigger sections, you can look for Autobuild section where the workflow is trying to build whatever code it find in the folder. Clearly this is a pretty good approach for a quick onboarding, but you need really to throw away that piece of code and replace it with all the correct commands to build your solution.
 Figure 4: Autobuild section of automatically generated CodeQL action
Another reason to override the Autobuild section is Building only the project you want to be analyzed. In some complex repositories you can find more than one projects and probably you do not want to analyze build result of everything. You will gain less noise and a quicker build. This is especially true for legacy project where you want to enable analysis on build result of a core set of projects.
Remember also that the build is done in a Linux environment, pay attention to path case
Sometimes you already have a working build on Windows Machine (.NET core project) and you got error running in analysis build. Most of the time it is just a problem with file name casing. I practically wasted 20 minutes of my life with an error due to specifying Nuget.config instead of NuGet.config.
In Figure 5 you can see my personal section that replaces the Autobuild section shown in Figure 4.
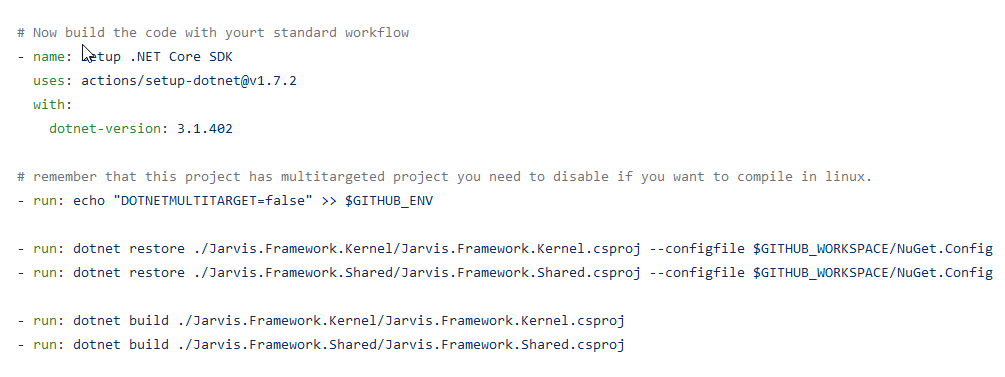 Figure 5: Autobuild section replacement
As you can see I’ve choose to build only two project of the solution, to speedup build time but also because some of the projects (tests) are compiled only in full .net461 framework so I could not build them in Linux. When everything works ok, you will have a GitHub action that is capable of checking your code with the tool of your choice and can run for each pull request to avoid bad code being inserted in the main code line.
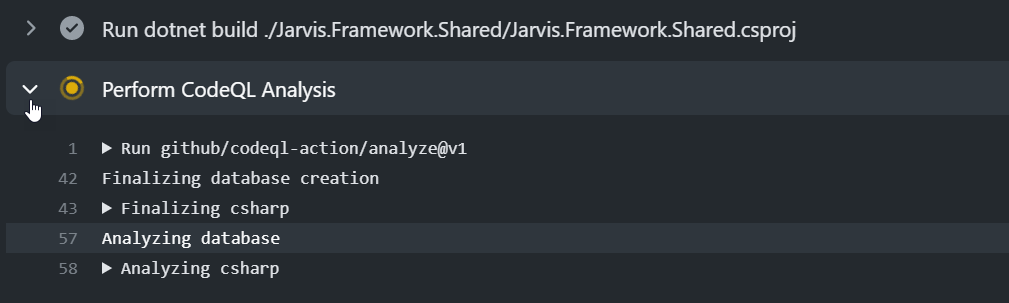 Figure 6: CodeQL in action
Once you have one or more analysis you can view results in the security section of your repository.
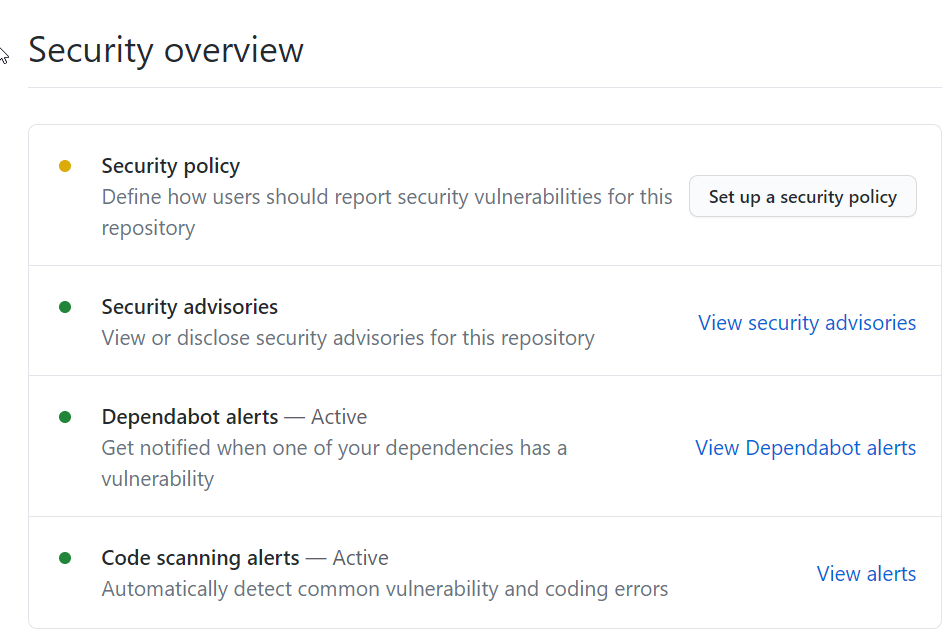 Figure 7: CodeQL result are available in security section
Here you can choose your branch and look at all the alerts, but you can add more scanning tools if you need.
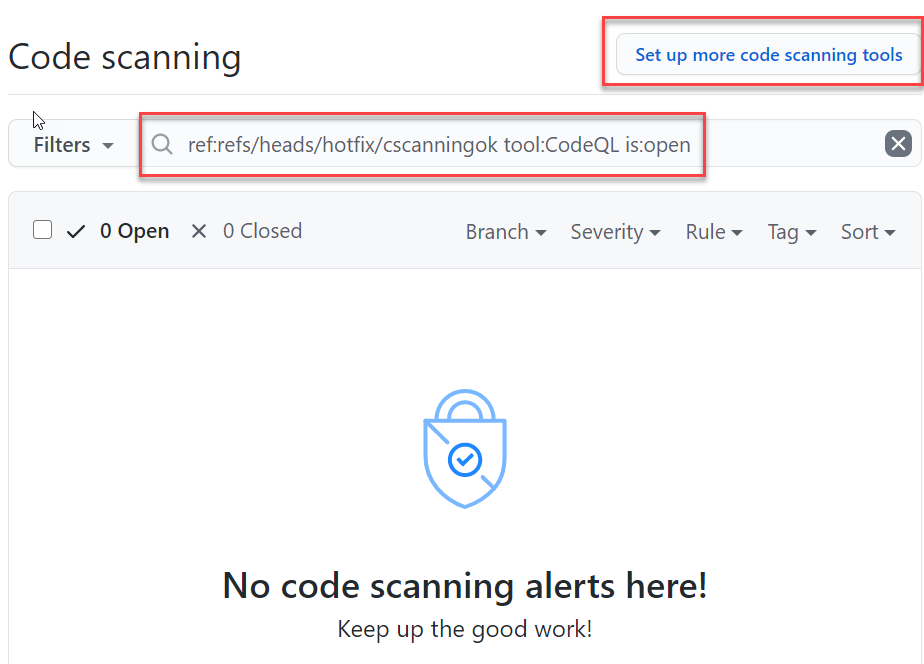 Figure 8: CodeQL results in GitHub Code Scanning result page
The overall experience is really simple, in less than half an hour I got an analyzer working on a project, simple, quick and effective.
Gian Maria.