Deploying a click-once application with build vNext in Azure Blob Storage
Thanks to the new build system in TFS / VSTS, publishing an application with Click-once during a build is really simple.
Versioning the click-once app
The project is using Git and GitFlow, thus it comes natural to use GitVersion (as described in a previous post ) to automatically add Semantic Versioning. In previous post I’ve demonstrated how to use this technique to publish Nuget Packages and nothing changes for Click Once applications.
Thanks to GitVersion and GitFlow I do not need to care about version management of my project.
The only difference is in how numbering is created for ClickOnce applications. Click-once does not support suffix like –unstable or –beta as Nuget can support for pre-release package. To have a good Major.Minor.Path.Suffix number the solution is splitting the prerelease tag (ex –unstable.3) to grab only the last number part. The result is: instead of having version 1.2.5-unstable7 (perfectly valid for nuget but not for click-once) the build will use version 1.2.5.7, perfectly valid for ClickOnce.
The whole operation is simply managed by powershell script.
| |
Building click-once package
In MSDN official documentation there is a nice page that explain how to publish click-once application from command line with MSBuild. This is an exceptional starting point, because parameters can be easily passed to MSBuild during vNext build thus we need no customization to create click-once package.
Publishing with MSBuild command line interface makes easy to integrate in vNext Build.
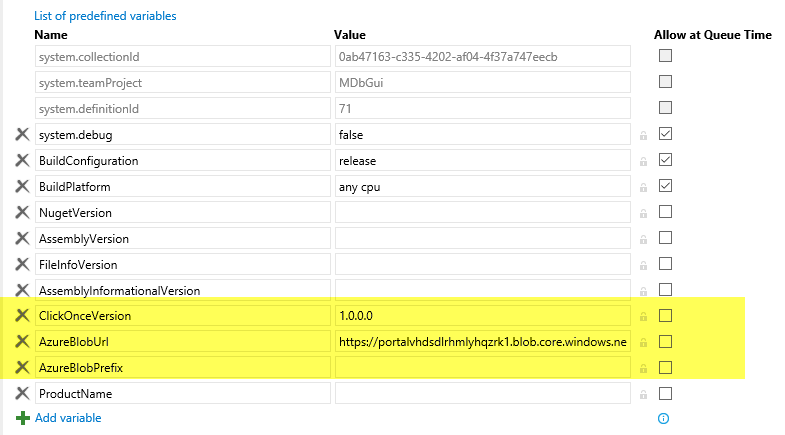
First step is declaring a bunch of Build Properties in the build, to store all needed values during the build.

Figure 1: Variables to add for vNext build
The build needs three variables: $(ClickOnceVersion) will contain the version generated by with GitVersion, $(AzureBlobUrl) will contain the address of Azure Blob Url where the application will be published. Finally $(AzureBlobPrefix) is the prefix (folder) to categorize publishing, basically is the subfolder in the Azure Blob where the files will be copied.
Powershell script does some sting manipulation to detect whitch branch is about to be published. Thanks to GitVersion in $preReleaseTag variable the build can know the logical branch that is about to be compiled (ex: unstable.1). If it is empty the build is building the stable branch, if it is not null a simple split by dot charachter gives the logical branch: unstable, beta, etc. Using GitVersion preReleaseTag is better than checking branch name, because it better explain the role of current branch in GitFlow.
Knowing the logical branch (stable, unstable, beta) allows the build to publish different version of the product (stable, beta, unstable) on different subdirectory of azure blob.
This technique allows people to choose the distribution they want, similar to what Chrome does.
| |
Now all variables are ready, it is time to specify MSBuild Arguments to the task that build the solution and this is the only modification needed to trigger publishing the Click-once package. These are the command line options needed to publish the click-once package from MSBuild
| |
Handling artifacts
Previous MSBuild command line produces all files needed for click-once publishing inside a subdirectory called app.publish inside the output directory. To have a clean and nice build, it is better to copy all relevant file the file inside staging directory.
This procedure was fully described in a previous post that deal with managing artifacts in a vNext Build. I always prefer including a script to copy all files that needs to be published as result for the build inside staging directory instead of relying on publishing every file inside bin folders.
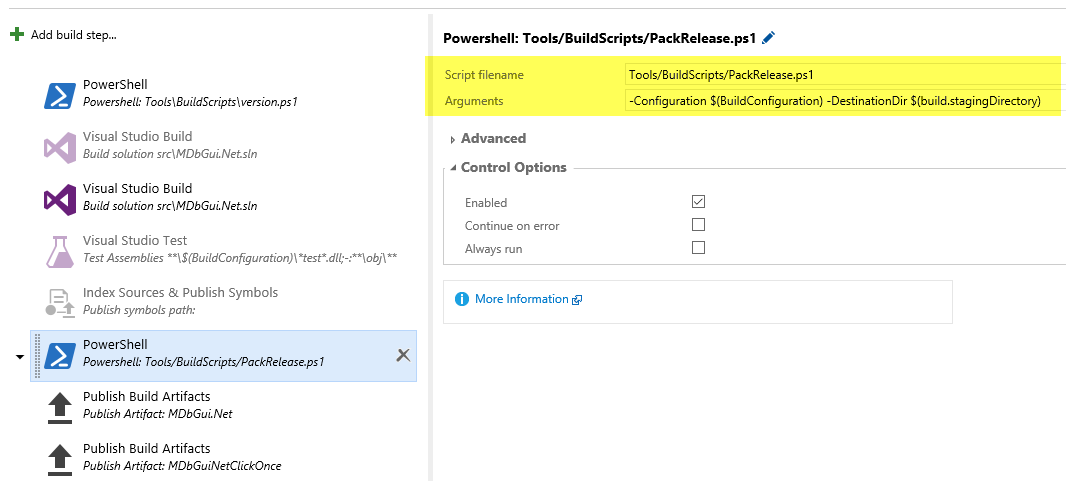
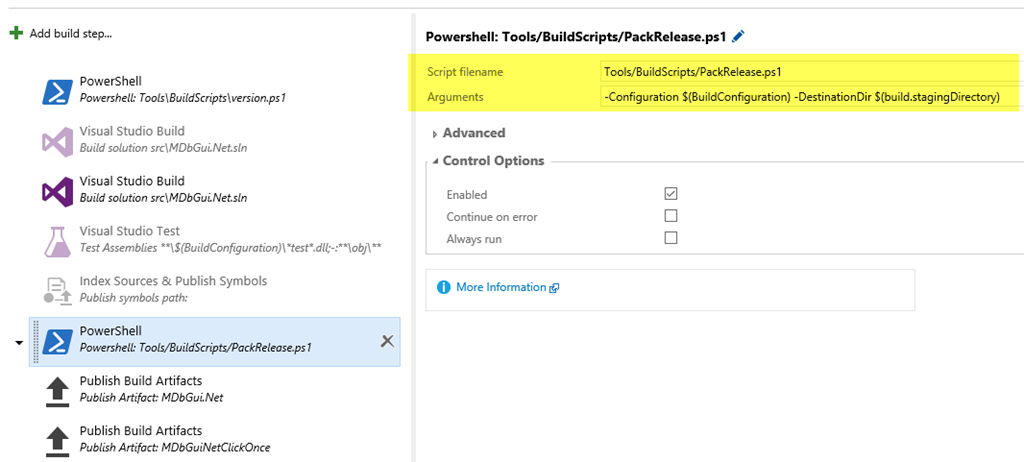
Figure 2: Call a PowerShell script to copy all relevant files on Staging Directory
At the end of this step the all click-once related files are placed inside a subfolder of staging directory. The last step is moving those files on a web site or azure blob storage. ClickOnce apps needs only to be placed on accessible site, an instance of IIS is perfectly valid, but cost of Azure Blob Storage is really low and there are already a nice Build vNext task to copy file on it , so it would be stupid not to take advantage of it.
Move everything on Azure Blob
The easiest solution to copy all click-once related file on a public accessible location is creating a public Azure Blob storage, because you already have an action in build vNext to accomplish this task.
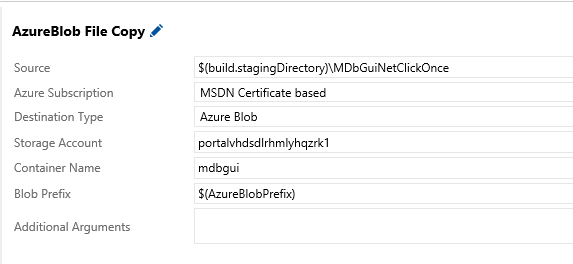
Figure 3: Azure Blob File copy task can copy files easily in target Blob Storage
To connect an Azure Account with Azure Endpoint please consult my previous post on the argument: Use the right Azure Service Endpoint in build vNext to avoid doing my mistake of trying to access a classic Blob Storage with Azure ARM.
As you can see from Figure 3 I specified the name of the storage acount, the container name and a prefix that is used to publish different branches for the application.
At the end of the build you have your application published on a url like this one: https://portalvhdsdlrhmlyhqzrk1.blob.core.windows.net/mdbgui/unstable/MDbGui.Net.application
Conclusion
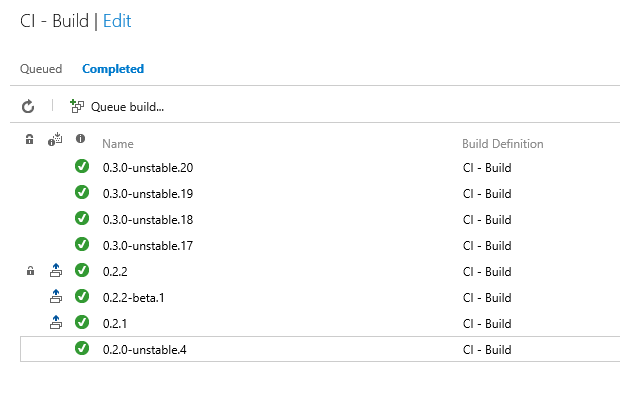
All the scripts used to create this articles are in project https://github.com/stefanocastriotta/MDbGui.Net/tree/develop/Tools/BuildScripts you can download them and use in your project if you want. Thanks to the ability to change build number here is the result
Figure 4: you can easily find the version number in build number.
Gian Maria.